Welcome to our blog, where we will take you on a journey through the fascinating world of food photography. In this article, we will delve into the art of mastering the use of lighting to capture stunning and mouth-watering images of food. Whether you are a professional photographer looking to enhance your skills or a food enthusiast looking to improve your Instagram game, this blog is the perfect place to learn how to manipulate light to create tempting and appetizing food photographs.
Table of Contents
- The Importance of Lighting in Food Photography
- A How-To Guide: Mastering Light Manipulation for Food Photography
- Frequently Asked Questions
- 1. How important is lighting in food photography?
- 2. What are some basic lighting skills every food photographer should know?
- 3. How can I manipulate light to create stunning food images?
- 4. Do I need expensive lighting equipment to get professional-looking food photos?
- 5. What are some general photography tips for better food images?
- 6. Are there any online resources or courses available for improving food photography skills?
- 7. How can I attract more viewers to my food photography blog?
- Wrap Up
The Importance of Lighting in Food Photography
Lighting is one of the most crucial elements in any form of photography, and food photography is no exception. Understanding how light interacts with the textures, colors, and shapes of different ingredients and dishes can significantly elevate the visual impact of your photographs. By mastering the use of lighting, you can create images that evoke emotions, highlight the deliciousness of the food, and leave viewers hungry for more.
1. The Role of Natural Light
Natural light is often considered the holy grail of food photography. Its soft and diffused nature can beautifully enhance the details and textures of your dishes without overpowering them. When photographing food, try to position your subject near a large window or in an outdoor setting where natural light is abundant. Avoid direct sunlight, as this can create harsh shadows and overly bright spots. Instead, aim for a soft and even light source that complements the food’s aesthetics.
2. Artificial Lighting for Controlled Results
While natural light is undoubtedly beautiful, it may not always be available or practical to use. This is where artificial lighting comes into play. By using artificial light sources such as studio lights, you can have complete control over the intensity, direction, and color temperature of the light. This control allows you to emphasize specific elements of the food and create a desired atmosphere. Experiment with different lighting setups, diffusers, and reflectors to achieve the desired effect.
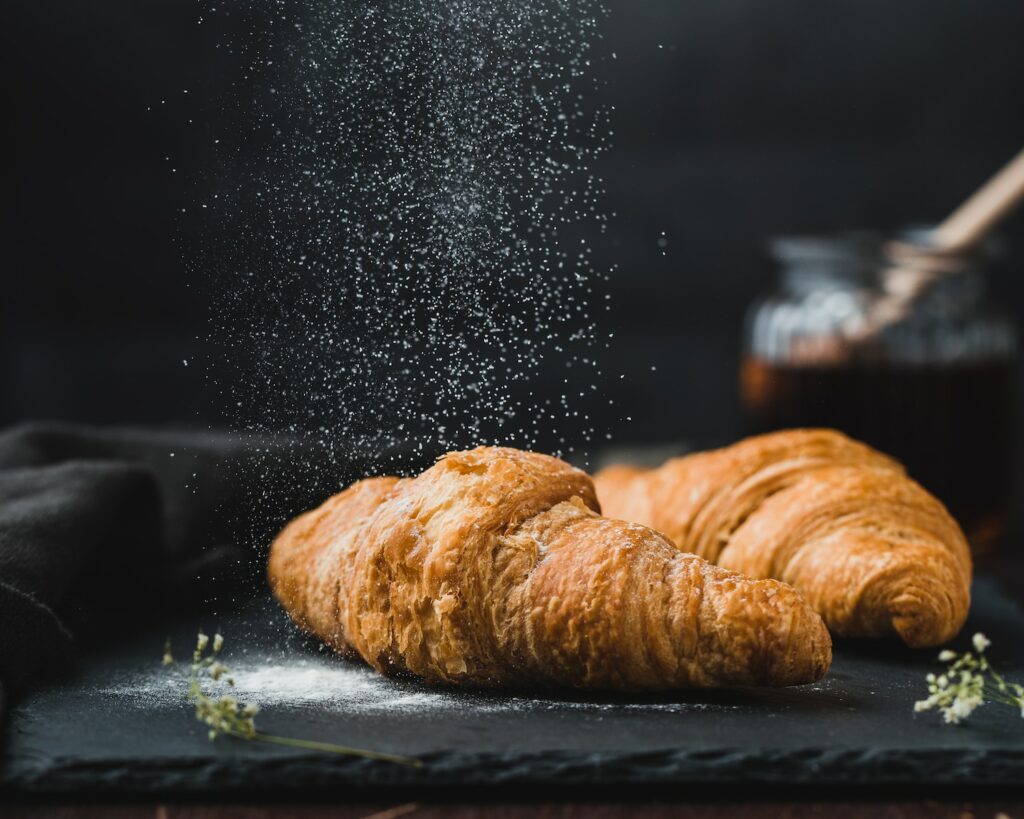
3. Manipulating Light for Texture and Depth
Lighting can dramatically enhance the texture and depth of the food you photograph. By utilizing shadows, highlights, and strategic placement of light sources, you can create a sense of dimensionality and make your food appear more three-dimensional. For instance, backlighting can bring out translucent and delicate ingredients, while side lighting can accentuate intricate details and create a sense of drama. The key is to experiment and find the lighting techniques that complement the unique characteristics of each dish.
4. Tips for Effective Light Manipulation
Mastering light manipulation in food photography requires practice and attention to detail. Here are some essential tips to help you hone your skills:
- Use reflectors or bounce cards to fill in shadows and balance the light.
- Experiment with different types of diffusers to soften harsh light.
- Consider the color temperature of the light source and adjust it accordingly with white balance settings or gels.
- Be mindful of the direction of light and its impact on the food’s appearance.
- Take advantage of props and backgrounds to create interesting light patterns and reflections.
5. Becoming a Lighting Master
Although it may seem overwhelming at first, mastering the use of lighting in food photography is a skill that develops over time. The key is to practice consistently, learn from your mistakes, and analyze the work of experienced photographers. Pay attention to the lighting techniques used in food magazines, cookbooks, and online platforms. By deconstructing and understanding their setups, you can apply those lessons to your own photography and create captivating food images that stand out.
Interesting Fact: Did you know that certain foods, such as ice cream and fried foods, require specific lighting techniques to prevent them from melting or looking greasy in photographs?
6. The Power of Lighting in Food Photography
Well-executed lighting can transform an ordinary dish into a mouth-watering masterpiece. The subtle interplay between light and shadows can add depth and dimension, while the right color temperature can evoke the desired mood. Whether you are shooting a delectable dessert, a vibrant salad, or a sizzling steak, understanding and mastering the use of lighting will elevate your food photography to new heights. So grab your camera, experiment with different lighting setups, and get ready to capture some truly tantalizing food images!
A How-To Guide: Mastering Light Manipulation for Food Photography
Food photography is an art that goes beyond just capturing the deliciousness of a dish. It’s about evoking emotion, creating desire, and making viewers crave the food with their eyes. One of the key elements in achieving this is mastering the use of lighting. In this guide, we will explore different techniques and tips for manipulating light to enhance the beauty and appetizing appeal of your food images.
1. Understand the Power of Natural Light
Natural light is every food photographer’s best friend. It’s soft, flattering, and brings out the natural colors and textures of the food. When shooting indoors, look for a window with diffused light or set up your shooting area near a large, open source of natural light. Avoid harsh shadows by positioning the food at a slight angle to the light source.
2. Experiment with Artificial Lighting
While natural light is ideal, there may be times when you can’t rely on it, especially in low-light situations or when shooting at night. This is where artificial lighting comes in. Invest in a good quality continuous light source or a strobe light with adjustable settings to mimic natural light as closely as possible. Play around with different angles and intensities to achieve the desired effect.
3. Utilize Reflectors and Diffusers
Reflectors and diffusers are essential tools for any food photographer. Reflectors bounce light back onto the scene, helping to fill in shadows and add a beautiful, soft glow to the food. Diffusers, on the other hand, soften and disperse the light, reducing harsh contrasts and creating a more even illumination. Experiment with different sizes and materials to achieve the desired results.
4. Control Shadows with Light Modifiers
Light modifiers such as softboxes, umbrellas, and grids allow you to have more control over the direction and intensity of the light. Softboxes create soft, diffused light, while umbrellas provide a wider spread of light. Grids help to control the light’s spill and narrow the beam. Play around with different light modifiers to create various moods and effects in your food photography.
5. Consider Color Temperature and White Balance
The color temperature of your light source can greatly impact the mood and overall aesthetic of your food images. Different light sources, such as daylight, tungsten, or fluorescent, have varying color temperatures. Be mindful of this when setting up your shot and adjust your camera’s white balance settings accordingly to ensure accurate color reproduction.
Mastering the use of lighting in food photography can elevate your images from ordinary to extraordinary. Understanding the power of natural light, experimenting with artificial lighting, utilizing reflectors and diffusers, controlling shadows with light modifiers, and considering color temperature and white balance are essential skills to develop. Practice and experimentation are key to finding your own personal style and creating captivating food images that leave viewers hungry for more.
Frequently Asked Questions
1. How important is lighting in food photography?
Lighting is crucial in food photography as it can make or break an image. Proper lighting techniques can enhance the colors, textures, and details of the food, creating a visually appealing and appetizing image.
2. What are some basic lighting skills every food photographer should know?
Some essential lighting skills for food photography include understanding the direction and quality of light, controlling shadows, diffusing harsh light, and using reflectors or bounce cards to fill in shadows and add dimension to the shot.
3. How can I manipulate light to create stunning food images?
There are several ways to manipulate light for food photography. You can use diffusers and reflectors to soften or redirect light, experiment with different light sources such as natural or artificial light, and play with shadows to create depth and texture in your images.
4. Do I need expensive lighting equipment to get professional-looking food photos?
No, you don’t necessarily need expensive lighting equipment to capture professional-looking food photos. Natural light, available in your home or a well-lit area, can work wonders. However, investing in a few affordable tools like reflectors or softboxes can significantly enhance your lighting options.
5. What are some general photography tips for better food images?
Aside from mastering lighting, here are a few general photography tips for improving your food images:
- Use a tripod to ensure sharpness and stability
- Experiment with different angles and perspectives
- Create a story or narrative with your composition
- Play with props and backgrounds to enhance the visual appeal
- Practice styling and plating techniques
6. Are there any online resources or courses available for improving food photography skills?
Yes, there are plenty of online resources and courses dedicated to food photography. Websites like Udemy, Skillshare, and YouTube offer tutorials and guides, while professional food photographers often share their knowledge through blogs and online communities. It’s always beneficial to learn from experienced photographers and constantly practice and refine your skills.
7. How can I attract more viewers to my food photography blog?
To attract more viewers to your food photography blog, here are a few tips:
- Optimize your blog posts with relevant keywords
- Share your images on social media platforms
- Collaborate with other bloggers or food-related websites
- Engage with your audience through comments and feedback
- Consistently provide valuable and visually appealing content
Wrap Up
In the world of food photography, mastering the use of lighting is an essential skill. It can transform a mediocre image into a mouthwatering masterpiece. By understanding the principles of light manipulation and using them to your advantage, you can capture the true essence of each dish.
Remember to experiment with different lighting techniques to bring out the texture, colors, and details of your food. Use props and reflectors to control shadows and highlights. And don’t be afraid to think outside the box and get creative with your light sources.
So go ahead and practice, practice, practice! With time and patience, you’ll be able to create stunning and tempting food images that will captivate your audience. And don’t forget to share your progress and experiences in the comments below. Let’s engage and learn together!