Welcome to our blog on how to create stunning wall galleries with your photos. Designing a wall gallery can be a complex task, but with the right tricks and tips, you can organize, layout, and hang photos like a pro. In this article, we will guide you through the process of creating beautiful photo wall galleries, sharing valuable designing tips and photo layout strategies. So, let’s dive in and turn your photos into captivating wall art!
Table of Contents
Choose a Theme for your Gallery: Reflect Your Style and Interest
When planning your wall gallery, it’s essential to select a theme that reflects your style and interests. Whether it’s travel, family, nature, or abstract, choose a theme that resonates with you and makes you feel inspired. This creates a cohesive and visually pleasing gallery.
Consider the Room and Surroundings
Take into account the room where you plan to hang the gallery and its surroundings. Think about the colors, furniture, and decor present in the space. A well-designed gallery should complement the room’s aesthetics and create a harmonious atmosphere.
Wall galleries can enhance the vibe and ambiance of a room by adding a personal touch and creating a focal point.
Plan and Organize: Measure the Space
Before diving into the layout, take measurements of the wall area where you plan to hang your gallery. This ensures you have a clear understanding of the available space and helps you determine the number of photos you can incorporate into your design.
Create a Gallery Mockup
Using paper or an online design tool, create a mockup of your gallery on the floor or a virtual canvas. This allows you to visualize the arrangement, experiment with different layouts, and make any necessary adjustments before hanging the photos on the wall.
Consider Frames and Mats
When organizing your gallery, think about the frames and mats you will use for your photos. Matching frames and mats can provide a cohesive look, while mixing different styles and sizes can add a creative and eclectic touch to your gallery.
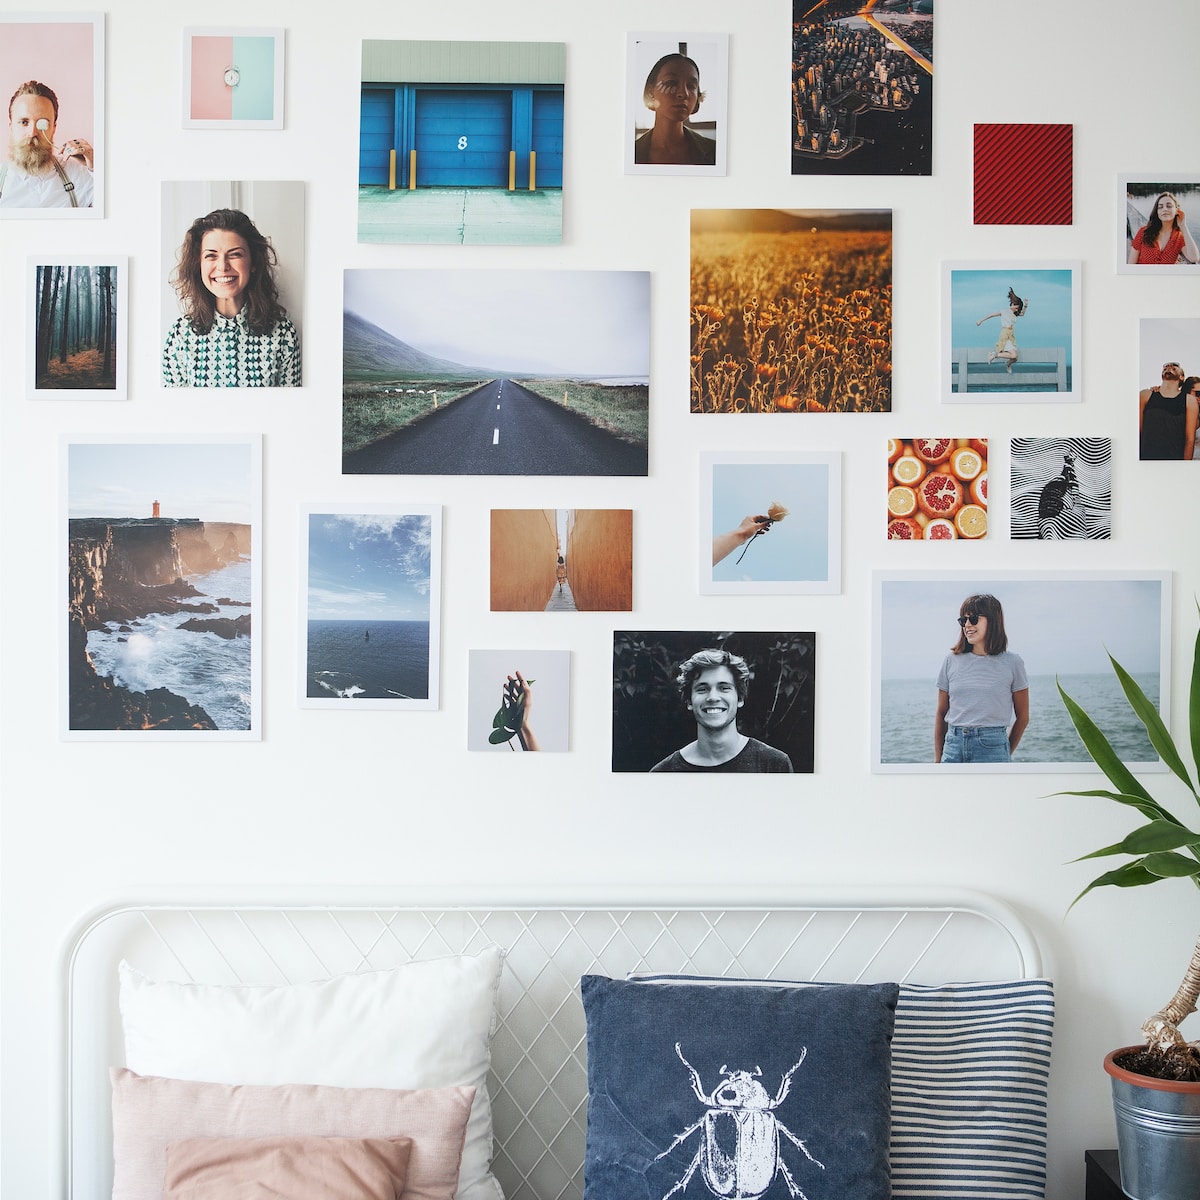
Layout and Composition: Create Balance
A well-balanced gallery is visually pleasing and creates a sense of harmony. Use a combination of small, medium, and large photos, evenly distributing them across the space. Pair photos of different orientations and sizes to add variety and balance.
Experiment with Arrangements
Don’t be afraid to experiment with different arrangements. Try symmetrical layouts with equal spacing between photos or asymmetrical layouts for a more dynamic and playful look. Use the mockup you created earlier to test various compositions until you find the perfect one.
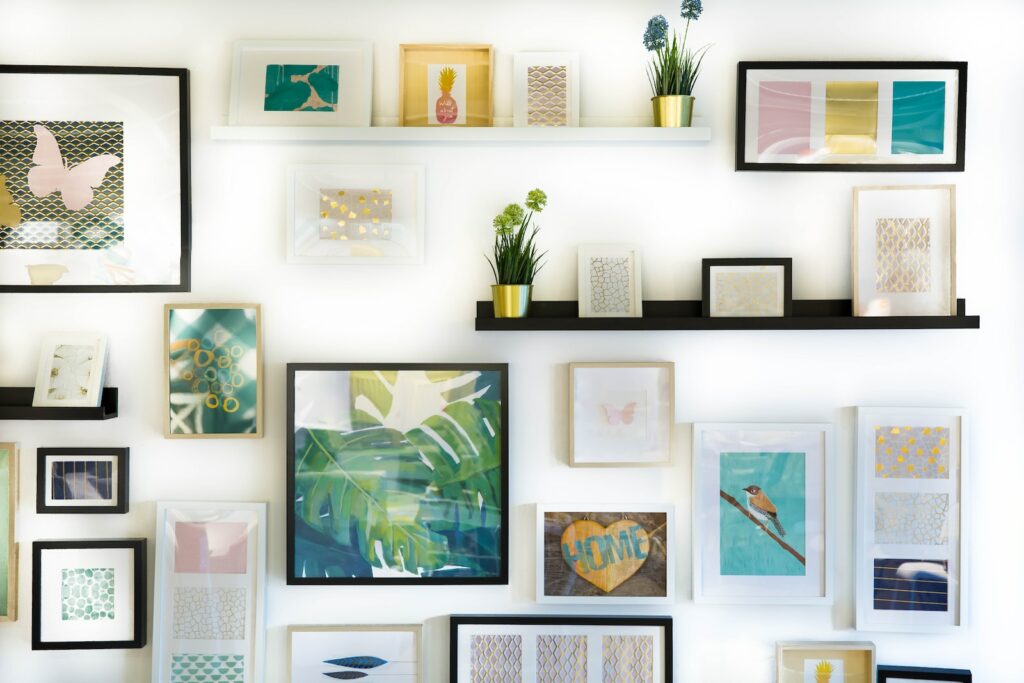
Add Depth with Layers
To create depth and dimension in your gallery, consider layering photos. Overlapping frames or strategically placing smaller photos in front of larger ones can add visual interest and make your gallery more captivating.
Hanging and Final Touches: Follow the Gallery Layout
Once you’ve finalized your layout, it’s time to hang your photos on the wall. Use the mockup as a guide and transfer the arrangement onto the wall. Start from the center and work your way out, ensuring each photo is level and properly aligned.
Add Personal Touches
After hanging your photos, feel free to add personal touches such as decorative accents, artwork, or sentimental objects that complement your gallery. These additions can enhance the overall aesthetic and make your gallery even more unique and meaningful.
Now that you have all the tips and tricks to create stunning wall galleries with your photos, it’s time to get started! Let your creativity flow, and watch as your walls come to life with cherished memories and captivating artwork.
How to Create Stunning Wall Galleries With Your Photos
Designing a wall gallery with your photographs can be a complex task. However, with the right tips and techniques, you can organize, layout, and hang your photos like a pro. In this guide, we will walk you through the process step by step, ensuring that you create a stunning wall gallery that will impress everyone who sees it.
Choose a Theme or Concept
The first step in creating a wall gallery is to decide on a theme or concept. This will help you narrow down your photo selection and give your gallery a cohesive look. Some popular themes include family, travel, nature, or a specific color palette. Choose a theme that resonates with you and reflects your personal style.
Gather Your Photos
Once you have chosen a theme, it’s time to gather your photos. Go through your collection and select the images that best fit your chosen concept. Consider the size and orientation of each photo, as well as the visual balance when they are displayed together. Don’t be afraid to mix different styles and subjects to add interest to your gallery.
Plan Your Layout
Before hanging your photos, it’s important to plan your layout. Lay your selected photos on the floor or use a digital tool to arrange them in the desired order. Play around with different configurations until you find the perfect layout. Remember to consider spacing between photos and the overall balance of the arrangement.
Create a Focal Point
A focal point helps draw attention to a specific area of your wall gallery. Choose one or two standout photos that will act as the centerpiece. Position them slightly off-center to create visual interest. You can also use larger frames or unique arrangements to highlight these focal points and create a captivating display.
Mix Frames and Sizes
One way to add depth and dimension to your wall gallery is to mix frames and sizes. Combine different frame styles, such as wooden, metal, or colorful frames, to add visual interest. Play with different sizes, from small to large, to create an engaging composition. Remember to maintain a consistent color palette or theme throughout to ensure cohesiveness.
Experiment with Arrangements
Don’t be afraid to experiment with different arrangements until you achieve the desired look. Consider using templates or stencils to help you visualize the placement of your photos on the wall. Try out different heights, angles, and spacing to create a dynamic and visually appealing gallery that reflects your unique style.
Hang with Care
When it’s time to hang your photos, take care to ensure they are level and secure. Use a level tool and measuring tape to align your frames properly. Consider using adhesive hooks or nails for stability, depending on the weight of your frames. Take your time and double-check each hanging position to guarantee a professional finish.
By following these tips and techniques, you can create a stunning wall gallery that showcases your photos in the best possible way. Remember, the key is to have fun, experiment, and let your creativity shine. So go ahead and start designing your own photo wall gallery today!
Frequently Asked Questions
1. How can I create a stunning wall gallery with my photos?
Creating a stunning wall gallery with your photos takes some planning and attention to detail. Here are a few tips to help you get started:
2. What are some designing tips for organizing a photo wall gallery?
When organizing a photo wall gallery, consider the following designing tips:
3. How do I choose the layout for my photo wall gallery?
Choosing the right layout for your photo wall gallery can enhance the overall visual appeal. Here’s how you can do it:
4. What are some tips for hanging photos like a pro?
To hang photos like a pro, follow these useful tips:
Wrap Up:
In conclusion, creating a stunning wall gallery with your photos is all about organization, layout, and hanging. By following these tips and tricks, you can transform a blank wall into a captivating display of cherished memories. Remember to choose a theme, plan your layout, experiment with different photo arrangements, and use proper measurements when hanging. Don’t be afraid to get creative and add personal touches to make your gallery unique. Whether you’re a novice or a pro, these strategies will help you achieve a visually appealing and well-organized photo wall gallery. Start designing today and turn your wall into a work of art! Have you tried creating a photo wall gallery? Share your experiences and tips in the comments below!