Welcome to “Illuminating Fairy Lights – A Photographer’s Guide”, your ultimate resource on capturing the magic and beauty of fairy lights through the lens. Whether you’re a beginner or a seasoned photographer, this blog will show you how to create stunning photographs with fairy lights, from mastering the elusive bokeh effect to shooting in low light conditions. Get ready to uncover unique creative ideas for compositions that will illuminate your photography skills.
Table of Contents
- The Beauty of Fairy Lights Photography
- Mastering the Bokeh Effect
- Adjusting Your Camera Settings
- Creative Compositions
- Case Study: Capturing the Magic of Fairy Lights
- Frequently Asked Questions
- 1. How do I capture the beautiful bokeh effect in fairy light photography?
- 2. What are some creative ideas for composing fairy light photographs?
- 3. How can I shoot fairy light photography in low light conditions?
- 4. What settings should I use for night photography with fairy lights?
- 5. Are there any safety precautions I should take while photographing fairy lights?
- Wrap Up
The Beauty of Fairy Lights Photography
Fairy lights are like a magical element that can instantly transform any setting into a whimsical wonderland. Whether they are delicately draped around a tree, hung in a room, or used as props, they add a touch of enchantment to any photograph. In this section, we will explore the captivating features of fairy lights and discuss photography techniques that will help you capture their ethereal beauty.
Fairy Lights: A Captivating Subject
The first step to creating stunning fairy lights photography is to understand the unique qualities that make them appealing. The soft warm glow emitted by these tiny bulbs creates a romantic and dreamy atmosphere. Their delicate presence can instantly elevate the mood and add a sense of magic to your photographs. Whether you are shooting indoors or outdoors, the twinkling lights provide the perfect backdrop for creativity.
When working with fairy lights, it’s important to understand their versatility. You can experiment with different colors, shapes, and sizes, or even mix and match various types of fairy lights for a dynamic effect. Play with their positioning, whether you are draping them on a subject or arranging them in a specific pattern. By exploring the possibilities, you can truly make your photographs stand out.
Photography Techniques for Fairy Lights
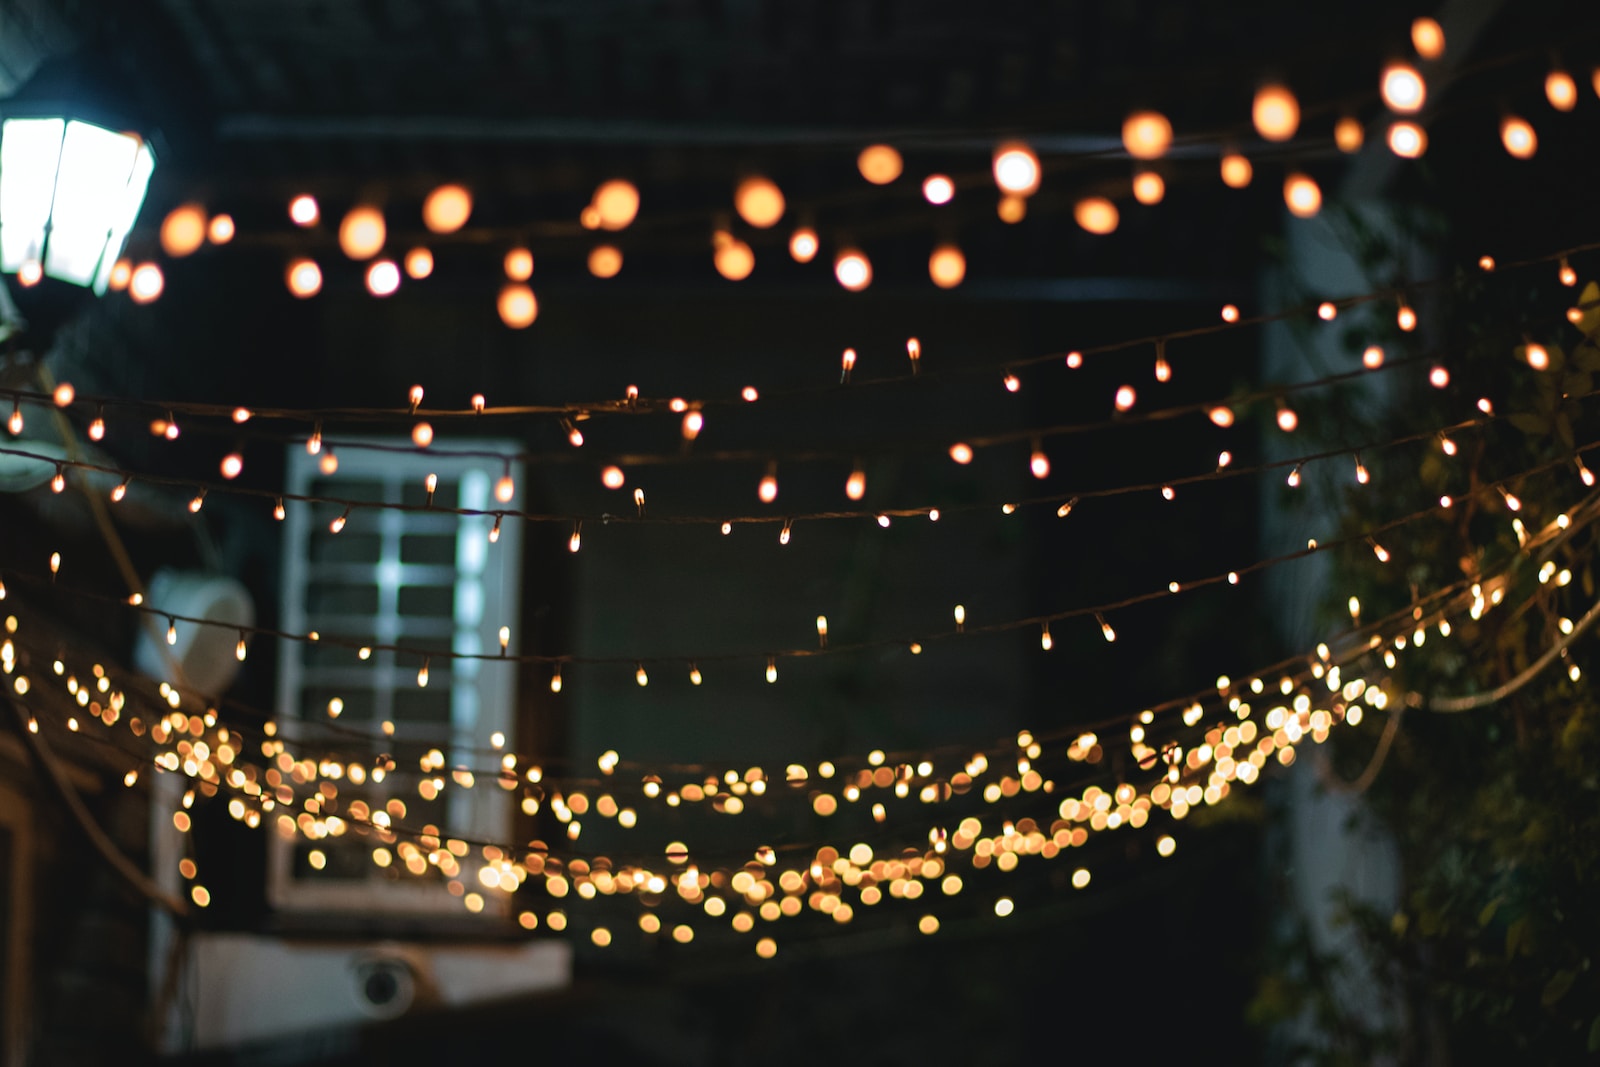
- Creating Bokeh: One of the most captivating aspects of fairy lights photography is the mesmerizing bokeh effect. To achieve this, use a wide aperture (low f-stop number) to create a shallow depth of field. Position the lights at varying distances from your subject, allowing some to be out of focus and creating that beautiful bokeh. The blurred lights will add a dreamy, magical element to your photographs, while keeping your subject sharp and in focus.
- Shooting in Low Light: Fairy lights often shine brightest in low light conditions, making them perfect for capturing stunning nighttime photographs. Embrace the darkness and use longer exposure times to capture the full beauty of the lights. Experiment with different shutter speeds to achieve the desired effect. Be sure to stabilize your camera on a tripod to avoid motion blur and maintain sharpness.
- Creative Compositions: Don’t be afraid to think outside the box and experiment with creative compositions when photographing fairy lights. Incorporate other elements such as flowers, mirrors, or reflective surfaces to add depth and interest to your images. Use the lights as leading lines or create a frame within a frame effect to draw attention to your subject. The possibilities are endless, so let your imagination soar and capture unique and captivating shots.
Mastering the Bokeh Effect
Bokeh is the dreamy, out-of-focus background that adds a touch of magic to your fairy light photos. To achieve this effect, use a wide aperture setting, such as f/1.8 or f/2.8, to create a shallow depth of field. This will blur the background, allowing the fairy lights to shine as sparkling orbs of light. Experiment with different focal lengths and distances to enhance the bokeh effect.
Choosing the Right Lens
Prime lenses with wider apertures, like a 50mm f/1.8 or a 35mm f/1.4, are ideal for capturing stunning bokeh. These lenses allow more light to enter the camera, creating a shallow depth of field and enhancing the bokeh effect. If you don’t have a prime lens, don’t worry! You can still achieve lovely bokeh using a zoom lens by zooming in and using a wider aperture.
Interesting Fact: Did you know that the word "bokeh" comes from the Japanese term meaning "blur" or "haze"?
Adjusting Your Camera Settings
When shooting in low light, it’s important to adjust your camera settings to capture enough light for proper exposure. Start by increasing the ISO to a higher value, such as ISO 800 or ISO 1600, to make your camera more sensitive to light. However, be cautious not to set the ISO too high, as it can introduce noise in your photos. Additionally, use a slower shutter speed and consider using a tripod for stability.
Utilizing Long Exposures
Long exposures can bring out the enchanting glow of fairy lights in your photos. Set your camera to manual mode and experiment with longer shutter speeds, ranging from a few seconds to several minutes, depending on the available light. Longer exposures allow the sensor to capture more light, resulting in beautifully illuminated fairy lights. Consider using a remote shutter release or the camera’s built-in timer to minimize camera shake.

Creative Compositions
One creative way to incorporate fairy lights into your photography is by capturing their magical glow as silhouettes. Position your subject between the camera and the fairy lights, ensuring that the lights are exposed correctly while your subject appears as a dark silhouette. Experiment with different poses and angles to create a captivating composition.
Exploring Still Life Photography
Fairy lights can bring life and glimmer to your still life setups. Experiment with different objects, such as flowers, glassware, or holiday decorations, to create visually stunning compositions. Play with different angles, depths of field, and lighting arrangements to add dimension and interest to your still life photos. The fairy lights will add a touch of enchantment and create a warm ambiance.
Did you know that fairy lights were initially used to decorate Christmas trees? They originated in the 17th century and were lit with real candles!
Bringing Fairy Lights Outdoors
Fairy lights aren’t just for indoor photography. Take your camera outside and explore the endless possibilities of capturing fairy lights in nature. Wrap fairy lights around trees, branches, or flowers to create a magical outdoor scene. Experiment with different weather conditions, such as fog or rain, to add an ethereal and dreamy atmosphere to your outdoor fairy light photography.

Case Study: Capturing the Magic of Fairy Lights
Photographing fairy lights can add a touch of enchantment to your images, transforming an ordinary scene into a magical wonderland. However, as any photographer knows, working with fairy lights presents its own set of challenges. In this case study, we will delve into the experience of Jane, a professional photographer, who wanted to capture the ethereal beauty of fairy lights in her night photography.
The Challenge: Creating the Perfect Bokeh Effect
One of the key elements that make fairy lights captivating is the bokeh effect. Jane wanted to achieve a beautiful, blurred background, with the fairy lights twinkling like stars. She experimented with different techniques to achieve the desired effect.
After some trial and error, Jane discovered that using a wide aperture (such as f/2.8 or wider) can create a shallower depth of field, resulting in a more pronounced bokeh effect. By adjusting her camera settings and focusing on a specific point among the fairy lights, she was able to achieve the dreamy bokeh effect she was after.
Shooting in Low Light: Overcoming the Darkness
Another challenge Jane faced was shooting in low light. Fairy lights often illuminate dark areas, and balancing the exposure can be tricky. To overcome this, Jane learned to optimize her camera’s settings for low light photography.
She experimented with different ISO settings, finding that a higher ISO setting (such as ISO 800 or above) helped capture more light in the scene. She also invested in a tripod to minimize camera shake and avoid motion blur. By using longer shutter speeds and the stability of a tripod, Jane was able to capture sharp and well-exposed images in low light conditions.
Unlocking Creativity: Composing Unique Fairy Light Images
While capturing the beauty of fairy lights is captivating in itself, Jane wanted to take her photography a step further by exploring creative compositions. She sought inspiration from other photographers and experimented with different angles, positions, and foreground elements to add depth and interest to her images.
One technique she found particularly effective was using fairy lights as a foreground element to create a layered composition. This created a sense of depth, with the fairy lights drawing the viewer’s attention to the main subject of the image. By thinking outside the box and incorporating creative ideas into her compositions, Jane was able to create unique and visually striking fairy light photographs.
In conclusion, photographing fairy lights requires experimenting with different techniques, overcoming low light challenges, and unlocking your creativity to compose captivating images. By learning from the experiences of photographers like Jane and continuously exploring new ideas, you too can illuminate your photography with the enchantment of fairy lights.
Frequently Asked Questions
1. How do I capture the beautiful bokeh effect in fairy light photography?
To create the mesmerizing bokeh effect in your fairy light photography, you need to use a wide aperture (low f-stop) setting on your camera. This will increase the depth of field, making the lights appear as blurred, out-of-focus orbs of light.
2. What are some creative ideas for composing fairy light photographs?
There are several creative ways to compose your fairy light photographs. You can try placing the lights in the foreground and capturing a subject in the background, creating a dreamy atmosphere. Experiment with different angles, compositions, and incorporating other elements like props or reflections for added visual interest.
3. How can I shoot fairy light photography in low light conditions?
When shooting in low light conditions, it’s important to stabilize your camera to avoid blurry images. Use a tripod or stable surface to prevent camera shake. You can also increase the ISO setting on your camera to make it more sensitive to light. However, be mindful of noise that can be introduced at higher ISO levels.
4. What settings should I use for night photography with fairy lights?
For night photography with fairy lights, it is recommended to use a tripod, a wide aperture setting (low f-stop), and a slow shutter speed. This combination allows enough light to enter the camera, creating a beautiful, illuminated effect. Experiment with different exposure times to achieve the desired results.
5. Are there any safety precautions I should take while photographing fairy lights?
Yes, it’s essential to prioritize safety when working with fairy lights. Ensure that the lights are in good condition and not damaged. Avoid overloading electrical sockets and keep cords away from water or flammable materials. Always follow the manufacturer’s instructions and guidelines when using fairy lights for photography.
Wrap Up
In conclusion, capturing the enchanting beauty of fairy lights through photography is a rewarding and magical experience. By mastering the technique of creating bokeh, embracing low light conditions, and experimenting with various compositions, your images will truly come alive with a captivating glow. Remember, practice makes perfect, so don’t be afraid to experiment and let your creativity shine. We hope this guide has sparked your inspiration and encouraged you to embark on your very own fairy light photography journey. Share your stunning shots in the comments below and let us know if there are any other photography topics you’d like to explore. Happy shooting!