Welcome to “Shooting Lanterns When the Sun Goes Down”! Are you a photography enthusiast who loves capturing the beauty of lanterns in the night sky? If so, you’ve come to the right place. This blog post will guide you through the process of capturing breathtaking shots of lanterns, providing you with tips on equipment, exposure settings, and composition. Get ready to master the art of lantern photography and take your nighttime shots to a whole new level!
Table of Contents
- Exploring the Magic of Lantern Photography
- Capture the Enchanting Glow
- Shooting Lanterns When the Sun Goes Down
- Frequently Asked Questions
- 1. What is lantern photography?
- 2. What equipment do I need for lantern photography?
- 3. How do I set exposure for lantern photography?
- 4. What composition techniques work well for lantern photography?
- 5. How can I capture the essence of lanterns in my photos?
- 6. Are there any specific tips for shooting lantern festivals?
- Wrap Up
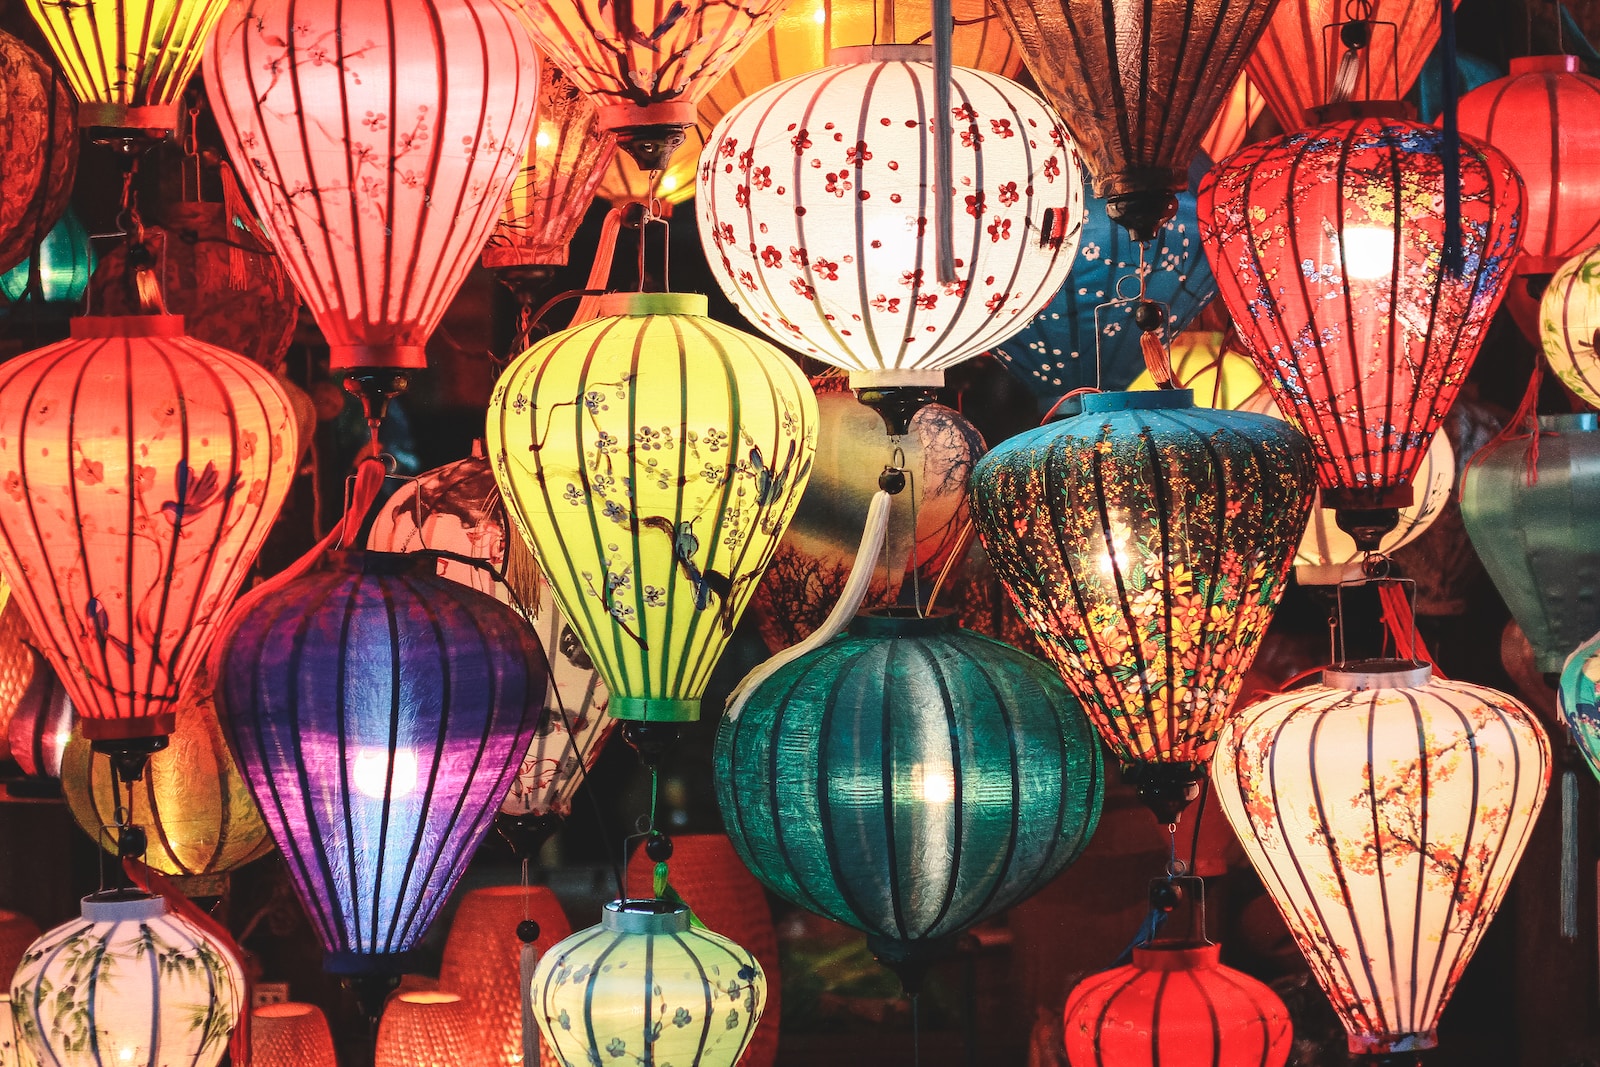
Exploring the Magic of Lantern Photography
If you’re new to lantern photography, it’s important to understand the basics before diving into the world of capturing these mesmerizing lights. Night photography can be challenging due to low light conditions, but with the right techniques and a bit of patience, you can achieve stunning results.
Essential Equipment for Lantern Photography
Before you head out for your lantern photography adventure, make sure you have the necessary equipment. Investing in a sturdy tripod will ensure stability for long exposure shots, while a wide-angle lens can help capture the vastness of the nighttime sky. Additionally, consider carrying extra batteries and memory cards to avoid any disappointments.
Mastering Exposure Settings
Exposure settings play a vital role in capturing the beauty of lanterns. Experiment with different shutter speeds to achieve the desired effect. Long exposure shots can create captivating light trails, while shorter exposures can capture the intricate details of the lanterns. Don’t forget to adjust your ISO and aperture settings accordingly to achieve the perfect balance.
Composition Tips for Captivating Shots
Composition is key when it comes to creating visually appealing lantern photographs. Position the lanterns strategically within your frame to create balanced compositions. Experiment with different angles and perspectives to add depth and dimension to your shots. Don’t be afraid to get creative and incorporate elements such as reflections or silhouettes to enhance the overall impact of your photographs.
Did you know that lantern festivals have been celebrated for centuries and are considered auspicious events in many cultures?
Post-Processing Magic
Once you’ve captured your lantern shots, it’s time to unleash your creativity during the post-processing stage. Editing tools like Adobe Lightroom or Photoshop can help you enhance the colors, adjust the exposure, and fine-tune the overall look of your photographs. Remember to maintain a balance between enhancing the beauty of the lanterns and retaining the natural ambiance of the night sky.
Sharing Your Lantern Photography
Now that you’ve perfected your lantern photography skills and crafted stunning shots, why not share your work with others? Social media platforms like Instagram and Flickr offer a great opportunity to showcase your talent and connect with fellow photography enthusiasts. Join online communities and engage in discussions to learn from others and inspire one another with your unique perspective.
Capture the Enchanting Glow
With these tips and techniques, you’re now equipped to capture the enchanting glow of lanterns when the sun goes down. Remember, practice makes perfect, so don’t be discouraged if your initial attempts don’t turn out as expected. Embrace the learning process, experiment with different settings, and most importantly, enjoy the experience of capturing the magic of lanterns through your lens!
Shooting Lanterns When the Sun Goes Down
Capturing the ethereal beauty of lanterns through photography can be a challenging yet immensely rewarding experience. As the sun sets and the world transitions into darkness, lanterns take center stage, emanating a soft glow that adds a touch of magic to any scene. In this blog post, we will guide you through the process of capturing stunning shots of lanterns, providing valuable tips on equipment, exposure settings, and composition.
The Importance of Low Light Photography
When shooting lanterns, low light photography becomes crucial. The absence of natural light requires the use of longer exposure times, allowing the camera to absorb more light and capture the brilliance of the lanterns. This technique creates striking images with vibrant colors, soft shadows, and a sense of tranquility.
One of the key elements to successful low light photography is the use of a tripod. By stabilizing your camera, you can keep it steady during the longer exposure times, avoiding any blurriness caused by camera shake. Additionally, a remote shutter release or a timer function can further minimize any camera movement.
Mastering Long Exposure
In a low light environment, long exposure photography becomes a valuable tool. By extending the exposure time, you can create stunning effects such as light trails and silky smooth water. When photographing lanterns, long exposure can be used to capture the movements and patterns created by the flickering flames.
To achieve long exposure shots, start by setting your camera to manual mode. Select a low ISO setting (around 100-400) to reduce noise in your images. Next, dial in a small aperture (such as f/16 or f/22) to maximize the depth of field and ensure that both the lantern and its surroundings are in focus. Finally, adjust the shutter speed to a longer duration (ranging from a few seconds to several minutes) to capture the desired amount of movement and light trails.
Composing Your Lantern Shots
Composition plays a vital role in creating visually appealing lantern photographs. When framing your shot, consider the placement of the lantern within the scene and its surroundings. Experiment with different angles and perspectives to add depth and interest.
One effective technique is to position the lantern off-center using the rule of thirds. This creates a more dynamic composition and draws attention to the lantern. Additionally, incorporating surrounding elements such as trees, buildings, or water can provide context and enhance the overall storytelling aspect of your photograph.
Frequently Asked Questions
1. What is lantern photography?
Lantern photography is a technique used to capture stunning images of illuminated lanterns, typically in low light or nighttime settings. It involves manipulating exposure settings and composition to create compelling photographs.
2. What equipment do I need for lantern photography?
To capture beautiful shots of lanterns, you’ll need a camera with manual controls, a tripod for stability, and a lens suitable for low light conditions. Additionally, a remote shutter release can be helpful to minimize camera shake during long exposure shots.
3. How do I set exposure for lantern photography?
When shooting lanterns at night, it’s essential to adjust your camera’s exposure settings to account for the low light conditions. Start with a low ISO setting, a wide aperture to allow more light in, and a longer shutter speed to capture the glow and movement of the lanterns. Experiment with different settings to achieve the desired effect.
4. What composition techniques work well for lantern photography?
Composition plays a crucial role in capturing striking lantern photographs. Consider using the rule of thirds, leading lines, and framing techniques to create visually appealing compositions. Experiment with different angles and perspectives to add depth and interest to your images.
5. How can I capture the essence of lanterns in my photos?
To truly capture the essence of lanterns in your photos, focus on the interplay of light and shadows. Use the lanterns as your primary light source and observe how they illuminate the surroundings. Incorporate the ambient light of the environment to create a mood and tell a compelling visual story.
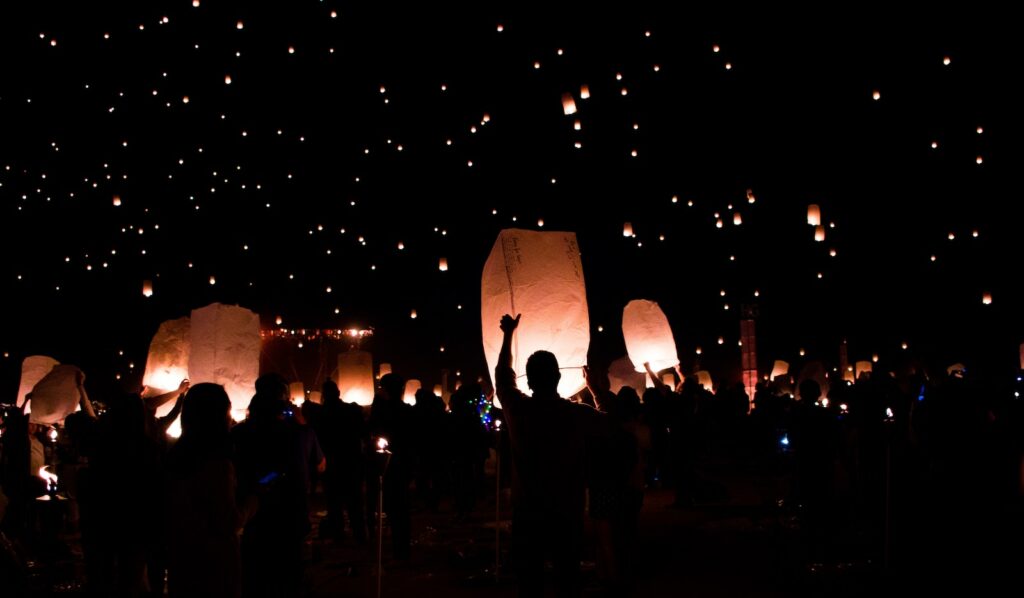
6. Are there any specific tips for shooting lantern festivals?
Yes! When photographing lantern festivals, remember to arrive early to scout the best shooting locations. Look for interesting compositions incorporating both lanterns and the surrounding environment. Experiment with different exposure settings to capture the vibrant colors and movement of the lanterns as they float in the air.
Wrap Up
In conclusion, shooting lanterns when the sun goes down can be an incredibly rewarding experience for photographers. With the right equipment, exposure settings, and composition, you can capture mesmerizing images that bring the magic of the night to life. Don’t be afraid to experiment with different angles and techniques to create unique and striking shots. Remember to use a tripod and remote shutter release to minimize camera shake during long exposures. Lastly, don’t forget to share your lantern photography masterpieces with the world! We would love to see your creativity in action, so please feel free to leave a comment and share your thoughts and experiences. Happy shooting!