Are you captivated by the raw power and beauty of storms? Are you eager to capture the mesmerizing and elusive lightning on camera? Look no further! This blog is your ultimate guide to mastering storm photography. Whether you’re a seasoned photographer or just starting out, we will delve into essential tips, techniques, and safety measures to ensure you get the most awe-inspiring shots. Join us on this thrilling journey as we explore the world of lightning photography and learn how to capture nature’s most electrifying moments. Don’t miss out on this electrifying adventure!
Table of Contents
- Discover the Power and Beauty of Lightning Photography
- The Best Camera and Equipment for Shooting Lightning: Mastering Storm Photography
- Best Time and Vantage Points for Shooting Lightning
- Frequently Asked Questions
- 1. How do I capture lightning in my photographs?
- 2. Is it safe to photograph lightning during a storm?
- 3. What time of day is best for capturing lightning?
- 4. What settings should I use for storm photography?
- 5. Are there any post-processing techniques for enhancing lightning photos?
- 6. Can I capture lightning with a smartphone?
- Wrap Up
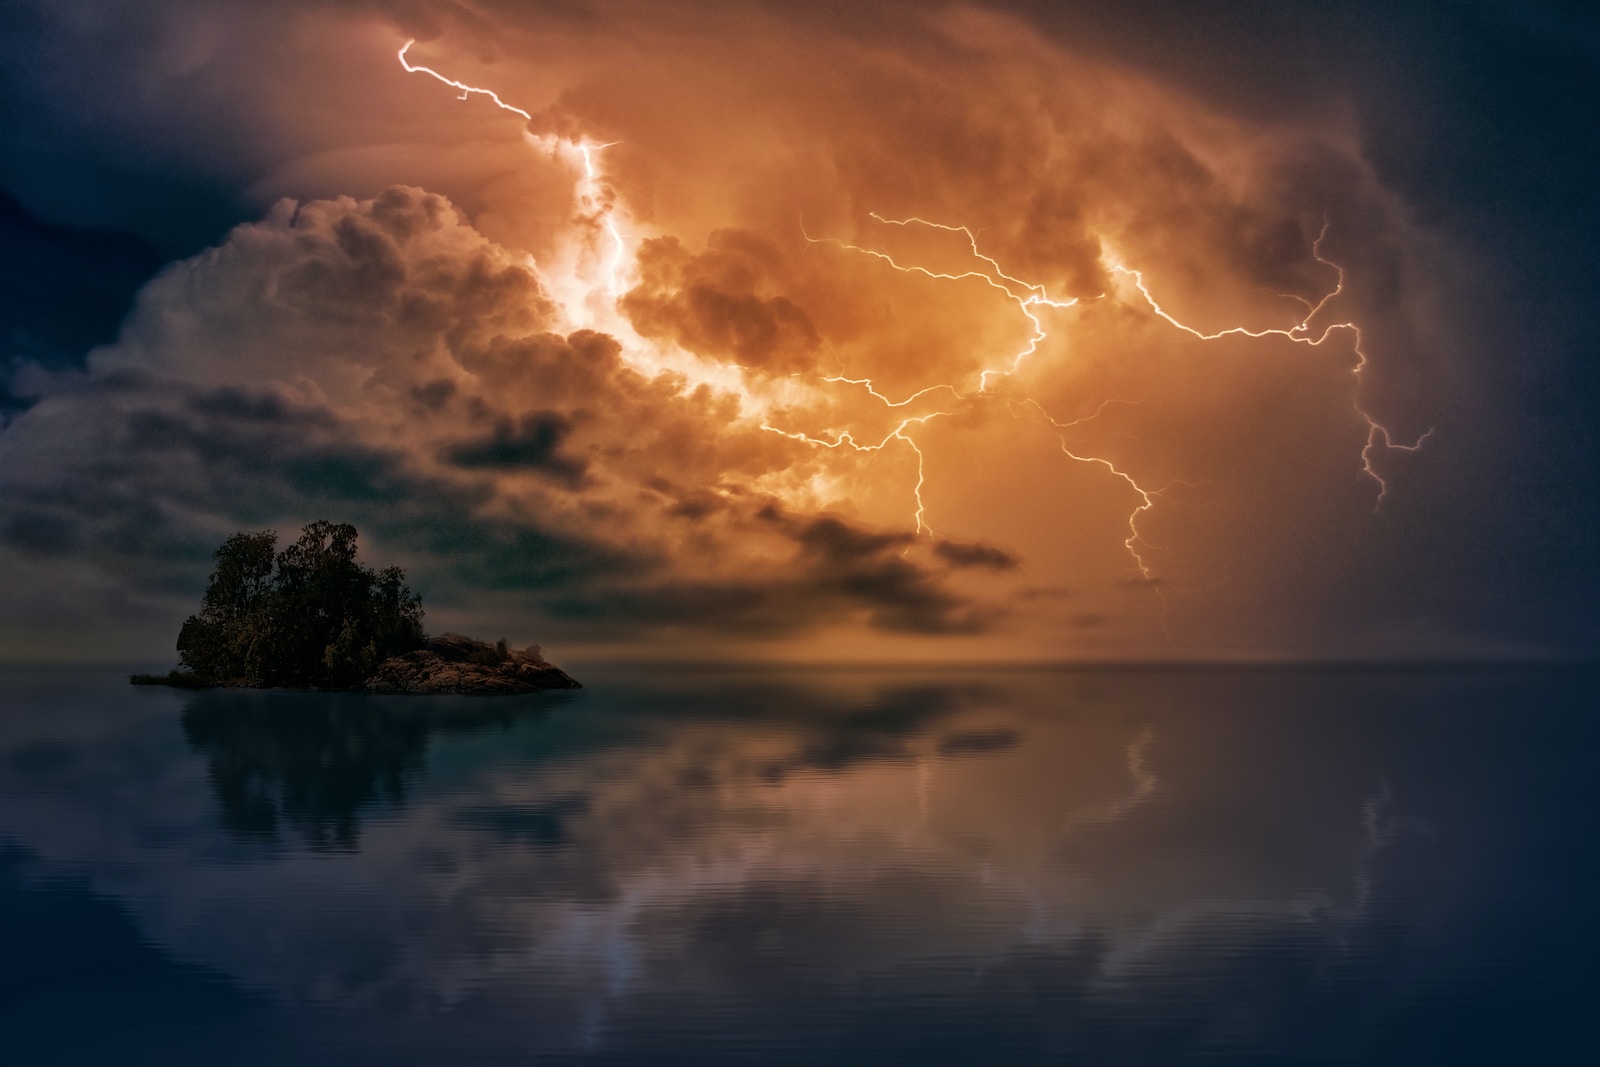
Discover the Power and Beauty of Lightning Photography
When it comes to capturing the raw power and beauty of nature, few subjects are as exhilarating and challenging as lightning. With its striking visual impact and unpredictable nature, photographing lightning can result in stunning and awe-inspiring images. In this article, we will explore the incredible potential of storm photography and share expert tips and techniques to help you master the art of shooting lightning.
The Magic of Lightning
Lightning is a natural phenomenon that occurs during thunderstorms when a buildup of electrical energy is discharged between the atmosphere and the ground or between different areas of the atmosphere itself. This powerful event produces a brilliant flash of light, often accompanied by thunder and dramatic changes in the sky.
One of the most fascinating aspects of lightning is its unique visual characteristics. The branching patterns, bold colors, and intense brightness make for captivating photographs that showcase nature’s raw power. Whether you want to capture a single bolt striking the ground or an intricate network of lightning illuminating the night sky, lightning photography offers endless creative possibilities.
Mastering the Techniques
Now that you understand the captivating nature of lightning, let’s delve into the techniques that will help you capture these breathtaking moments:
- Prepare and Stay Safe: Before venturing out to photograph lightning, it’s crucial to prioritize your safety. Take note of weather forecasts and only head out when you can maintain a safe distance from the storm. Ensure you are positioned in an area providing an unobstructed view of the storm while also having a secure shelter nearby in case the weather conditions worsen suddenly.
- Use a Tripod and Remote Shutter Release: To capture sharp and well-exposed lightning shots, it’s essential to keep your camera steady. Use a sturdy tripod to eliminate camera shake during long exposures. Additionally, a remote shutter release or cable release will minimize the risk of blur caused by pressing the camera’s shutter button.
- Long Exposures and Bulb Mode: Shooting lightning often requires long exposures to capture multiple strikes within a single frame. Set your camera to Bulb mode, allowing you to manually control the exposure time. Start with an exposure of several seconds and adjust accordingly based on the intensity and frequency of the lightning.
- Composition and Timing: To add impact to your lightning photographs, consider incorporating other elements such as landscapes, cityscapes, or silhouettes. Experiment with different compositions and try to anticipate the lightning strikes. Patience and timing are key to capturing that perfect moment.
- Experiment with Different Settings: While a longer exposure is often the go-to technique for capturing lightning, don’t be afraid to experiment with faster shutter speeds, higher ISO settings, and different aperture values. Each lightning strike is unique, and adjusting your camera settings can result in a variety of mesmerizing effects.
Remember, safety should always be your top priority when photographing lightning. Never put yourself in harm’s way or jeopardize the safety of others just to get the perfect shot. With the right equipment, knowledge, and patience, you can capture stunning images that showcase the raw power and beauty of nature’s most electrifying spectacle – lightning.
Did you know that each lightning strike can contain up to one billion volts of electricity? That's enough power to light up 50,000 homes for an entire day!
The Best Camera and Equipment for Shooting Lightning: Mastering Storm Photography
Choosing the Right Camera
In the world of storm photography, capturing lightning requires a specific set of skills and equipment. While any camera can technically be used, there are a few key features you should look for to ensure the best results.
- Sensor Size: A larger sensor allows for better image quality and low-light performance. Look for cameras with APS-C or full-frame sensors as they tend to handle high ISO levels more effectively.
- High ISO Performance: Lightning photography often requires shooting in low-light conditions. To effectively capture the details in the dark, choose a camera with excellent high ISO performance, preferably with a minimal amount of noise.
- Fast Burst Mode: Lightning can be elusive and unpredictable. A camera with a fast burst mode allows you to capture multiple frames in quick succession, increasing your chances of capturing the perfect strike.
- Manual Controls: Storm photography requires a hands-on approach. Make sure your camera has manual control options for adjusting shutter speed, aperture, and ISO settings.
Essential Lenses for Lightning Photography
The lens you choose plays a significant role in the quality and composition of your lightning photographs. Here are some options that work well for this genre:
- Wide-angle Lens: A wide-angle lens, typically ranging between 14mm and 35mm, allows you to capture expansive scenes and include more of the stormy sky. This lens is ideal for photographing lightning against a breathtaking backdrop.
- Telephoto Lens: A telephoto lens with a focal length between 70mm and 200mm is excellent for zeroing in on specific lightning bolts or capturing detailed shots of distant storm phenomena. The longer focal length allows you to photograph lightning from a safe distance.
- Prime Lens: If you prefer a fixed focal length and want to capture stunning close-ups of lightning, a prime lens can be a great choice. A popular option for lightning photography is a 50mm prime lens, which provides sharpness and versatility.
Remember, different lenses offer unique perspectives and creative possibilities. Exploring various options and experimenting with different focal lengths will help you develop your own style and vision. In addition to the camera and lenses, consider investing in a sturdy tripod to ensure the stability of your shots, especially during longer exposures. A remote shutter release or cable release can also be incredibly useful in minimizing camera shake.
By selecting the right camera, lenses, and additional equipment tailored to the specific demands of lightning photography, you can better capture the raw power and beauty of storms.
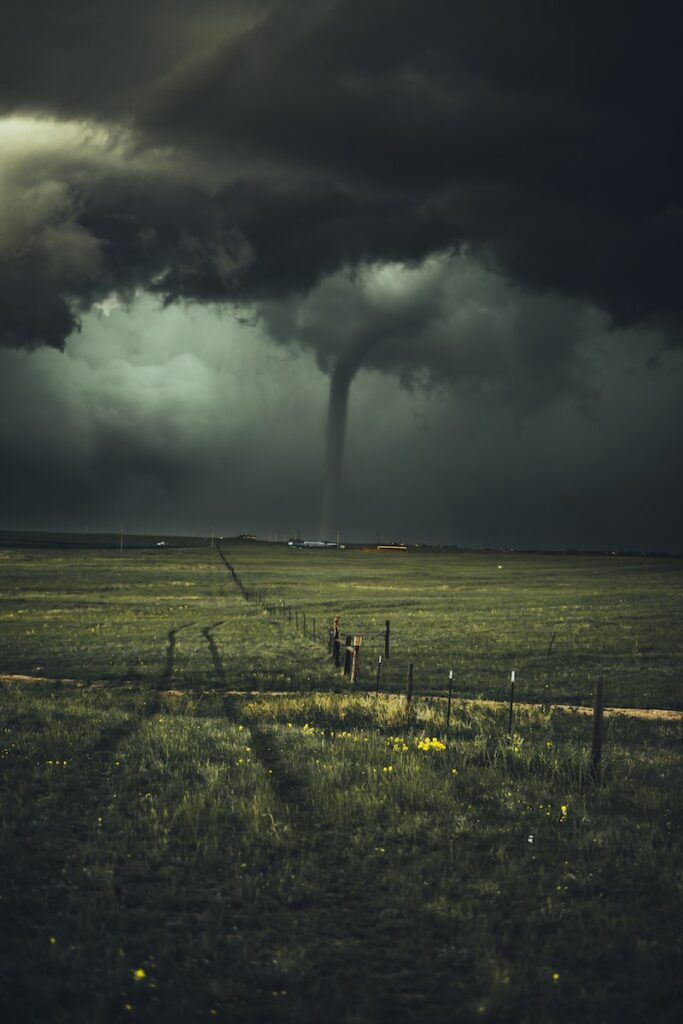
Best Time and Vantage Points for Shooting Lightning
Capturing the raw power and breathtaking beauty of a thunderstorm through photography is an exhilarating experience. To maximize your chances of getting stunning lightning shots, it’s essential to understand the best time and vantage points for your storm photography adventures.
The Ideal Time for Lightning Photography
One of the first things to consider when planning a lightning photography session is the time of year. While thunderstorms can occur throughout the year, certain seasons and weather conditions offer more frequent and intense thunderstorms, increasing your chances of capturing that perfect lightning bolt.
Summer is often the prime time for thunderstorms in many regions, thanks to the combination of warm temperatures and higher humidity levels. With these conditions, cumulonimbus clouds are more likely to form, creating the perfect environment for lightning to strike. So, make sure to keep an eye on weather forecasts during summer months for potential opportunities.
Aside from the time of year, it’s also important to consider the time of day. Most thunderstorms tend to develop in the late afternoon or evening when the sun’s heat has had a chance to build up moisture and instability in the atmosphere. Shooting during this time can provide you with dramatic sky colors and an impressive backdrop for your lightning shots.
Choosing the Right Vantage Points and Positions
When it comes to storm photography, location is everything. Here are a few vantage point options to consider, each offering its own unique benefits:
- Open Fields or Countryside: Find a high spot or open field away from tall buildings or trees that could obstruct your view. This vantage point allows you to capture lightning bolts against a wide landscape, providing a sense of scale and awe.
- Elevated Areas: Seek out hills, cliffs, or rooftops that offer a clear view of the storm. The elevated position not only gives you a broader perspective but also reduces the chances of interference from surrounding structures.
- Waterfront Locations: If you have access to beaches, lakes, or rivers, these areas can serve as excellent vantage points. Water can act as a reflective surface, beautifully mirroring the lightning bolts and creating captivating compositions.
- Urban Skyscrapers: While it may seem counterintuitive, urban environments can also provide unique opportunities for capturing lightning. Skyscrapers offer a striking contrast with the powerful bolts, adding an urban flair to your storm photography.
- Storm Chasing: For the more adventurous photographers, consider chasing storms on the road. This option requires careful planning, knowledge of weather patterns, and, most importantly, adherence to safety precautions. Chasing storms allows you to be right in the heart of the action, capturing incredible lightning shots up close.
Remember, irrespective of your chosen location, always prioritize safety. Thunderstorms are unpredictable and can be dangerous, so make sure you are aware of the risks associated with lightning photography and take necessary precautions.
By understanding the best time and vantage points for shooting lightning, you can increase your chances of capturing striking images that showcase the raw power and beauty of a storm. So, grab your camera, get to a safe spot, and let Mother Nature’s light show unfold before your lens.
When shooting lightning, use a tripod to keep your camera steady and prevent blurry images. Set a long exposure time (around 10-30 seconds) to capture multiple bolts of lightning in one shot. Experiment with different compositions and angles to create unique and captivating images. Always prioritize safety by photographing from a safe distance and finding shelter if necessary.
Frequently Asked Questions
1. How do I capture lightning in my photographs?
To capture lightning in your photographs, you will need a camera with manual settings, a tripod, and a remote shutter release. Set your camera to manual mode and choose a long exposure time, typically around 20-30 seconds. Use a low ISO value to minimize noise and a small aperture to increase depth of field. Frame your shot and focus on the area where you expect lightning to strike. Keep your camera steady on the tripod and use a remote shutter release to minimize camera shake.
2. Is it safe to photograph lightning during a storm?
Photographing lightning can be dangerous if proper safety measures are not taken. It is essential to prioritize personal safety over getting the perfect shot. Always find a safe location away from open areas, tall objects, and bodies of water. Seek shelter in a sturdy building or car. Do not use metallic tripods and avoid standing on wet ground. Remember, your life is more valuable than any photograph.
3. What time of day is best for capturing lightning?
The best time to capture lightning is during the evening or night when the sky is dark. This helps create a dramatic contrast between the lightning and the surrounding environment. Storms are also more likely to occur during these hours. However, it’s important to consider your safety and choose a time that works best for you.
4. What settings should I use for storm photography?
When photographing storms, it’s important to adjust your camera settings accordingly. Use a wide-angle lens to capture more of the sky. Set your camera to manual mode and choose a low ISO value (e.g., ISO 100) to minimize noise. Select a small aperture (e.g., f/8 or smaller) to increase depth of field. Experiment with different exposure times to capture the desired effect. Remember to check your histogram to ensure proper exposure.
5. Are there any post-processing techniques for enhancing lightning photos?
Yes, there are several post-processing techniques to enhance lightning photos. You can increase the contrast and saturation to make the lightning stand out. Adjust the levels or curves to fine-tune the overall exposure. Use a noise reduction tool to minimize any noise present in the image. Experiment with different editing techniques to achieve your desired results.
6. Can I capture lightning with a smartphone?
While it is possible to capture lightning with a smartphone, it can be more challenging compared to using a DSLR or mirrorless camera. Smartphone cameras have limited manual controls, making it difficult to adjust settings for optimal lightning photography. However, you can still try using a slow shutter app to increase the exposure time and stabilize your phone on a tripod or stable surface.
Wrap Up
In conclusion, storm photography is a thrilling and rewarding art form that allows you to capture the awe-inspiring power of nature. By following expert tips and safety measures, you can master the art of shooting lightning and create stunning images that will leave viewers in awe.
Remember to always prioritize safety when photographing storms. Stay informed about weather conditions, use proper equipment, and seek shelter if necessary. Experiment with different techniques, such as long exposure and multiple exposures, to add creativity to your shots.
Feel free to share your own experiences and tips for storm photography in the comments below. We’d love to hear about your adventures and see your fantastic shots! Keep capturing the beauty and power of nature through the lens.