Are you ready to embark on an enchanting journey through the vast expanse of the night sky? Look no further – Star Gazing: Astrology Photography for Beginners is here to unleash your inner stargazer. Whether you’re a photography enthusiast or simply captivated by the wonders of the cosmos, this blog will guide you through the mesmerizing world of astrology photography. From mastering camera techniques to capturing awe-inspiring images of stars and galaxies, let’s delve into the secrets of the celestial realm together.
Table of Contents
- Exploring the Beauty of the Night Sky
- Camera Selection: Unleash Your Creativity
- Best Time and Positions for Astrology Photography
- Frequently Asked Questions
- 1. What equipment do I need for astrology photography?
- 2. How do I find the best location for star gazing?
- 3. What camera settings should I use for astrology photography?
- 4. How can I focus my camera on stars?
- 5. What composition techniques work well in astrology photography?
- 6. Are there any post-processing techniques for enhancing astrology photos?
- 7. Can I capture astrology photos with a smartphone?
- 8. How can I capture star trails?
- 9. Are there any safety precautions I should take while star gazing?
- 10. Where can I find more resources on astrology photography?
- Wrap Up:
Exploring the Beauty of the Night Sky
Night-time offers a breathtaking opportunity to gaze at the mesmerizing stars spread across the sky. If you are fascinated by the celestial wonders and have a keen interest in photography, capturing the beauty of the night sky can be an awe-inspiring experience. In this blog post, we will delve into the world of astrology photography for beginners and provide you with valuable tips and techniques to create stunning images of the cosmos.
Finding the Perfect Subject
Before you start photographing the night sky, it’s crucial to choose the right subject that will make your pictures stand out. The possibilities are endless, but here are a few suggestions:
- Starscapes: Immortalize the vast expanse of the starry sky by capturing the intricate patterns formed by constellations.
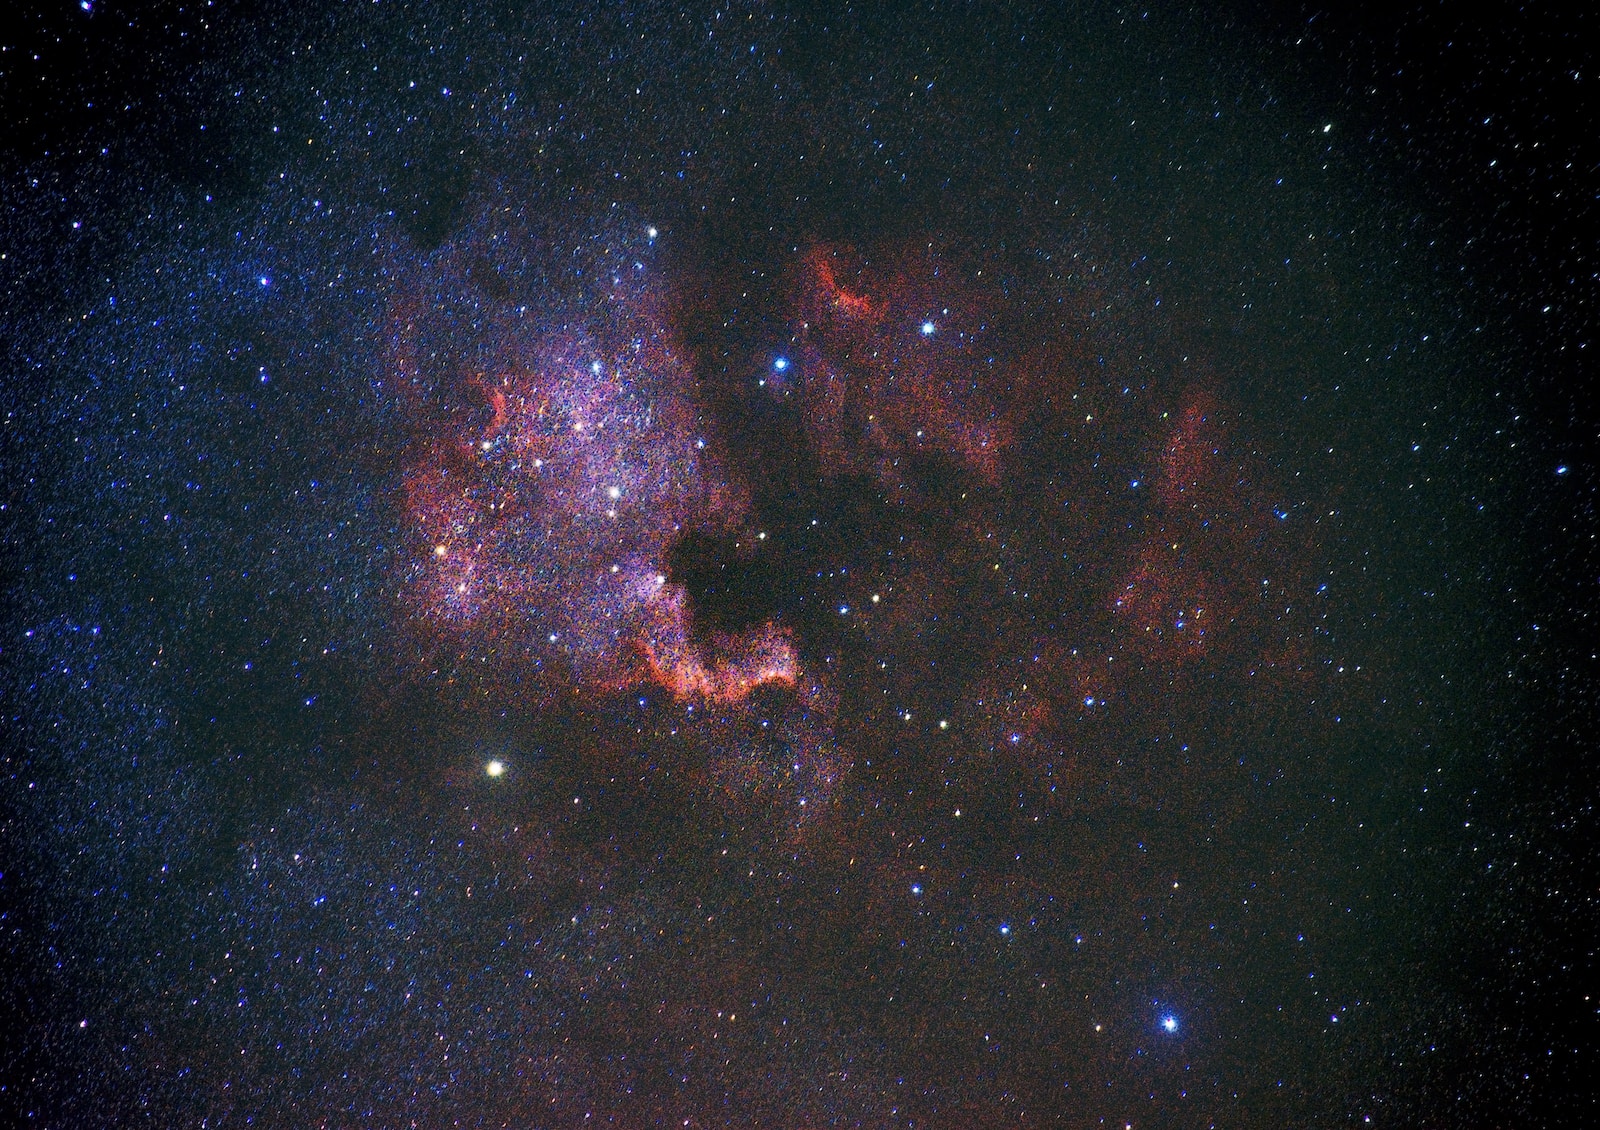
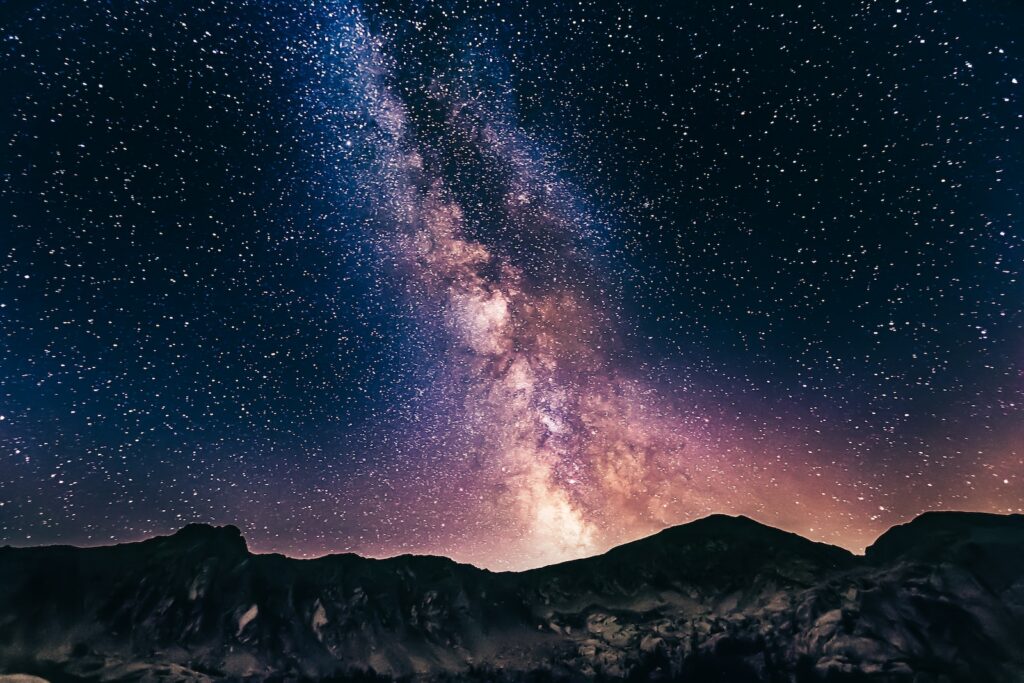
- Milky Way: Photograph the breathtaking Milky Way galaxy, revealing its stunning colors and intricate arm structure.
- Lunar Landscapes: Experiment with lunar photography, capturing the craters, lunar phases, and the dramatic contrast between light and darkness.
- Astrophotography: Explore the possibility of capturing other celestial objects such as nebulae, star clusters, and even planets.
Each subject offers its unique challenges and rewards. Experiment with different subjects to find what excites you the most and allows you to unleash your creative potential.
Techniques to Capture Stellar Images
Once you have chosen your subject, it’s time to delve into the world of photography techniques that will elevate your astrology images to new heights. Here are a few essential techniques to consider:
- Long Exposure: Utilize long exposure to capture the faint details of stars and create stunning trailing effects.
- Planetary Alignment: Keep an eye out for special astronomical events, such as planetary alignments or meteor showers, to add an extra layer of interest to your images.
- Light Painting: Experiment with light painting techniques to emphasize foreground elements and add a surreal effect to your photographs.
- Remote Shutter Release: Use a remote shutter release or a timer to avoid any camera shake when capturing long exposure images.
Remember to always scout your location beforehand, as light pollution can significantly impact the quality of your images. Look for remote areas with minimal light pollution, such as national parks or rural regions.
Equipped with these photography techniques, venture into the realm of astrology photography with confidence. Capture the mysteries of the night sky and immortalize them in photographs that will leave your viewers in awe. Embrace the beauty of the cosmos and unleash your creativity to create stellar images that mesmerize.
Did you know that astrology is the study of the stars and celestial bodies, while astronomy focuses on the scientific observation and interpretation of the universe? Both disciplines are connected through their fascination with the wonders of the cosmos.
Camera Selection: Unleash Your Creativity
When it comes to capturing the mesmerizing beauty of the night sky, having the right camera is essential. The first thing to consider is the type of camera that best suits your needs. Mirrorless cameras and DSLRs are both popular choices among astrophotographers, each offering unique advantages.
A mirrorless camera, known for its compact size and versatility, allows for more portability and convenience. With their electronic viewfinders, you can instantly see the impact of different settings on your images, providing a real-time preview of the final result. On the other hand, DSLRs offer an extensive range of lenses and accessories, giving you flexibility and control over your shots.
Lenses: Focus on Detail and Clarity
When it comes to capturing the celestial wonders, choosing the right lens can make all the difference. Wide-angle lenses are a popular choice for astrophotography as they allow you to capture a larger portion of the night sky. With a wider field of view, you can include more stars, constellations, or even the Milky Way in a single frame, creating stunning compositions.
Alternatively, telephoto lenses provide the ability to zoom in on distant celestial objects, letting you capture intricate details of the moon’s craters or the rings of Saturn. These lenses are also great for capturing close-up shots of planets and deep sky objects, bringing them closer to the viewer.
Other Equipment: Enhancing your Astrological Journey
In addition to a quality camera and lenses, there are a few other pieces of equipment that can enhance your astrological photography experience. One such accessory is a sturdy tripod, which provides stability and eliminates camera shake during long exposure shots. This is crucial to capture sharp and clear images of the night sky.
For those interested in capturing the cosmos in all its glory, consider investing in a star tracker. This handy device compensates for the Earth’s rotation, allowing you to capture longer exposures without suffering from star trailing. Ultimately, this results in clearer and more detailed images of the stars and planets.
Remember, the best equipment for you depends on your photography goals and budget. Whether you choose a mirrorless camera for its convenience or a DSLR for its vast lens selection, it’s essential to experiment and find the combination that suits your unique astrophotography style. So, grab your camera, select your lens, and embark on an astronomical journey like never before.
Best Time and Positions for Astrology Photography
Embarking on a captivating journey through the cosmos requires not only a keen eye but also an understanding of the ideal time and positions for astrology photography. To capture the stars in all their glory, you need to know when and where to look. Below, we delve into the best time of year and the most advantageous positions for photographers seeking the perfect celestial shot.
The Perfect Timing: Finding the Ideal Season
While the stars light up the sky all year round, certain seasons offer better conditions for astrology photography than others. One of the prime times to immerse yourself in the cosmic wonders is during the winter months. The crisp air and longer nights provide a breathtaking backdrop for capturing the celestial objects.
Winter is also known for its clear skies, which reduce light pollution and enhance the clarity of your astrological images. The lack of humidity during this season minimizes atmospheric interference, allowing you to capture sharper and more detailed shots of the stars.
Moreover, during the winter, the night sky presents a wide range of constellations and other astronomical phenomena that are both mesmerizing and awe-inspiring. From Orion’s Belt to the Pleiades, the winter night sky boasts a plethora of photographic opportunities.
The Perfect Position: Scouting Prime Vantage Points
Apart from timing, the position from which you capture your astrology shots can greatly impact their quality and composition. To make the most of your cosmic photography experience, here are two distinct vantage points worth considering:
Open Fields:
Venturing into open fields away from the city lights offers several advantages for astrological photography. The vast expanse of uninterrupted sky provides a vivid canvas that allows the stars to truly shine. Additionally, open fields provide ample space for setting up your equipment, reducing the risk of obstacles obstructing your view.
Furthermore, being immersed in nature allows for a deeper connection with the cosmos. The serene environment lends a sense of tranquility to the experience, making it easier to become one with your subject matter and capture the essence of the night sky.
Key Benefits:
- Unobstructed view of the night sky
- Reduced light pollution
- Ample space for setting up equipment
- Enhanced serenity and connection with nature
Elevated Positions:
Another captivating option for astrology photography is finding elevated positions that offer a sweeping view of the landscape and the sky. Climbing hills, mountains, or even tall buildings allows you to capture the stars from a unique perspective, adding depth and dimension to your photographs.
When shooting from an elevated position, you can incorporate the foreground into your compositions, creating compelling juxtapositions between the celestial objects and earthly elements. This technique can result in stunning astrological images that are not only visually striking but also tell captivating stories.
Key Benefits:
- Unique perspective and composition opportunities
- Incorporation of foreground elements
- Increased visual depth and storytelling potential
By understanding the most opportune time and the advantageous positions for astrology photography, you can embark on a celestial journey armed with knowledge that will elevate your shots to new heights. Remember, the winter months offer prime conditions for capturing the starry wonders above, and exploring open fields or seeking elevation will provide you with captivating perspectives for your astrological compositions.
Use a tripod when capturing astrology photography to minimize camera shake and capture sharp images of the stars. This will ensure that the sky appears clear and the stars are free from motion blur.
Frequently Asked Questions
1. What equipment do I need for astrology photography?
To get started with astrology photography, you will need a DSLR camera with manual settings, a sturdy tripod, and a wide-angle lens. Additionally, a remote shutter release and a red flashlight are handy for preserving night vision.
2. How do I find the best location for star gazing?
For capturing the best astrological images, you’ll want to find a location with minimal light pollution. Choose a spot away from city lights, preferably in a rural or remote area. Dark Sky Finder and Light Pollution Map are useful tools for finding dark sky locations near you.
3. What camera settings should I use for astrology photography?
Set your camera to manual mode and adjust the following settings:
- ISO: Start with a high value, around 1600, and adjust as needed based on the brightness of the stars.
- Aperture: Use the widest possible aperture (lowest f-number) to capture more light. Generally, f/2.8 or lower is ideal.
- Shutter Speed: Experiment with different shutter speeds to achieve optimal exposure. Start with around 15-30 seconds and increase or decrease as needed.
4. How can I focus my camera on stars?
Switch your lens to manual focus and use the infinity symbol (∞) as a reference point. If your lens doesn’t have an infinity symbol, focus on the brightest star in the sky and fine-tune the focus until the stars appear sharp. Some cameras also have a live view zoom feature for precise focusing.
5. What composition techniques work well in astrology photography?
When composing your shots, look for interesting foreground elements like trees, mountains, or buildings to add depth and perspective to your astrological images. Experiment with different angles and use the rule of thirds to create a visually appealing composition.
6. Are there any post-processing techniques for enhancing astrology photos?
Absolutely! In post-processing, you can adjust the levels of brightness, contrast, and saturation to bring out the details in the stars and enhance the colors. Software like Adobe Lightroom or Photoshop can be helpful for post-processing your astrology photos.
7. Can I capture astrology photos with a smartphone?
While smartphones have improved in terms of camera capabilities, they may not produce the same level of quality and control as a DSLR camera. However, there are smartphone apps available that can help you take better astrology photos, such as NightCap or ProCamera.
8. How can I capture star trails?
To capture star trails, you will need to take long-exposure shots over an extended period. Use a wider aperture, set a longer shutter speed (several minutes or more), and keep your ISO relatively low to avoid excessive noise. You can also stack multiple images together in post-processing to create more pronounced star trails.
9. Are there any safety precautions I should take while star gazing?
Absolutely! When venturing into the night for astrology photography, make sure to dress warmly, bring insect repellent, and carry a flashlight for safety. Familiarize yourself with the area beforehand and inform someone of your plans. It’s also essential to respect nocturnal wildlife and minimize any impact on their habitat.
10. Where can I find more resources on astrology photography?
There are several online communities and websites dedicated to astrology photography, such as astrophotography-subreddit and lonelyspeck. These platforms provide great resources, tutorials, and a space to connect with other astro photography enthusiasts.
Wrap Up:
In conclusion, star gazing and astrology photography can be a captivating and rewarding hobby. By using the right techniques and equipment, you can capture breathtaking images of the cosmos like never before. Remember to keep learning and experimenting with different settings to improve your skills. The sky is the limit when it comes to exploring the wonders of the universe through your camera lens. So grab your gear, head outside on a clear night, and let the stars guide you on a visual journey of a lifetime.
I hope these tips have inspired you to embark on your own astrology photography adventure. If you have any questions or would like to share your own experiences, please leave a comment below. Let’s engage in a conversation and learn from each other’s tips and tricks. Happy star gazing, fellow photographers!