Experience the awe-inspiring beauty of Mount Rainier like never before in “The Splendid Capture: Photographing Mount Rainier” blog. Prepare yourself for an unforgettable journey as we delve into the scenic wonders and reveal the secrets to capturing its majestic splendor through your camera lens. Unlock the secrets of nature photography, and immerse yourself in the tranquil wilderness as we explore the breathtaking landscapes and unveil the tips and tricks you need to take your photography skills to new heights. Are you ready to embark on this unforgettable adventure?
Table of Contents
- The Magnificent Mount Rainier: An Enchanting Subject for Photographs
- The Best Tools for Photographing Mount Rainier
- Best Time to Photograph Mount Rainier
- Frequently Asked Questions
- 1. What camera settings should I use to capture Mount Rainier?
- 2. Are there any specific lenses that work best for capturing Mount Rainier?
- 3. What is the best time of year to photograph Mount Rainier?
- 4. How can I make my Mount Rainier photographs stand out from the rest?
- 5. Are there any photography restrictions in Mount Rainier National Park?
- Wrap Up
The Magnificent Mount Rainier: An Enchanting Subject for Photographs
Mount Rainier, standing tall at 14,411 feet, is an awe-inspiring presence that beckons photographers from all over the world. Located in Washington State, this majestic peak offers endless opportunities to capture its scenic beauty through the lens of your camera. From its snow-capped peak to its lush meadows and crystal-clear lakes, Mount Rainier provides a mesmerizing backdrop for your photographic journey.
The Diverse Terrain
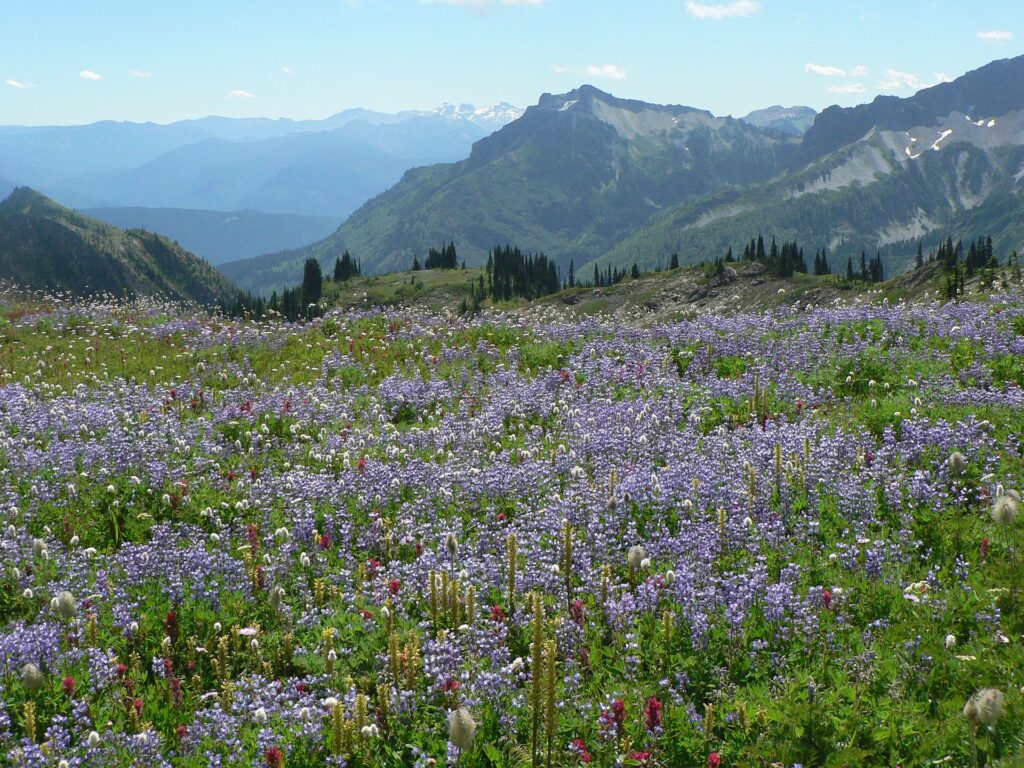
One of the most remarkable aspects of Mount Rainier is its diverse terrain, which provides a plethora of unique photo opportunities. As you explore the mountain, you’ll encounter jaw-dropping glaciers, dense forests, wildflower meadows, and shimmering waterfalls. Each of these landscapes offers its own distinct charm and can be a subject of visual delight.
Transition word: Furthermore, the changing seasons play a crucial role in showcasing the ever-changing beauty of Mount Rainier. In spring, the meadows burst into a kaleidoscope of colors as the wildflowers bloom, creating a picturesque vista. In winter, the mountain is draped in a pristine white blanket, offering a stunning contrast against the clear blue skies. By visiting Mount Rainier during different seasons, you can capture its evolving beauty and create a diverse and captivating portfolio of photographs.
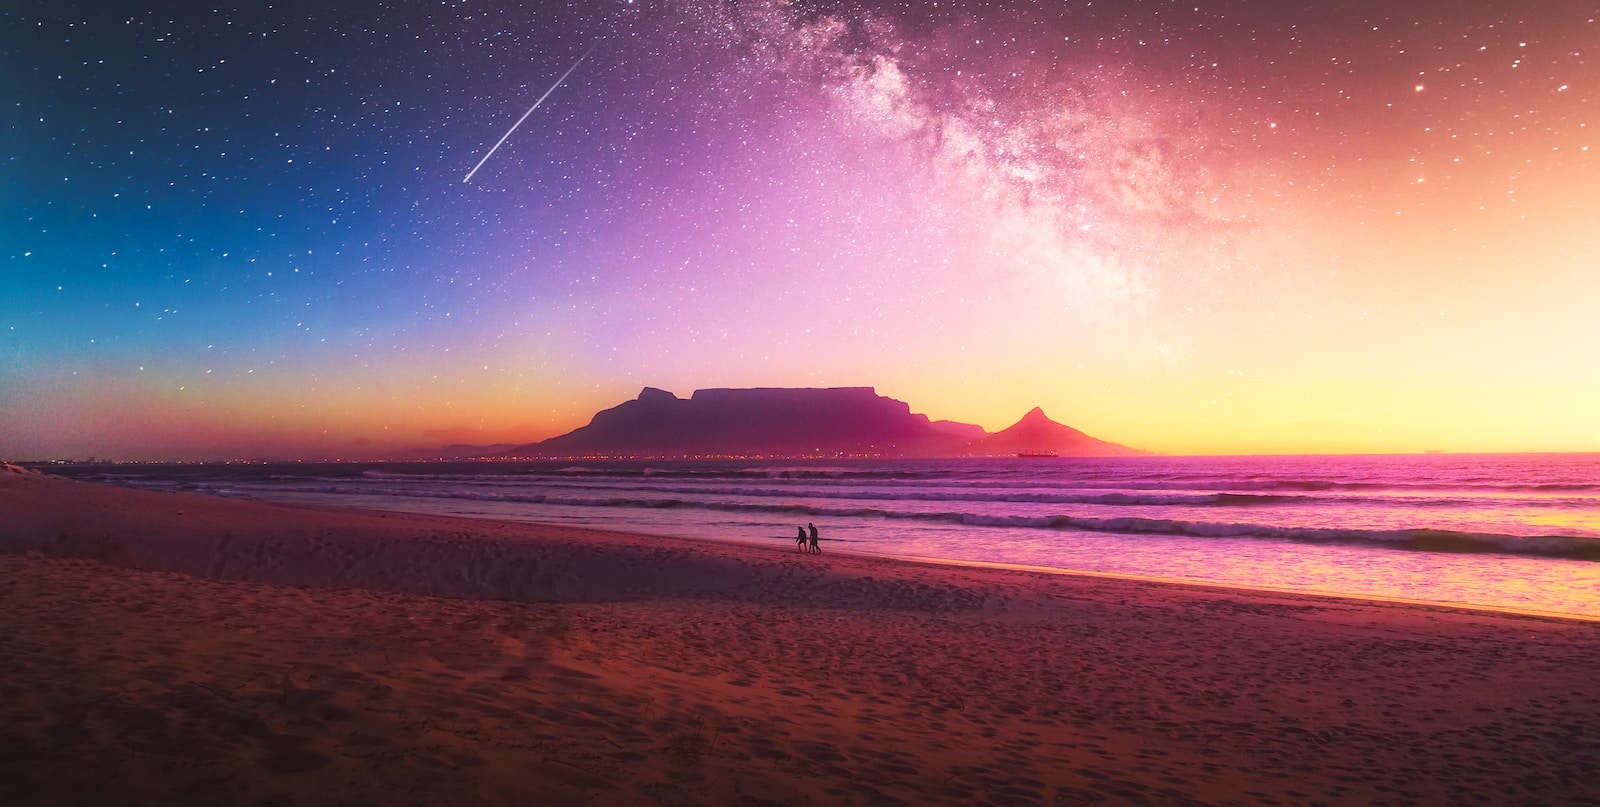
Stunning Sunrise and Sunset
Another unforgettable aspect of photographing Mount Rainier is the opportunity to capture its breathtaking sunrise and sunset. When the first rays of sunlight kiss the peak of the mountain, the entire landscape transforms into a spectacle of warm hues and dramatic shadows. The vibrant orange and pink hues blend with the snowy slopes, creating a magical scene that is perfect for landscape photography.
Transition word: Additionally, the sunsets at Mount Rainier are equally mesmerizing. As the day comes to a close, the mountain becomes bathed in a golden glow, creating a serene and ethereal atmosphere. The combination of the mountain’s silhouette against the fiery sky and the reflection in the surrounding lakes makes for truly captivating photographs.
To make the most out of these breathtaking moments, consider using techniques such as long exposure to capture the movement of clouds or water, or experimenting with different angles and perspectives to create unique compositions. Play with silhouettes and incorporate foreground elements to add depth to your images, making them even more captivating.
Remember, the key to capturing the splendor of Mount Rainier lies not only in technical skills but also in an appreciation of its scenic beauty. Take your time to explore, immerse yourself in the tranquility of the surroundings, and let your photographs tell the story of this natural wonder.
Interesting fact: Mount Rainier is an active stratovolcano located in Washington state, USA. With a height of 14,411 feet (4,392 meters), it is the highest mountain in the state and a prominent landmark of the Pacific Northwest region. The mountain is surrounded by diverse ecosystems, including old-growth forests, subalpine meadows, and glaciers, making it a paradise for nature and photography enthusiasts.

Mount Rainier, can it be seen from Seattle?
Mount Rainier can be seen from Seattle, Washington. Seattle is located approximately 59 miles (95 kilometers) north-northeast of Mount Rainier, which is the highest mountain in the state of Washington and an iconic landmark in the region.
However, visibility of Mount Rainier from Seattle depends on various factors, including the weather, atmospheric conditions, and the time of day. The mountain is most visible when the skies are clear, and there is minimal cloud cover or haze. Early mornings or late afternoons, when the sunlight hits the mountain at an angle, can provide stunning views and great opportunities for photography.
Keep in mind that Seattle’s weather is known for its variability and the prevalence of cloudy or overcast days, especially during the fall and winter months. So, while it’s possible to see Mount Rainier from Seattle, it’s not guaranteed every day, and the best chances are during periods of good weather and clear skies.
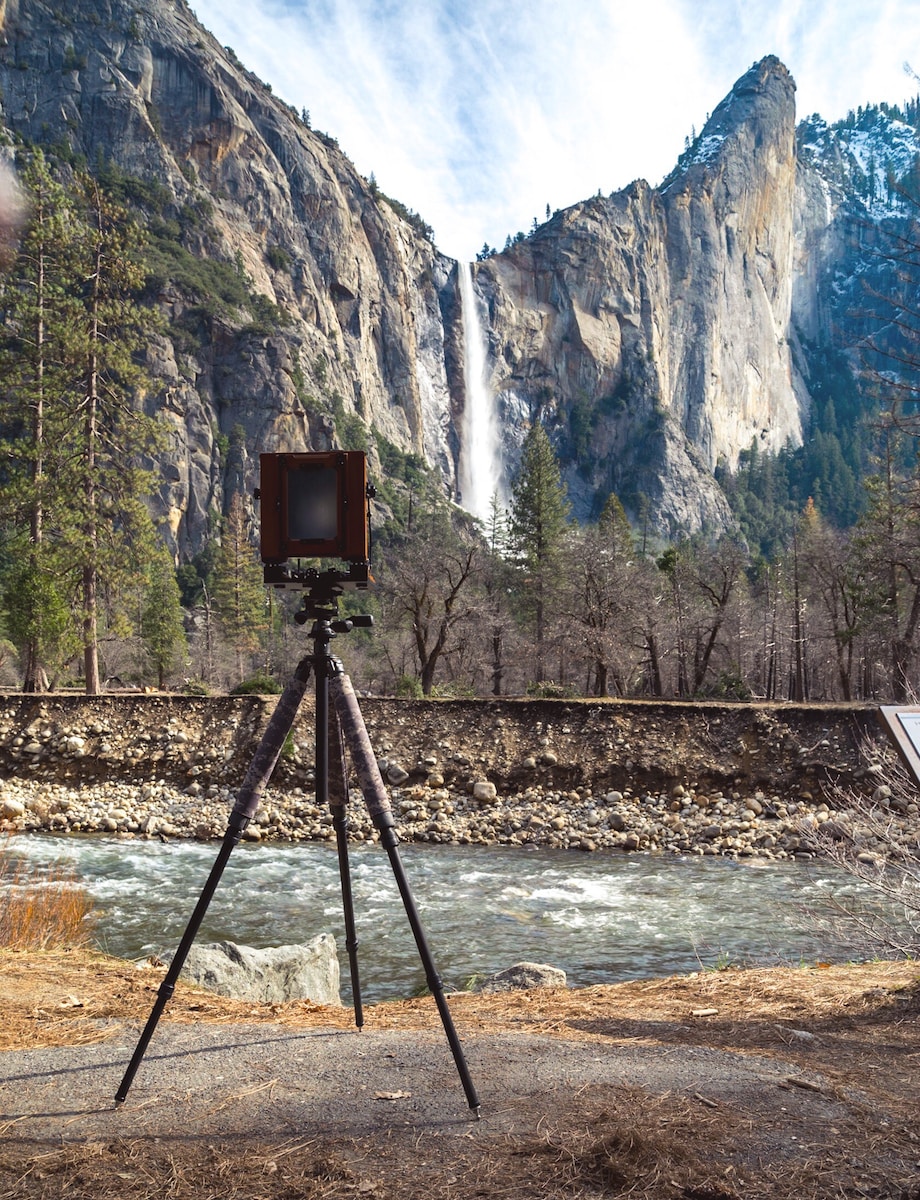
The Best Tools for Photographing Mount Rainier
When it comes to capturing the awe-inspiring beauty of Mount Rainier, having the right camera and equipment is essential. Whether you are a seasoned photographer or just starting out, investing in quality gear can make a significant difference in the quality of your photographs. Let’s explore some of the best options available:
1. Camera
Choosing the right camera is crucial for capturing the scenic beauty of Mount Rainier. In today’s market, there are several options to consider:
- DSLR Cameras: These versatile cameras offer excellent image quality and allow you to change lenses based on your specific needs. Models such as the Nikon D850 and Canon EOS 5D Mark IV are popular choices among professional photographers.
- Mirrorless Cameras: These cameras are compact and lightweight, making them ideal for photographers on the go. The Sony Alpha a7 III and Fujifilm X-T4 are known for their exceptional image quality and advanced features.
- Compact Cameras: If you prefer a more portable option, compact cameras like the Sony RX100 VII and Canon PowerShot G7 X Mark III can still deliver stunning results. They are perfect for capturing spontaneous moments during your Mount Rainier adventure.
No matter which type of camera you choose, make sure it has manual control settings, allowing you to adjust exposure, aperture, and shutter speed to capture the perfect shot.
2. Lenses
Picking the right lenses will greatly enhance your ability to capture the scenic beauty of Mount Rainier. Consider the following options:
- Wide-Angle Lens: A wide-angle lens, such as a 16-35mm or 24mm prime lens, is ideal for capturing sweeping landscapes and showcasing the grandeur of Mount Rainier. It allows you to include more of the surrounding environment in your frame.
- Telephoto Lens: A telephoto lens, like a 70-200mm or 100-400mm, is perfect for capturing close-up details of the mountain, wildlife, or distant landscapes. It enables you to compress the perspective and create stunning compositions.
- Macro Lens: If you’re interested in capturing the smaller wonders of Mount Rainier, a macro lens is a must-have. With a focal length of around 90-105mm, it allows you to photograph intricate details like wildflowers or dewdrops.
Remember, investing in high-quality lenses can significantly improve the sharpness and clarity of your images. Consider renting different lenses based on the specific shots you want to capture during your Mount Rainier journey.
Additionally, don’t forget other essential equipment such as a sturdy tripod (for stability during long exposures or time-lapse shots), extra batteries, memory cards with ample storage capacity, and lens filters (such as a polarizing filter to enhance colors and minimize glare).
Now that you know what equipment you need, it’s time to head out and capture the splendid beauty of Mount Rainier through your camera lens. Be prepared, experiment with different settings, and let your creativity flow. Happy shooting!
Best Time to Photograph Mount Rainier
When it comes to capturing the majestic beauty of Mount Rainier in all its glory, timing is key. The best time to photograph the mountain depends on what you want to capture and the overall experience you desire.
- Spring: Spring is a magical time to photograph Mount Rainier as the wildflowers bloom, covering the meadows in bursts of vibrant colors. This season also offers a higher chance of clear skies, providing stunning views of the snow-capped peak.
- Summer: Summer provides longer days, allowing for more opportunities to capture the beauty of Mount Rainier at different times of the day. The warm weather also opens up hiking trails to explore various vantage points and viewpoints.
- Fall: The autumn season brings a stunning display of fall colors to the surrounding forests, adding an extra dimension to your photographs. The golden hues combined with the mountain’s majestic presence create a truly captivating scene.
- Winter: Winter showcases Mount Rainier in its most dramatic form. The snow-covered landscapes, frozen waterfalls, and icy alpine lakes present unique opportunities for capturing the mountain’s awe-inspiring beauty.
2. Best Vantage Points and Positions
Mount Rainier offers a multitude of vantage points that cater to photographers of all skill levels. Each location provides a unique perspective, allowing you to capture the essence and grandeur of this natural wonder.
- Sunrise at Reflection Lakes: Start your day early and head to Reflection Lakes for a breathtaking sunrise view. The calm waters reflect the mountain, creating mirror-like images that are absolutely stunning.
- Paradise Meadows: Paradise Meadows is a photographer’s paradise (hence the name). With its fields of wildflowers, picturesque trails, and unmatched views, this location offers endless opportunities for capturing Mount Rainier in all its glory.
- Tipsoo Lake: Located on the eastern side of the mountain, Tipsoo Lake provides a beautiful foreground element with its vibrant wildflowers and reflection of the mountain in the calm waters. This spot is particularly recommended during the peak wildflower season.
- Grove of the Patriarchs: For a different perspective, visit the Grove of the Patriarchs. This ancient forest, adorned with towering old-growth trees, offers a serene and mystical setting, making it perfect for capturing the mountain in a unique context.
Remember, the best vantage point and position vary depending on the weather conditions and the specific shot you want to achieve. Be open to exploring different perspectives, experimenting with angles, and incorporating foreground elements to add depth and visual interest to your photographs.
Now that you know the best time and vantage points for photographing Mount Rainier, get ready to immerse yourself in the magnificent beauty of this natural wonder and capture the essence of its splendor through your camera lens.
To capture the grandeur of Mount Rainier, try shooting during the golden hour - the hour after sunrise or before sunset. The soft, warm light will enhance the details and colors of the mountain, creating more stunning photographs.
Frequently Asked Questions
1. What camera settings should I use to capture Mount Rainier?
When photographing Mount Rainier, it is best to use a combination of a small aperture (high f-stop value) for increased depth of field, a low ISO setting to minimize noise, and a slow shutter speed to capture the details of the scene.
2. Are there any specific lenses that work best for capturing Mount Rainier?
Wide-angle lenses are ideal for capturing the vastness of Mount Rainier and its surroundings. They allow you to include more of the stunning landscape in your frame. However, telephoto lenses can also be useful for capturing intricate details from a distance.
3. What is the best time of year to photograph Mount Rainier?
Mount Rainier offers breathtaking views throughout the year. However, the best time to capture its beauty is during the summer months when the wildflowers are in bloom, the skies are clear, and the mountain is often snow-capped.
4. How can I make my Mount Rainier photographs stand out from the rest?
To make your Mount Rainier photographs unique, try experimenting with different compositions and perspectives. Look for interesting foreground elements, use leading lines, or capture the mountain during different weather conditions to create compelling and memorable images.
5. Are there any photography restrictions in Mount Rainier National Park?
While photography is generally allowed in Mount Rainier National Park, there are some restrictions. Commercial photography and filming require permits, and certain areas may have restrictions to protect wildlife or sensitive vegetation. It is important to check with the park authorities for any specific guidelines or permits required.
Wrap Up
Mount Rainier offers a truly awe-inspiring experience for photographers and nature enthusiasts alike. By following these tips and techniques, you can capture the majestic beauty of this iconic mountain and create stunning photographs that will leave a lasting impact.
Remember to pay attention to lighting, composition, and perspective to truly bring out the splendor of Mount Rainier. Whether you’re a beginner or experienced photographer, exploring this scenic wonder will surely ignite your passion for capturing natural beauty.
Now it’s your turn to grab your camera and embark on your own adventure. Don’t forget to share your magnificent Mount Rainier photographs with us and leave a comment below. We’d love to see your stunning captures and hear about your experience!