Welcome to our blog on transforming your action camera footages into cinematic videos! If you’re looking to enhance your action camera videos for a more professional look, you’ve come to the right place. In this tutorial, we will provide you with step-by-step instructions on video editing techniques to bring out the cinematic quality in your footages. Whether you’re a travel enthusiast capturing breathtaking landscapes or a thrill-seeker recording epic action shots, this guide will help take your video editing skills to the next level.
Table of Contents
- Selecting the Right Footage
- 2. Organizing Your Footage
- 3. Adding Cinematic Transitions
- 4. Enhancing Colors and Contrast
- 5. Adding Music and Sound Effects
- 6. Exporting and Sharing Your Cinematic Video
- Transforming Your Action Camera Footages into Cinematic Videos
- Frequently Asked Questions
- 1. How can I transform my action camera footages into cinematic videos?
- 2. Which video editing software is best for editing action camera footages?
- 3. How can I make my action camera videos look more professional?
- 4. Can you recommend any resources for learning video editing?
- 5. What are some recommended settings for action cameras?
- Wrap Up
Selecting the Right Footage
Before diving into the editing process, it’s important to choose the best footage for your cinematic video. Review your action camera recordings and select clips that showcase exciting moments, unique perspectives, or stunning imagery. Aim for shots with smooth camera movements and avoid shaky footage, as it can be challenging to stabilize in post-production.
Did you know that incorporating slow-motion shots in your action camera videos can enhance the cinematic feel? By slowing down certain segments, you can emphasize the intensity of the action and create more dramatic moments in your footage. Experiment with different speeds to find the perfect balance for your video.
2. Organizing Your Footage
Once you have selected your preferred clips, it’s essential to organize them effectively. Create a dedicated folder on your computer for your project and name it accordingly. Within this folder, create subfolders to categorize your footage, making it easier to navigate during the editing process. Segregating your footage by location, date, or specific scenes will save time and keep your project streamlined.
TIP: Utilize Color Labels
An efficient way to manage your footage is by utilizing color labels within your video editing software. Assign different labels to specific clips based on their importance or the desired sequencing in your final video. This visual organization method allows for easy identification and quick decision-making during the editing process.
3. Adding Cinematic Transitions
One of the key elements to transform your action camera footages into cinematic videos is the use of smooth transitions between clips. Experiment with various transition effects, such as fades, dissolves, or slide animations, to add a professional touch to your video. These transitions help maintain visual continuity, making the overall viewing experience more engaging.
Interesting fact: Luma fade is a popular transition effect used in many cinematic videos. It creates a smooth fade-in or fade-out effect by manipulating the luminance values of the footage. This transition adds an elegant and sophisticated touch to your action camera videos.
4. Enhancing Colors and Contrast
Cinematic videos often have rich and vibrant colors that effectively convey emotions and enhance the visual experience. To achieve this, adjust the color grading and contrast of your action camera footages. Experiment with the color temperature, saturation, and highlights to create the desired mood and atmosphere in your video.
Color Lookup Tables (LUTs) are pre-designed color presets that can be applied to your footage. There are various LUTs available online that replicate the look of popular movies or give your videos a specific cinematic style. Apply different LUTs to see which best suits your action camera footage and desired cinematic aesthetic.
5. Adding Music and Sound Effects
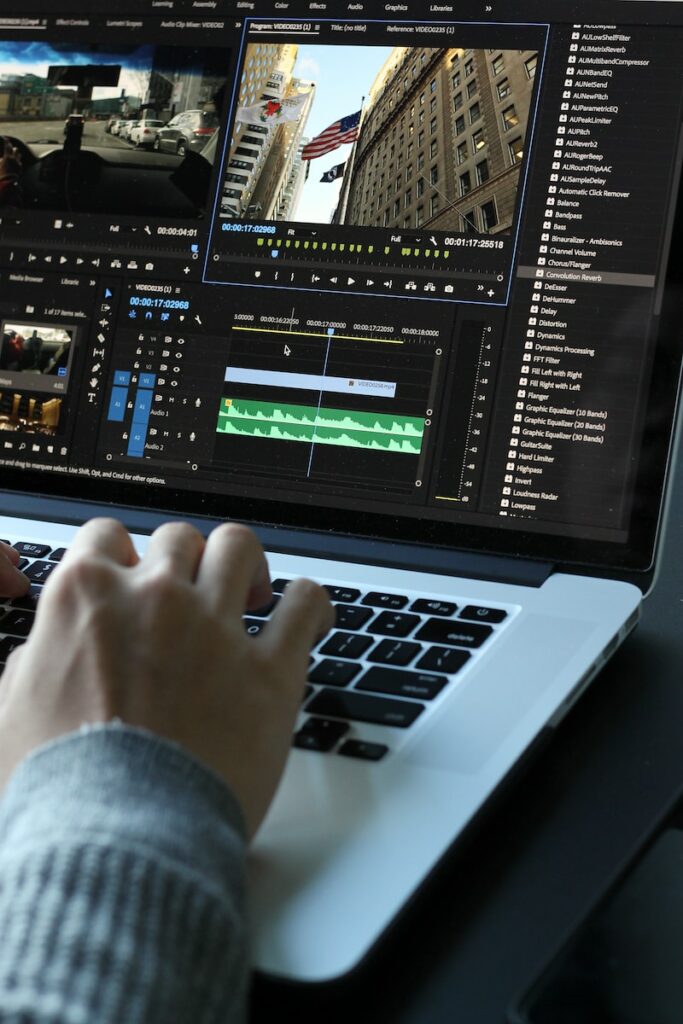
Sound plays a crucial role in creating a cinematic video. Find the right music tracks and sound effects that complement the mood and pace of your action camera footage. Incorporate dramatic music during intense action sequences and softer melodies for serene landscapes. Balance the audio levels between the background music, dialogue (if any), and ambient sounds to create a captivating audio experience.
6. Exporting and Sharing Your Cinematic Video
Once you are satisfied with the final result of your editing, it’s time to export your cinematic video. Select the appropriate export settings based on your desired platform or use. Consider elements such as resolution, bitrate, and file format to maintain the video’s quality while ensuring compatibility with various devices and streaming platforms. Finally, share your cinematic masterpiece with your audience and receive recognition for your video editing skills!
Remember, practice makes perfect! Don’t be afraid to experiment and try new techniques. The more you explore and refine your video editing skills, the better you’ll become at transforming your action camera footages into cinematic videos.
Transforming Your Action Camera Footages into Cinematic Videos
Are you tired of your action camera videos looking amateur and lacking the cinematic touch? Well, you’re in luck! In this tutorial, we’ll teach you how to edit and enhance your action camera videos to give them a more professional and cinematic look. Whether you’re a beginner or an experienced videographer, these tips and techniques are sure to take your videos to the next level!
Understanding the Importance of Video Editing
Before we dive into the editing process, let’s discuss why video editing plays a crucial role in transforming your action camera footages into cinematic videos. Editing allows you to tell a story, create a seamless flow, and enhance the visual quality of your videos. It’s the secret ingredient that adds that wow-factor to your footages, making them visually captivating and engaging.
Now, let’s move on to the step-by-step guide on how to edit your action camera videos!
Step 1: Organize and Review Your Footages
Start by importing your footages into a video editing software of your choice. Create a new project and take a quick preview of each clip. Identify the best footages that capture the essence of your video and delete any unnecessary or repetitive shots. This will save you time and help you focus on the most impactful moments.
Step 2: Make Basic Adjustments
Now it’s time to enhance the visual quality of your footages. Begin by adjusting the brightness, contrast, and saturation levels. Experiment with these settings until you achieve the desired cinematic look. Don’t be afraid to make bold adjustments; after all, you want your videos to stand out!
Step 3: Add Transitions and Effects
To create a seamless flow between your clips, use transitions such as fades, dissolves, or wipes. These smooth transitions will add a professional touch to your videos and keep your audience engaged throughout. Additionally, explore various effects like slow-motion, time-lapse, or color grading to add visual interest and evoke emotions.
Step 4: Incorporate Music and Sound Effects
No cinematic video is complete without the right audio. Choose a background music track that complements the mood and pace of your footage. Consider using sound effects to enhance specific moments or actions. Be mindful of copyright restrictions and use royalty-free music and sound effects to avoid any legal issues.
Step 5: Finalize and Export Your Video
After completing the editing process, review your video to ensure everything is in place. Make any necessary tweaks or adjustments to enhance the overall quality. Once you’re satisfied with the final result, export your video in a high-resolution format suitable for sharing on various platforms.
Remember, practice makes perfect. Don’t be discouraged if your first few attempts don’t yield the desired results. Keep experimenting, learning new techniques, and soon you’ll be creating stunning cinematic videos with your action camera footages!
Ready to elevate your videos to the next level? Check out our video editing software recommendations and start transforming your action camera footages into cinematic masterpieces today!
Frequently Asked Questions
1. How can I transform my action camera footages into cinematic videos?
To transform your action camera footages into cinematic videos, you can follow these steps:
- Import your footage into a video editing software.
- Trim unnecessary parts and organize your clips.
- Add transitions between different shots for a seamless flow.
- Color grade your footage to achieve a more cinematic look.
- Incorporate music or sound effects to enhance the mood.
- Apply visual effects or filters to create a unique style.
- Adjust the pacing and rhythm of your video for better storytelling.
- Export your final video and share it with the world!
2. Which video editing software is best for editing action camera footages?
There are several video editing software options available, but some popular choices for editing action camera footages are:
- Adobe Premiere Pro
- Final Cut Pro
- Davinci Resolve
- iMovie
- Sony Vegas Pro
Each software has its own set of features and user interface, so it’s recommended to try out different ones and see which suits your needs the best.
3. How can I make my action camera videos look more professional?
Here are some tips to make your action camera videos look more professional:
- Use a tripod or stabilizer to reduce shakiness.
- Experiment with different angles and compositions.
- Shoot in the highest resolution and frame rate available.
- Ensure proper lighting for better visibility.
- Capture steady and smooth camera movements.
- Record high-quality audio and use external microphones if needed.
- Plan your shots and follow a storyboard or shot list.
- Edit your videos using professional techniques and software.
4. Can you recommend any resources for learning video editing?
Yes, there are various online resources that can help you learn video editing:
- YouTube tutorials from popular video editing channels.
- Online courses and classes on platforms like Udemy and Skillshare.
- Books and ebooks on video editing techniques and software.
- Online forums and communities where you can ask for advice or feedback.
- Practice and experimentation with different editing techniques.
Remember, the more you practice and explore, the better you will become at video editing!
5. What are some recommended settings for action cameras?
Here are some recommended settings for action cameras to capture high-quality footages:
- Choose the highest resolution and frame rate supported by your camera.
- Enable image stabilization to reduce shakiness.
- Adjust the exposure settings based on the lighting conditions.
- Consider using a wide-angle lens for capturing a wider perspective.
- Shoot in RAW format for more flexibility in post-processing.
It’s always a good idea to consult your camera’s manual for specific settings and recommendations.
Wrap Up
Transforming your action camera footages into cinematic videos is easier than you think. With the right video editing techniques and a little bit of practice, you can elevate the quality of your videos and achieve a more professional and captivating look.
Remember to carefully plan your shots, experiment with different angles and movements, and use cinematic transitions to create a seamless flow. Pay attention to color grading and audio enhancements to further enhance the cinematic feel.
Now it’s your turn! Have you tried these editing techniques? What other tips or tricks do you have for creating cinematic videos from action camera footages? Share your thoughts and experiences in the comments below. Let’s inspire and learn from each other!
