Welcome to our blog! Are you fascinated by the colorful beauty of stained glass? If so, you’re in the right place. In this guide, we will teach you how to capture the stunning essence of stained glass through photography. From understanding backlighting to finding the perfect angles and focus, we’ll cover all the crucial aspects. Whether you’re an architecture enthusiast or a photography lover, this blog will provide you with valuable tips and techniques to enhance your skills and create breathtaking images.
Table of Contents
- Understanding Backlighting Techniques
- Exploring the Perfect Angles
- Capturing Stained Glass: A How-To Guide
- Frequently Asked Questions
- 1. How do I photograph stained glass windows?
- 2. What equipment do I need for photographing stained glass?
- 3. How should I set up the lighting for stained glass photography?
- 4. Are there any specific camera settings I should use?
- 5. How can I enhance the colors in my stained glass photos?
- 6. Can I photograph stained glass from the inside?
- Wrap Up
Understanding Backlighting Techniques
Backlighting is key to bringing out the vibrant colors and intricate details of stained glass. Here’s how you can master the art of backlighting:
- Positioning Yourself for Success: When photographing stained glass, stand in a way that allows the light to pass through the glass and illuminate the colors. Experiment with different angles and positions until you find the perfect spot.
- Utilizing Natural Light: Natural light is a stained glass photographer’s best friend. Take advantage of daylight hours and position yourself to capture the maximum amount of sunlight filtering through the glass. This will enhance the beauty and depth of the colors.
- Eliminating Glare: Glare can be a common issue when photographing stained glass. Use a polarizing filter or capture the image at an angle to minimize any unwanted reflections. This will ensure the colors are the focus of your photograph.
Exploring the Perfect Angles
Finding the right angles when photographing stained glass can make all the difference in the final image. Here are some tips to help you capture the beauty of stained glass from various angles:
- Straight-On Shot A straight-on shot allows you to capture the symmetry and precise details of the stained glass. Position yourself at the center of the glass and frame the image to include the entire piece.
- Angled Perspective: Experiment with different angles to showcase the depth and dimension of the stained glass. Capture the glass from a slightly tilted perspective to create a unique and captivating composition.
- Close-Up Details: Don’t be afraid to get up close and personal with the stained glass. Zoom in on specific sections to highlight the intricate details and patterns. This can create visually compelling images that emphasize the artistry of the glass.
Focusing on Clarity and Sharpness
To achieve crystal-clear images of stained glass, pay attention to focus and sharpness. Follow these guidelines to ensure your photographs are tack sharp:
- Manual Focus: Using manual focus allows you to have complete control over what elements of the stained glass are in focus. Take your time to adjust the focus ring until the details are sharp and crisp.
- Aperture Selection: Choosing the right aperture can greatly affect the depth of field in your photograph. For maximum sharpness, use a smaller aperture (higher f-stop number) to ensure the entire stained glass is in focus.
- Tripod Stability: Stability is crucial when photographing stained glass, as even the slightest camera movement can result in blurry images. Use a sturdy tripod to eliminate shake and ensure your images are sharp and clear.
Capturing the Essence of Stained Glass
Photographing stained glass is not just about technical aspects; it’s about capturing the essence and emotion of the art. Consider these factors to truly convey the beauty and magic of stained glass:
- Composition and Visual Flow: Compose your images in a way that guides the viewer’s eye through the stained glass. Look for leading lines, shapes, and patterns that enhance the overall visual flow and create a harmonious composition.
- Play with Colors and Textures: Experiment with exposure settings to bring out the vibrant colors and varied textures of the stained glass. Find the right balance between preserving the original hues and enhancing them to create stunning visual impact.
- Timing is Everything: Consider visiting the location at different times of the day to capture the ever-changing quality of light that interacts with the stained glass. The time of day can dramatically impact the mood and aesthetics of your photographs.
Capturing Stained Glass: A How-To Guide
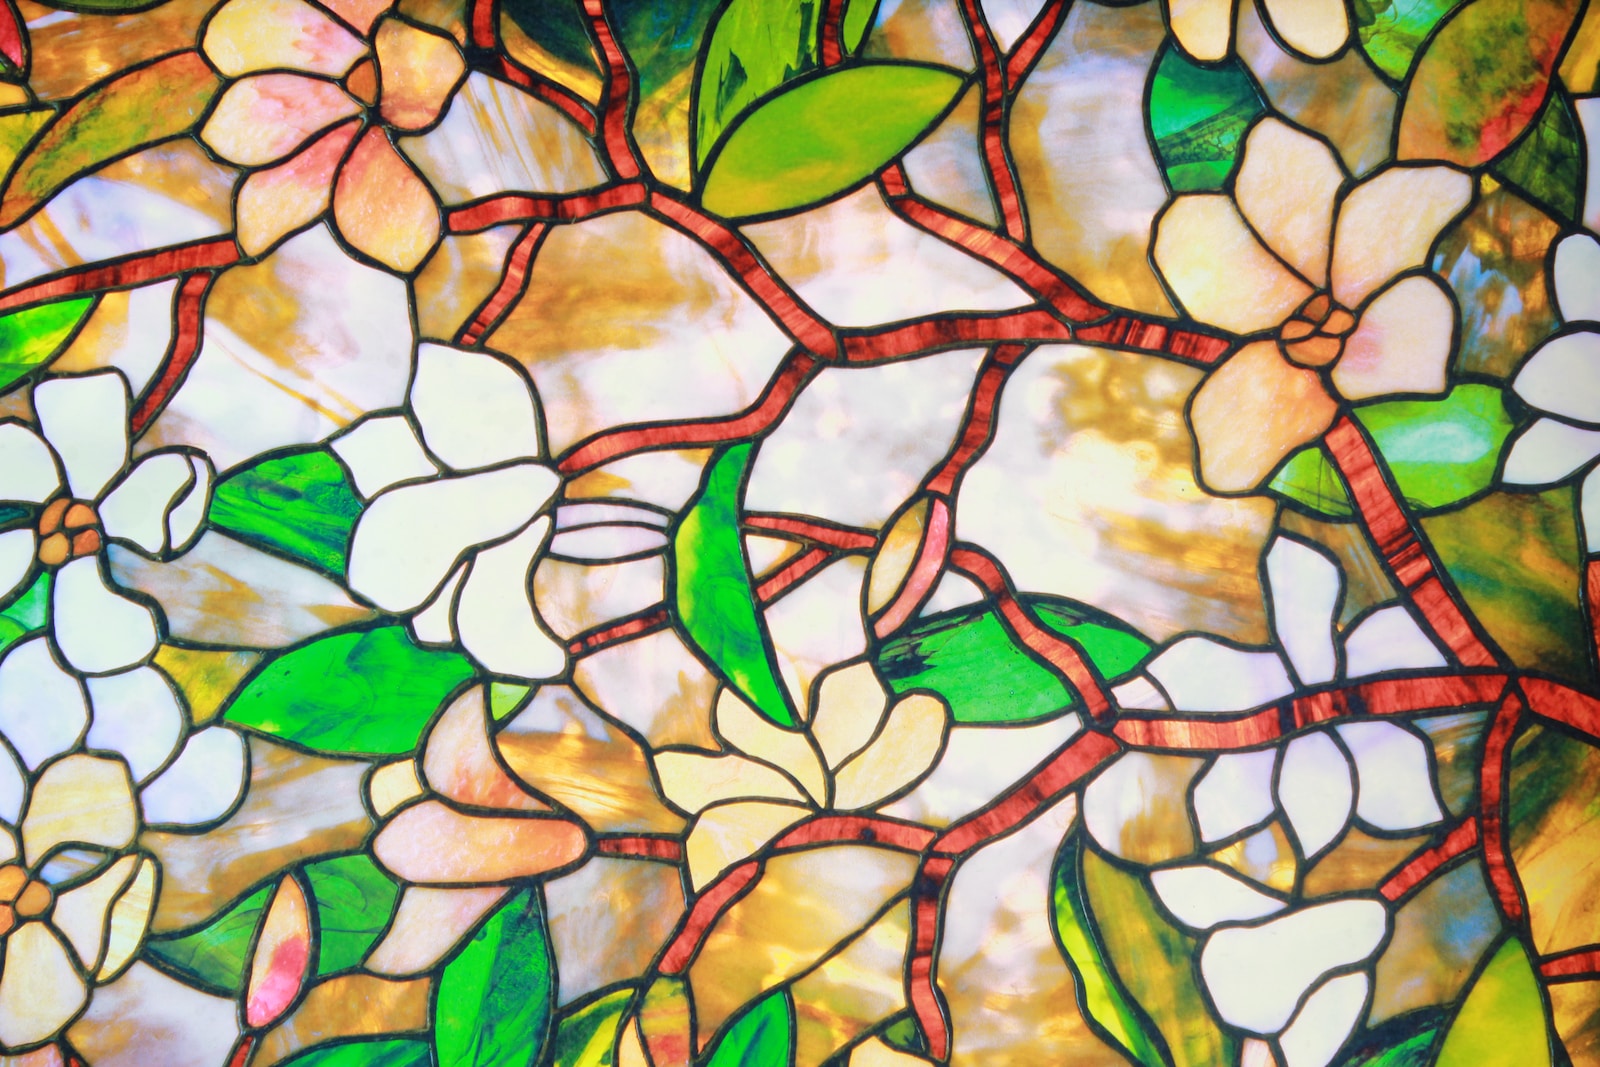
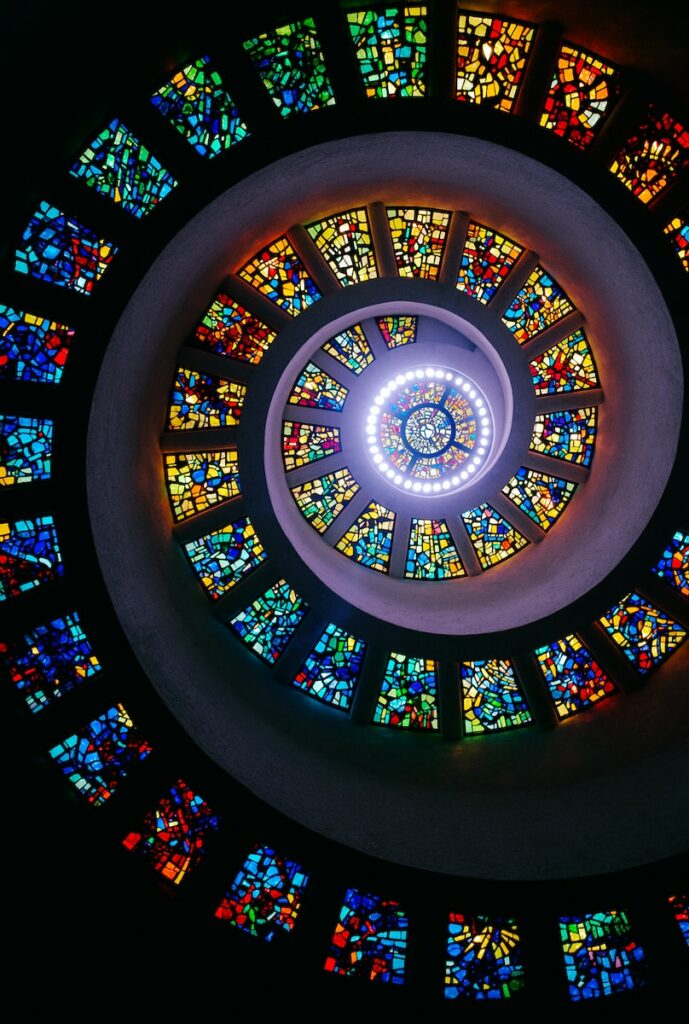
Stained glass is not only a stunning architectural element, but it also has the power to take your photography to a whole new level. The vibrant colors and intricate designs make it a captivating subject to capture through the lens of your camera. In this guide, we will delve into the art of photographing stained glass, exploring techniques and tips that will help you master this niche form of architecture photography.
The Importance of Backlighting
One of the key elements to consider when photographing stained glass is backlighting. This technique allows the light to shine through the glass, highlighting its colors and intricate details. To achieve this effect, position yourself in a way that allows the natural light to come from behind the stained glass. This can be done by shooting during the golden hour when the sun is low, or by using artificial backlighting sources, such as a softbox or a flashlight.
By using backlighting, you create a mesmerizing glow that enhances the colors and adds depth to your images. Experiment with different angles and distances to find the perfect balance between backlighting and preserving the details of the stained glass.
Choosing the Right Angle
When photographing stained glass, the angle at which you capture the subject can greatly influence the final result. Explore different angles to find the one that best showcases the pattern and design of the glass. You can experiment with shooting from below to emphasize the height and scale of a stained glass window, or try shooting from an elevated position to capture the overall beauty of a larger stained glass installation.
Additionally, consider the composition of your shot. Use leading lines to guide the viewer’s eye towards the stained glass, and be mindful of any distracting elements that may take away from the main subject of your photograph. By carefully selecting the angle and composition, you can create impactful and visually appealing images that truly capture the essence of stained glass art.
Focusing on the Details
When photographing stained glass, it’s crucial to pay attention to the details. The intricate designs and delicate patterns are what make stained glass so captivating, and you want to ensure that your images do justice to these beautiful elements. To achieve sharpness and clarity, use a tripod to stabilize your camera and prevent any unwanted blur.
Consider using a narrow aperture (high f-stop number) to maximize depth of field and keep the entire stained glass window in focus. However, be cautious not to go too narrow, as it may lead to diffraction, softening the overall image. Play around with different aperture settings to find the sweet spot that maintains sharpness and detail while also achieving the desired level of bokeh.
Frequently Asked Questions
1. How do I photograph stained glass windows?
When photographing stained glass windows, it’s essential to consider backlighting to bring out the vibrant colors. Position yourself at an angle to capture the details and textures, and ensure proper focus to highlight the intricate designs.
2. What equipment do I need for photographing stained glass?
To capture the beauty of stained glass, you’ll need a camera with manual settings to control exposure and focus. A tripod is recommended to keep the camera steady during longer exposures. Additionally, a polarizing filter can reduce glare on the glass surface.
3. How should I set up the lighting for stained glass photography?
Backlighting is crucial for photographing stained glass. Place the light source behind the window to allow the colors and details to shine through. Experiment with the angle and intensity of the light to achieve the desired effect.
4. Are there any specific camera settings I should use?
Using manual or aperture priority mode can give you greater control over the exposure. Adjust the aperture (f-stop) to achieve the desired depth of field, and use a low ISO setting to minimize noise. Bracketing exposures can also help in capturing the dynamic range of the stained glass.
5. How can I enhance the colors in my stained glass photos?
During post-processing, you can enhance the colors of your stained glass photos by adjusting the white balance, saturation, and vibrance. Be careful not to oversaturate the colors to maintain a natural and pleasing look.
6. Can I photograph stained glass from the inside?
Photographing stained glass from the inside can provide a unique perspective. However, it may require additional planning and coordination with the property owner or administrator. Ensure that the lighting conditions are suitable and be mindful of any obstructions that may affect the composition.
Wrap Up
Now you’re ready to capture the colorful beauty of stained glass like a pro! Remember to experiment with different angles and lighting techniques to create stunning architecture photography. Don’t be afraid to play with focus and composition to highlight the details and intricate designs. The vibrant colors and intricate patterns of stained glass make it a perfect subject for color photography.
I hope this guide has provided you with valuable insight and inspiration. Have you tried photographing stained glass before? I would love to hear about your experiences and see your stunning shots. Leave a comment below and share your thoughts, tips, or even your favorite stained glass locations. Let’s keep the conversation going!