Welcome to Crafting the Scene: DIY Photography Props! Are you a photography enthusiast looking to take your imagery to the next level? Look no further! In this blog, we will guide you through the art of creating your own photography props, helping you to craft the perfect scene. Whether you’re a professional or a hobbyist, we’ve got you covered with tips, tricks, and step-by-step tutorials. So grab your camera and let’s dive into the world of DIY props and captivating photography!
Table of Contents
- Capturing Unique Features
- Essential Equipment for DIY Photography Props
- Finding the Perfect Time for Shooting
- Frequently Asked Questions
- Q: What are some easy DIY props for photography?
- Q: How can I create a unique prop for my photography?
- Q: What tips do you have for using props effectively in photography?
- Q: Can you suggest some budget-friendly prop ideas?
- Q: How can props enhance the storytelling aspect of photography?
- Q: Where can I find inspiration for DIY photography props?
- Wrap Up
Capturing Unique Features
When it comes to photography, choosing the right subject is crucial. One way to make your photographs truly stand out is to select a subject that possesses interesting features and characteristics. By highlighting these unique aspects of your subject, you can create captivating images that will leave a lasting impression on your viewers. In this section, we will explore some tips and techniques to capture the essence of your main subject.
Focus on Details
To make your photographs visually appealing, it’s essential to pay attention to the finer details of your subject. Using a macro lens or getting up close and personal will allow you to capture intricate textures, patterns, and colors that might be overlooked from a distance. Whether it’s the delicate petals of a flower, the rough texture of a tree bark, or the intricate patterns on a butterfly’s wings, zooming in on these details will create breathtaking images.
For instance, if you are photographing a beautiful flower, try capturing its vibrant colors and unique petal formations by shooting from different angles and perspectives. Experimenting with different lighting conditions, such as natural sunlight or artificial sources, can also add depth and drama to your photographs.
Remember to utilize the depth of field effectively. By using a wider aperture, you can selectively focus on specific details while creating a gorgeous bokeh effect in the background. This technique draws the viewer’s attention to the subject, making it the focal point of the image.
Play with Perspective
Another way to make your photographs truly stand out is by exploring different perspectives. Instead of photographing your subject from eye level, try experimenting with unique angles and viewpoints. Changing your perspective can add visual interest and tell a captivating story through your images.
Consider getting low to the ground to capture your subject from a worm’s-eye view. This technique can be particularly effective when photographing children, pets, or nature scenes. Shooting from above, on the other hand, can offer a bird’s-eye view, providing a fresh and unique perspective.
To add a sense of scale and drama to your images, incorporate leading lines and diagonals into your compositions. These lines can guide the viewer’s eye towards your subject, creating a visual journey within the frame.
Experiment with different lenses, such as wide-angle or telephoto, to change your perspective further. A wide-angle lens can capture vast landscapes, while a telephoto lens can bring distant subjects closer, emphasizing their features.
By focusing on the details and playing with perspective, you can elevate your photography and capture truly unique and captivating images. Remember, practice makes perfect, so don’t be afraid to experiment and push your boundaries as a photographer. Craft the scene, create DIY photography props, and let your imagination soar!
Did you know that using homemade DIY photography props can add a unique touch to your photos and help you create stunning scenes? Get ready to unleash your creativity and learn how to craft your very own photography props!
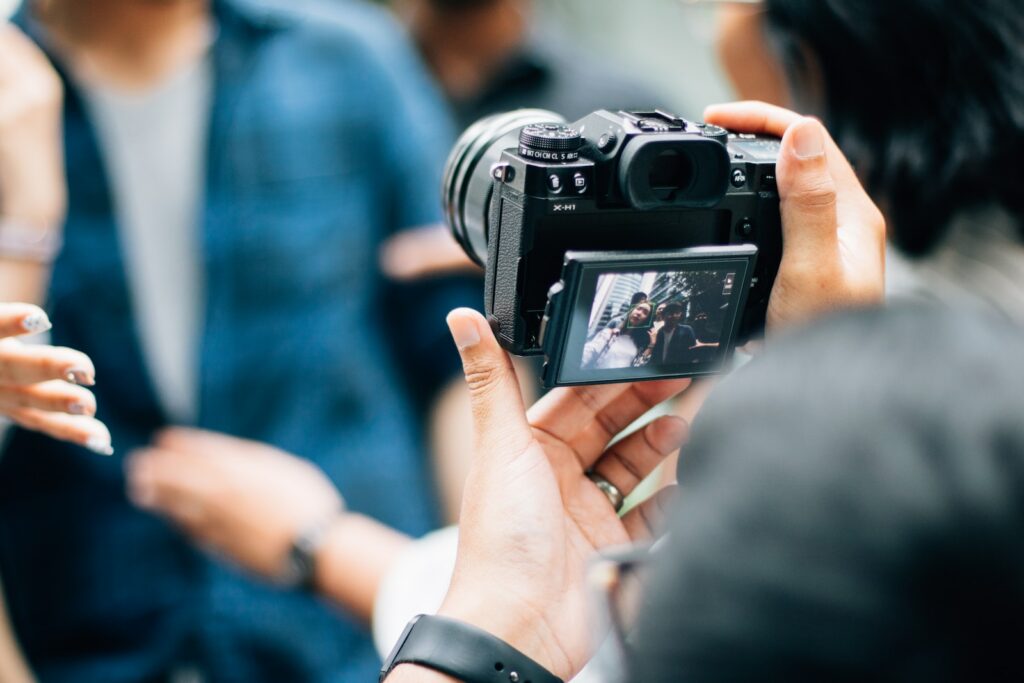
Essential Equipment for DIY Photography Props
When it comes to DIY photography props, one must not only have a creative eye but also the right equipment to bring their vision to life. In this section, we explore the essential camera, lenses, and other equipment that will help you capture stunning images of your handmade props.
The Camera: Finding the Perfect Match
Selecting the right camera is the first step towards creating professional-looking photographs. Depending on your budget and preference, there are a variety of options available in the market. For those who are just starting out, an entry-level DSLR (Digital Single-lens Reflex) camera can offer great versatility and image quality. These cameras allow you to experiment with different settings and provide full manual control over your shots.
On the other hand, if you are looking for more advanced features and superior image quality, you may consider investing in a mirrorless camera. These cameras are compact and lightweight, making them ideal for on-location shoots. Additionally, they often come with advanced autofocus systems and high-resolution sensors, which ensure exceptional detail in your photographs.
The Lens: Focusing on Detail and Creativity
While the camera body is crucial, the lens you choose plays a significant role in the overall quality of your images. When it comes to DIY photography props, versatility is key. A prime lens with a fixed focal length, such as a 50mm or 35mm, can offer sharpness, great aperture control, and excellent low-light performance. These lenses are often affordable and perfect for capturing a wide range of scenes.
However, if you desire more flexibility and the ability to zoom in and out, a zoom lens like a 24-70mm or 70-200mm might be a great option. These lenses allow you to frame your shots precisely and capture different perspectives, making them a valuable tool for photographing various DIY props and scenes.
In addition to the camera and lens, there are a few other pieces of equipment that can enhance your photography experience. A sturdy tripod provides stability and eliminates camera shake, ensuring sharp images even in low-light situations. A remote shutter release allows you to trigger the camera without touching it, eliminating any accidental movement that might ruin your shot.
Moreover, investing in quality lighting equipment, such as a portable LED panel or a set of studio lights, can significantly improve the look and feel of your DIY photography props. By controlling the lighting, you can highlight the intricate details of your props and create captivating shadows.
Remember, the key is to find equipment that suits your unique style and creative vision. Experimenting with different cameras, lenses, and accessories will help you discover your preferences and elevate your photography skills to the next level.
Finding the Perfect Time for Shooting
As a photographer, understanding the best time to capture a shot can make a significant difference in your final results. The golden hour, the time just after sunrise or before sunset, is a highly coveted period for its soft, warm lighting. During this time, the sun is low in the sky, casting a beautiful, golden glow on the surroundings. Utilizing this enchanting lighting can enhance the overall mood and ambiance of your photos.
Besides the golden hour, other moments throughout the day can also result in stunning images. The blue hour refers to the period of twilight before sunrise or after sunset when the sky exhibits a deep blue hue. This time provides a unique atmosphere and is ideal for photographing cityscapes or landscapes.
In contrast, shooting during midday when the sun is directly overhead can create harsh shadows and overexposed areas. However, if you find yourself in this situation, consider embracing the shadows and experimenting with creative compositions.
Choosing the Optimal Vantage Points and Positions
Once you’ve determined the best time for your shoot, the next step is to find the optimal vantage points and positions to capture your subject. Consider the following options:
- Eye-level Perspective: This is the most common approach, allowing you to capture your subject’s features accurately. It works well for portraits and details. Example Benefit: By shooting at eye level, you establish a personal connection with your subject, creating an intimate and relatable composition.
- Low Angle View: Shooting from a lower position can add drama and impact to your photos. It works especially well for photographing objects or people in motion. Example Benefit: By shooting from a low angle, you can make your subject appear more dominant and powerful.
- High Angle View: Shooting from an elevated position can provide a unique perspective, especially when capturing landscapes or large crowds. Example Benefit: Shooting from a high angle allows you to showcase the scale and patterns within the scene, creating visually intriguing compositions.
- Unconventional Perspectives: Don’t be afraid to experiment and think outside the box. Trying different angles, such as shooting from behind objects or from below, can result in captivating and unexpected images. Example Benefit: Unconventional perspectives can add a sense of mystery and intrigue, making your photographs more visually engaging.
Remember, the best vantage point and position will depend on your subject, the scene, and the story you want to convey. Don’t be afraid to explore multiple angles and experiment with different positions until you find the perfect shot.
One helpful tip for creating DIY photography props is utilizing everyday household items. Repurpose old books, fabrics, or even kitchen utensils to add unique elements to your scene. Get creative and think outside the box to make your photos stand out.
Frequently Asked Questions
Q: What are some easy DIY props for photography?
A: There are plenty of options for easy DIY props! Some ideas include creating a simple backdrop using fabric or paper, using household items like mirrors or vases as props, or even crafting your own photo booth accessories.
Q: How can I create a unique prop for my photography?
A: To create a unique prop, think outside the box and get creative! Consider repurposing items you already have, such as old picture frames or vintage books, or even making props from scratch using materials like foam, cardboard, or wood.
Q: What tips do you have for using props effectively in photography?
A: When using props, it’s important to keep a few things in mind. First, make sure the prop enhances the overall theme or story you want to convey in your photograph. Secondly, pay attention to composition and balance – props should complement the subject and not overpower the image. Lastly, don’t be afraid to experiment and try different angles and arrangements to find the perfect prop placement.
Q: Can you suggest some budget-friendly prop ideas?
A: Absolutely! If you’re on a budget, consider using natural elements like flowers, leaves, or shells as props. You can also find affordable props at thrift stores, flea markets, or online marketplaces. Additionally, don’t underestimate the power of DIY – repurposing items you already have and adding a personal touch can result in unique and budget-friendly props.
Q: How can props enhance the storytelling aspect of photography?
A: Props can play a crucial role in storytelling by adding depth, context, and visual interest to your images. They can help create a specific atmosphere, convey emotions, or highlight certain themes or narratives. By carefully selecting and incorporating props, you can elevate the storytelling aspect of your photography and engage viewers on a deeper level.
Q: Where can I find inspiration for DIY photography props?
A: Inspiration for DIY photography props can be found everywhere! Browse through online platforms like Pinterest or Instagram, visit photography blogs or websites, explore magazines or books on interior design or crafts, or simply take a walk and observe the environment around you. Inspiration can be found in unexpected places, so keep an open mind and let your creativity flow.
Wrap Up
Crafting the perfect scene for your photography doesn’t have to be expensive or time-consuming. By embracing DIY photography props, you have the power to create stunning images that tell a story. From using everyday objects to giving old items a new life, the possibilities are endless.
Remember to experiment, have fun, and let your creativity shine through. Don’t be afraid to think outside the box and try new techniques. And most importantly, share your journey with us! We would love to hear about your experiences and see the scenes you create using DIY props.
So, go ahead and get crafting! Let your props enhance your photography skills and take your images to the next level. Engage with us in the comments below, and let’s inspire each other in this wonderful world of photography.