Welcome to “From Pixels to Prints: A Comprehensive Guide”! Are you ready to take your digital images to the next level? In this blog, we will dive into the art and science of converting your digital images into stunning prints. Discover the secrets behind choosing the right paper, sizing, resolution, and more. Whether you’re a photography enthusiast or a professional looking to showcase your work, this guide will provide you with valuable insights and techniques. Let’s unlock the beauty of your digital prints together!
Table of Contents
- Choosing the Perfect Photo Paper
- Determining the Ideal Image Resolution
- Demystifying Photo Sizing
- An Overview of the Printing Process
- Digital Prints: From Pixels to Prints – A Comprehensive Guide
- Frequently Asked Questions
- What are digital prints?
- What is photo paper?
- How does image resolution affect print quality?
- Why is photo sizing important for printing?
- What factors should I consider when choosing the right paper for my prints?
- How can I determine the ideal resolution for my prints?
- Can I print digital images at home or should I use a professional printing service?
- What are some common print sizes and aspect ratios?
- How can I ensure accurate color reproduction in my prints?
- What are the advantages of printing black and white photographs?
- Wrap Up
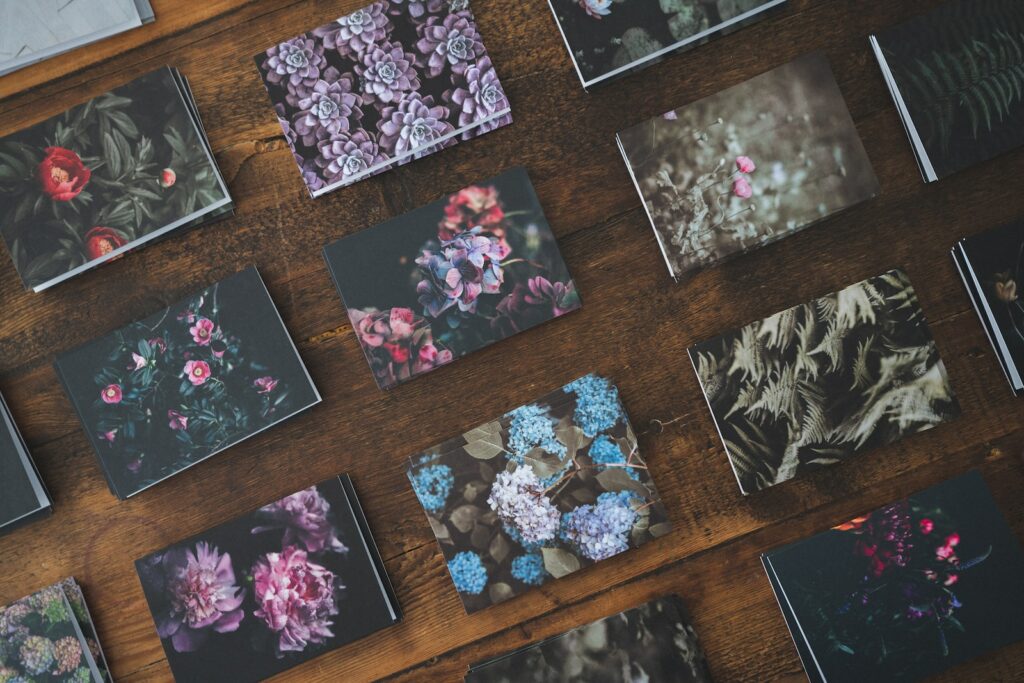
Choosing the Perfect Photo Paper
When it comes to getting the best results from your digital prints, selecting the right photo paper is crucial. The type of paper you choose will directly impact the overall look and feel of your prints. Here are a few factors to consider:
1. Paper Finish
The paper finish refers to the surface texture and appearance of the paper. Different finishes can create distinct effects on your prints. There are typically three main types of finishes:
- Glossy
- Satin or Semi-Gloss
- Matte
2. Print Longevity
Print longevity refers to the lifespan of your prints. If you want your images to stand the test of time, choosing archival-quality paper is essential. Archival papers are acid-free and resistant to fading, ensuring your prints last for decades without losing their vibrancy.
3. Paper Weight
Paper weight plays a significant role in how your prints look and feel. Generally, heavier-weight papers provide a more luxurious and professional appearance. Keep in mind that paper weight is measured in grams per square meter (gsm), and higher gsm values indicate thicker, sturdier paper.
Interesting Fact: Did you know that some photo papers have a metallic finish, offering unique and eye-catching effects? These papers add a stunning vibrancy and depth to your prints.
4. Compatibility with Printer
Not all photo papers are compatible with all printers. It’s crucial to ensure that the paper you choose is compatible with your specific printer. Check the printer specifications and recommended paper types to avoid any compatibility issues.
Determining the Ideal Image Resolution
Image resolution plays a vital role in the quality of your prints. It determines the level of detail and sharpness in the final output. Here’s what you need to know:
1. Pixels per Inch (PPI)
Pixels per inch (PPI) refers to the number of pixels packed into every inch of an image. The higher the PPI, the more detail and clarity the image will have. For high-quality prints, it’s generally recommended to use a minimum PPI of 300. This ensures crisp and sharp prints with intricate details.
2. Print Size
The size at which you plan to print your image is a crucial factor when determining the ideal resolution. Larger prints typically require a higher resolution to maintain quality, while smaller prints may tolerate lower resolutions without sacrificing too much detail.
3. Megapixels
Megapixels (MP) represent the total number of pixels captured by your camera. As a rule of thumb, the more megapixels your camera has, the higher the potential resolution of your image. It’s important to note that simply having a high megapixel count doesn’t guarantee a high-quality print. Image processing and lens quality also play a significant role.
4. Viewing Distance
The distance at which your prints will be viewed also influences the required resolution. If your prints will be scrutinized up close, such as in a gallery setting, higher resolutions are necessary to maintain clarity. On the other hand, prints intended for distant viewing may tolerate lower resolutions without noticeable quality degradation.
Demystifying Photo Sizing
Understanding photo sizing is crucial for obtaining prints that perfectly fit your desired display area. Here’s what you need to consider:
1. Aspect Ratio
Aspect ratio refers to the proportional relationship between the width and height of an image. It’s essential to choose a print size that matches the aspect ratio of your original image to avoid cropping or distorting the composition. Common aspect ratios include 3:2, 4:3, and 16:9.
2. Cropping Considerations
In some cases, you may need to crop your image to fit a specific print size or aspect ratio. When cropping, always ensure that you retain the essential elements of your composition and maintain visual balance.
3. Resizing Techniques
Resizing refers to changing the dimensions of an image to fit a particular print size. Whether you’re upsizing or downsizing, using high-quality resizing techniques can help maintain image sharpness. Avoid excessive resizing, as it can lead to loss of detail and pixelation.
An Overview of the Printing Process
Now that you understand the importance of paper, resolution, and sizing, let’s take a quick look at the printing process itself:
1. Calibration and Printer Profiles
Calibrating your monitor and using printer profiles are essential steps to ensure accurate color representation in your prints. Calibration helps minimize color shifts, while printer profiles optimize color reproduction specific to your printer and paper combination.
2. Print Settings
Adjusting print settings allows you to fine-tune various parameters, such as brightness, contrast, and saturation, to achieve the desired look in your prints. Experimenting with different settings and performing test prints can help you achieve optimal results.
3. Test Prints and Proofing
Before committing to large prints or multiple copies, it’s wise to create test prints to evaluate color accuracy, sharpness, and overall quality. Proofing ensures that your final prints align with your vision and meet your expectations.
By delving into the art and science of printing, you can bring your digital images to life and showcase them with pride. Remember to consider the paper, resolution, and sizing carefully, ensuring that each element works harmoniously to create breathtaking prints. Now, go ahead and explore the endless possibilities of turning pixels into tangible masterpieces!
Digital Prints: From Pixels to Prints – A Comprehensive Guide
Welcome to our comprehensive guide on converting your digital images into stunning prints. In this article, we will delve into the art and science of selecting the right paper, sizing your images correctly, and optimizing the resolution for the best print quality. Whether you’re a professional photographer or an enthusiast, this guide will help you get the most out of your digital prints.
Choosing the Right Paper
One of the key factors in getting high-quality prints is selecting the right paper. The type of paper you choose can significantly impact the final look and feel of your prints. Different papers have varying textures, finishes, and weights, each lending a unique character to your images.
When choosing a paper, consider factors such as the type of finish you desire – glossy, matte, or satin – as well as the weight and thickness of the paper. Each finish has its own benefits and aesthetic appeal, so it’s wise to experiment with different options to find the one that suits your images best.
For vibrant and highly saturated images, glossy paper is an excellent choice. It offers sharp details and bright colors that can make your prints pop. On the other hand, matte paper is ideal for images with softer tones and less contrast. It provides a more subtle and classic look, reducing glare and reflections. Satin paper, with its semi-gloss finish, strikes a balance between the two options, offering a compromise between vibrant colors and reduced reflections.
Sizing Your Images
The size of your prints can have a significant impact on how your images are perceived. It’s crucial to consider the purpose and display settings for your prints to determine the appropriate sizes. Whether you’re printing images for framing, albums, or exhibitions, it’s important to choose the right dimensions.
When sizing your images, keep in mind the aspect ratio. This is the proportional relationship between the width and height of the image. Different print sizes have different aspect ratios, so you may need to crop or resize your images to fit perfectly.
Before resizing your images, it’s essential to ensure they have a high enough resolution. A low-resolution image may appear pixelated and lack the necessary sharpness when printed. Generally, a resolution of 300 pixels per inch (PPI) is recommended for high-quality prints. This resolution ensures crisp details and sharp lines.
The Importance of Image Resolution
Image resolution refers to the amount of detail captured in an image. It is usually measured in dots per inch (DPI) or pixels per inch (PPI). The higher the resolution, the more detail is retained in the image, resulting in sharper and clearer prints.
When printing your digital images, it’s crucial to ensure they have a sufficient resolution to avoid pixelation and loss of detail. If your image has a low resolution, enlarging it for printing can result in a noticeable decrease in quality. To avoid this, always start with a high-resolution image or use advanced upscaling techniques to enhance the resolution while minimizing quality loss.
Remember, the resolution requirements may vary depending on the size of your print. Larger prints typically require higher resolutions to maintain quality. Be sure to check the recommended resolution guidelines provided by your printer or photo lab for optimal results.
To conclude, converting your digital images into stunning prints involves considering various factors such as paper selection, proper sizing, and resolution optimization. By choosing the right paper, sizing your images correctly, and ensuring a high resolution, you can transform your digital pixels into breathtaking prints. Stay tuned for more tips and techniques to enhance the printing process.
Frequently Asked Questions
What are digital prints?
Digital prints refer to the process of transforming a digital image into a physical print using a printer or professional printing service.
What is photo paper?
Photo paper is a type of paper specifically designed for printing high-quality photographs. It is coated with a chemical compound that enhances the color vibrancy and sharpness of the printed image.
How does image resolution affect print quality?
Image resolution determines the level of detail and clarity in a printed photo. The higher the resolution, the sharper and more detailed the image will appear on paper.
Why is photo sizing important for printing?
Photo sizing is crucial to ensure that the image fits correctly on the desired print size. It helps avoid issues such as cropping, stretching, or pixelation.
What factors should I consider when choosing the right paper for my prints?
When choosing photo paper, consider factors such as finish (glossy, matte, or satin), weight (thickness), and archival properties (longevity). These factors can significantly impact the final look and durability of your prints.
How can I determine the ideal resolution for my prints?
To determine the ideal resolution, consider the intended use and size of the print. A general rule of thumb is to aim for a resolution of 300 pixels per inch (PPI) for optimal print quality.
Can I print digital images at home or should I use a professional printing service?
You have the option to print digital images at home using a high-quality printer or utilize the services of a professional printing lab. The choice depends on your specific needs, budget, and desired print quality.
What are some common print sizes and aspect ratios?
Common print sizes include 4×6, 5×7, 8×10, and 11×14 inches. The aspect ratio refers to the proportional relationship between the width and height of the image, such as 3:2 or 16:9.
How can I ensure accurate color reproduction in my prints?
To ensure accurate color reproduction, it is advisable to calibrate your monitor and use color profiles when editing your digital images. Additionally, some professional printing services offer color correction options to match the intended colors of your photographs.
What are the advantages of printing black and white photographs?
Black and white printing can add a timeless and artistic touch to your photographs. It enhances contrast, highlights textures, and emphasizes composition, allowing you to create striking monochrome prints.
Wrap Up
In this comprehensive guide, we have explored the intricate process of transforming pixels into striking prints. By understanding the importance of image resolution and sizing, you can ensure the highest quality results. Additionally, selecting the right photo paper is crucial in achieving the desired look and feel for your prints. Remember to consider factors like finish, weight, and durability.
Now that you have the knowledge and tools to create stunning digital prints, it’s time to get creative! Experiment with different paper types, try out various sizes, and play around with image editing software to enhance your pictures even further. Don’t forget to share your experiences and leave a comment below. We’d love to hear about your journey from pixels to prints and any tips you have to share with the community. Happy printing!