Are you ready to capture the enchanting beauty of snowflakes through your lens? Look no further! Welcome to “How to Photograph Snowflakes: A Beginner’s Guide.” In this blog, we will dive into the magical world of snowflake photography, revealing the secrets to stunning winter photography. Whether you are a beginner or a seasoned photographer, our tips and techniques will help you capture the intricate design of snowflakes, transforming a simple snowfall into a photographic winter wonderland.
Table of Contents
- Why Snowflakes Make Fantastic Subjects for Photography
- The Best Camera for Snowflake Photography
- Best Time and Position for Snowflake Photography
- Frequently Asked Questions
- 1. What equipment do I need to photograph snowflakes?
- 2. What settings should I use for snowflake photography?
- 3. How can I find suitable snowflakes to photograph?
- 4. How should I compose my snowflake photographs?
- 5. Should I use natural or artificial lighting for snowflake photography?
- 6. How can I protect my camera and lens from the cold weather?
- 7. Any post-processing tips for snowflake photography?
- 8. Are there any safety precautions I should take while photographing snowflakes?
- Wrap Up
Why Snowflakes Make Fantastic Subjects for Photography
When it comes to winter photography, few subjects are as captivating and intricate as snowflakes. These tiny frozen works of art are incredibly unique, each bearing its own symmetrical pattern. Capturing the delicate beauty of snowflakes requires a keen eye, patience, and understanding of certain techniques. In this section, we’ll explore why snowflakes make fantastic subjects for photography and discuss some tips for capturing their stunning beauty.
The Intricate Design of Snowflakes
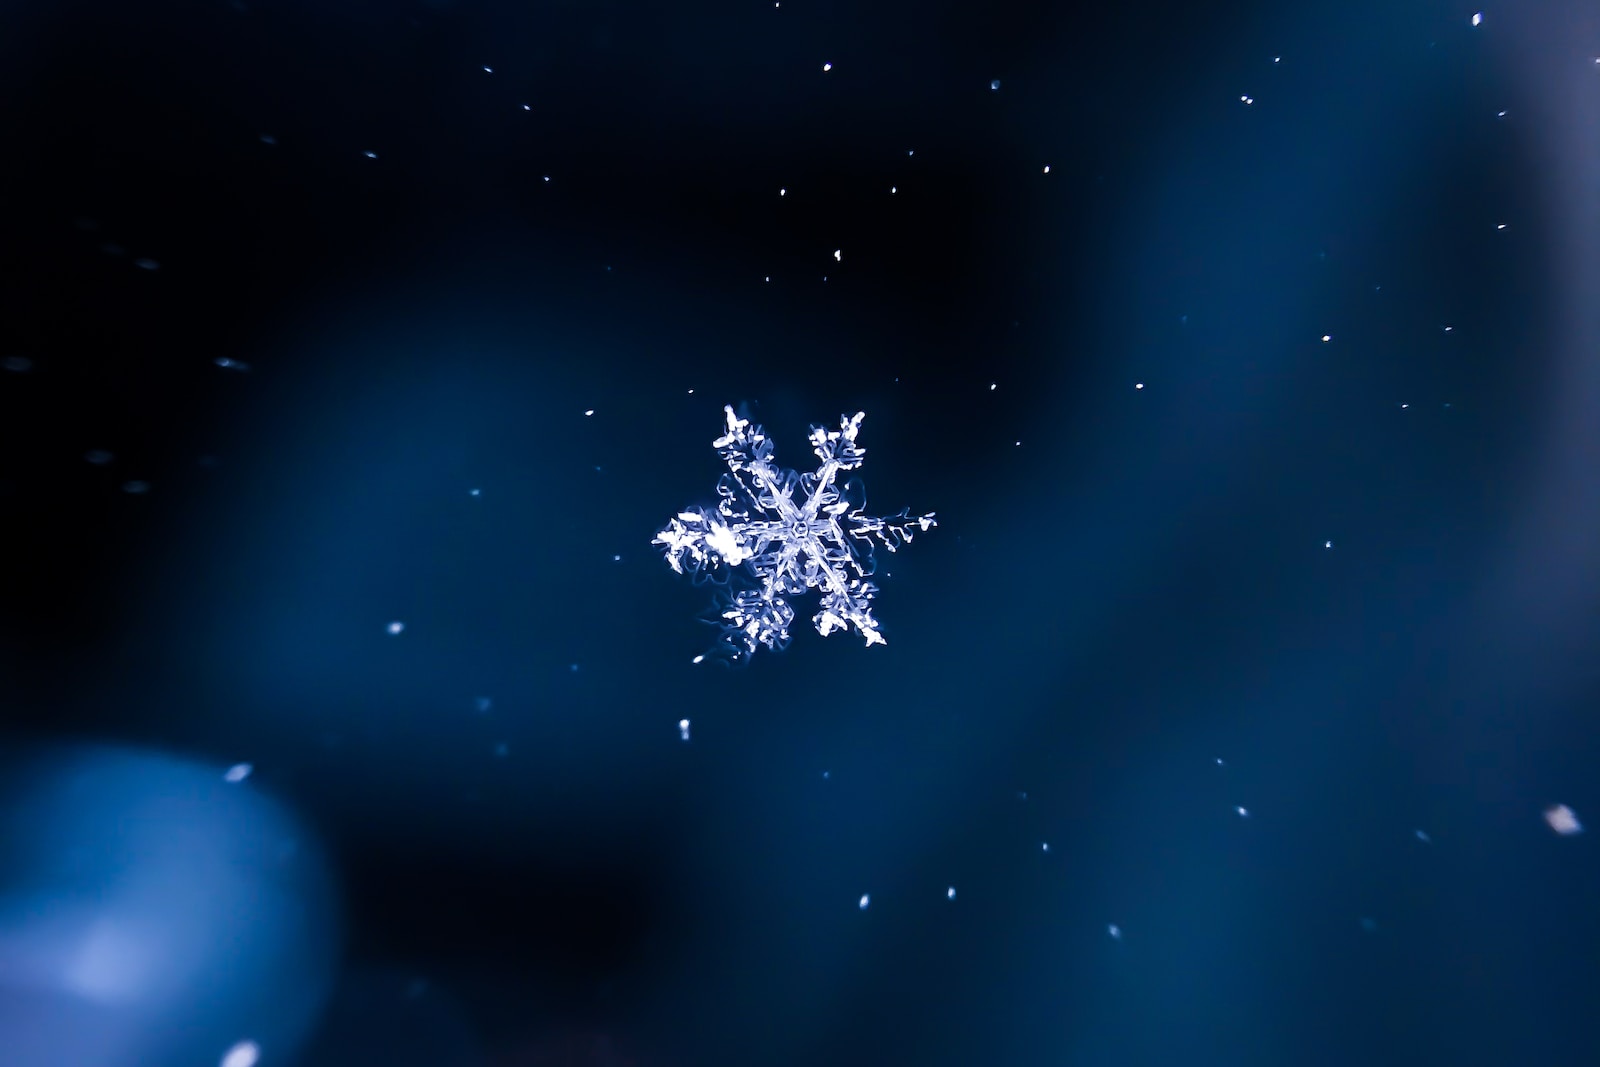
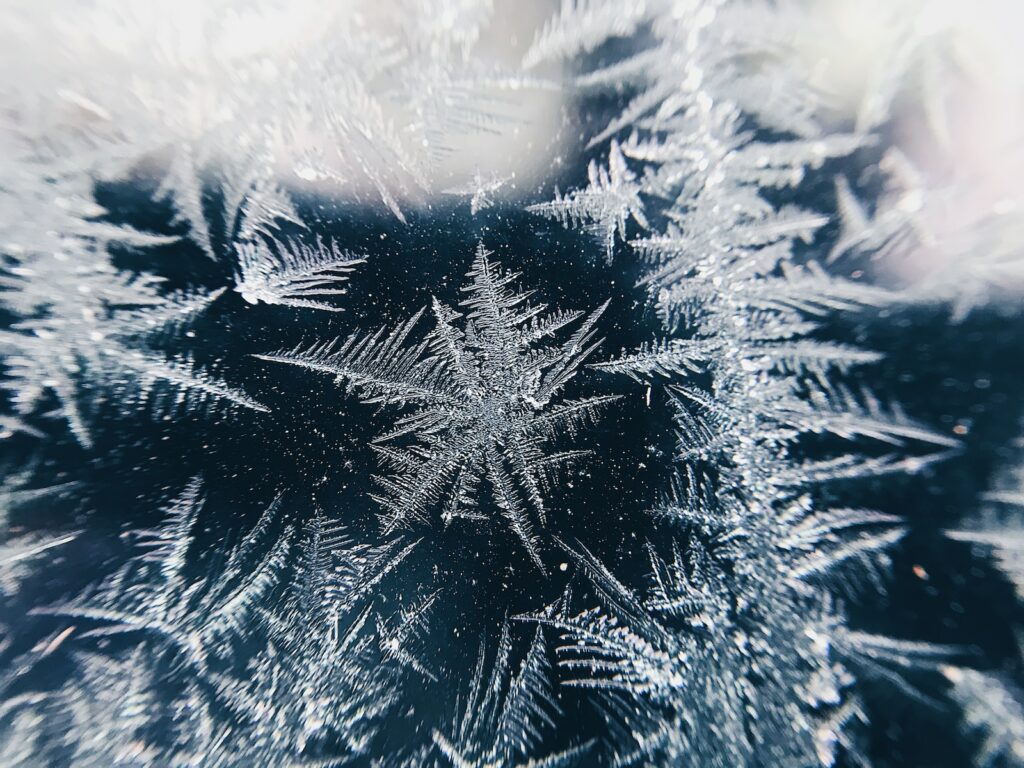
One of the main reasons why snowflakes are such fascinating subjects for photographers is their intricate design. Each snowflake is composed of ice crystals that form in a hexagonal pattern as they fall from the sky. This natural symmetry creates stunning geometric shapes, making every snowflake a unique masterpiece. By photographing snowflakes up close, you have the opportunity to showcase the complexity and detail that is often invisible to the naked eye.
Capturing the intricate design of snowflakes requires the use of macro photography techniques. By using a macro lens or extension tubes, you can get up close and personal with the snowflake, revealing its intricate details. To enhance the fine detail even further, consider using a tripod to stabilize your camera and prevent any unwanted blur.
Tips for Photographing Snowflakes
To capture the magic of snowflakes in your photographs, here are a few tips to keep in mind:
- Choose the right location: Look for areas with minimal wind, such as under a tree or on a windowsill, to prevent the delicate snowflakes from being blown away before you can capture them.
- Shoot in natural light: Natural light enhances the beauty of snowflakes and brings out their intricate details. Avoid using flash, as it can wash out the delicate features.
- Use a macro lens: A macro lens or macro extension tubes allow you to get up close and capture the intricate details of each snowflake. Experiment with different focal lengths to find the best composition.
- Focus on a single snowflake: Instead of trying to capture multiple snowflakes in one shot, focus on one snowflake at a time to highlight its unique design.
- Freeze the motion: Use a fast shutter speed to freeze the motion of falling snowflakes. This will help maintain sharpness and prevent any blurring.
- Experiment with angles: Try shooting from different angles to capture various perspectives of the snowflakes. Get creative and explore unique compositions.
By following these tips and techniques, you’ll be well on your way to capturing stunning snowflake photographs that showcase the intricate beauty of winter. Remember to be patient and enjoy the process, as each snowflake is truly one of a kind. Now, let’s dive into some practical advice on how to best capture snowflakes in different weather conditions.
Interesting Fact: Did you know that each snowflake is completely unique, with no two snowflakes being exactly the same? The intricate and delicate structures of snowflakes are formed through the process of crystallization, resulting in a mesmerizing variety of shapes and patterns.+
The Best Camera for Snowflake Photography
Capturing the intricate beauty of snowflakes requires a camera that allows for precise focus and detail. While many cameras can potentially produce stunning snowflake photos, there are a few key features to consider.
One option to consider is a DSLR camera. These cameras offer manual controls, allowing you to adjust settings such as aperture and shutter speed to capture the perfect shot. The ability to change lenses also allows for greater versatility and the opportunity to experiment with different focal lengths.
Mirrorless cameras are another excellent choice for snowflake photography. These cameras are compact, lightweight, and offer high-quality image sensors, ensuring sharp and detailed photos. Their electronic viewfinders can also help with accurate composition and focusing.
Recommended Lenses and Other Equipment
When it comes to lenses, a macro lens is essential for capturing the intricate details of snowflakes. A dedicated macro lens, such as a 100mm or 105mm, allows for close-up shots while maintaining sharpness and clarity. The longer focal length also provides you with some working distance, preventing your camera from casting a shadow on the subject.
If you don’t have a macro lens, extension tubes can be a great alternative. They fit between your camera body and lens, allowing you to focus closer and achieve macro-like results. Although the image quality may not be as high as with a dedicated macro lens, they still offer a cost-effective solution for getting started with snowflake photography.
To stabilize your camera and avoid any unwanted blurriness, a tripod is a must-have accessory. Look for a sturdy tripod that can hold the weight of your camera and lens. Additionally, a remote shutter release can further eliminate any camera shake caused by pressing the shutter button.
Lastly, consider using a diffuser or a piece of white translucent fabric to soften the harsh natural light. This will help to evenly illuminate the snowflakes and reduce any harsh shadows that could distract from their delicate patterns.
Remember, while having high-quality equipment is beneficial, it’s ultimately the photographer’s skills and understanding of light, composition, and technique that truly make stunning snowflake photos.
Now that you have the necessary camera and equipment, it’s time to move on to the next section: understanding snowflake formations and identifying ideal shooting conditions.
Best Time and Position for Snowflake Photography
When it comes to photographing snowflakes, timing is everything. The best time to capture these delicate creations is during a snowfall, but not just any snowfall will suffice. Look for days when the snowflakes are large and falling slowly, as this will give you the best chance to capture their intricate details.
An ideal time for snowflake photography is when the temperatures are below freezing. This is when the snowflakes are most likely to retain their shape and structure, allowing you to capture their individual beauty.
Choosing the Right Vantage Points
In order to get the most stunning snowflake photos, you need to position yourself in the right vantage points. Here are a few options to consider:
Vantage Point Option 1: Outdoors
One option is to photograph snowflakes outdoors, in their natural environment. Find a sheltered spot, such as under a porch, where the snowflakes are less likely to be blown away by the wind. This will offer you the advantage of capturing a variety of snowflake types and sizes, as they fall freely from the sky.
When capturing snowflakes outdoors, make sure to have a clean backdrop. Position yourself at an angle to the falling snowflakes, so that they are not directly in line with your camera lens, which could cause them to appear out of focus.
Vantage Point Option 2: Indoors
If you prefer to photograph snowflakes in a controlled environment, setting up indoors can offer some unique advantages. Find a dark room with a plain background, such as a black or dark blue cloth, to showcase the intricate details of the snowflakes.
One technique to try indoors is to place a piece of glass or clear acetate outside, so that the snowflakes land on it. Then, position your camera on the opposite side of the glass, focusing on the snowflakes as they settle. This method allows you to manipulate the lighting and background, resulting in artistic and captivating snowflake photographs.
Experiment with both vantage points to determine which option suits your style and desired outcome. Remember, the key is to be patient and keep your camera settings adjusted for macro photography, ensuring you capture the intricate beauty of each snowflake.
One helpful tip when photographing snowflakes is to use a macro lens or macro mode on your camera. This will allow you to capture the intricate details of each individual snowflake, showcasing their unique beauty. Adjust your focus manually to ensure sharpness, and consider using a tripod to keep your camera steady.
Frequently Asked Questions
1. What equipment do I need to photograph snowflakes?
To photograph snowflakes, you will need a camera with macro capabilities, such as a DSLR or mirrorless camera. A macro lens or extension tubes can help you achieve close-up shots. Additionally, a tripod is essential for stability, especially in low light conditions.
2. What settings should I use for snowflake photography?
For capturing detailed snowflakes, set your camera to manual mode. Use a small aperture (high f-stop number) to maximize depth of field and ensure the entire snowflake is in focus. Adjust your ISO to maintain image quality and select a fast shutter speed to freeze the falling snowflakes.
3. How can I find suitable snowflakes to photograph?
Look for freshly fallen snowflakes on surfaces such as tree branches, windowsills, or even clothing. Avoid snowflakes that have melted or undergone significant changes in shape. Patience is key, as it may take some time to find perfect snowflakes.
4. How should I compose my snowflake photographs?
When composing your shot, focus on capturing the intricate details of the snowflake. Place the snowflake off-center to create a visually appealing composition. Experiment with different angles and perspectives to add depth to your images.
5. Should I use natural or artificial lighting for snowflake photography?
Natural lighting works best for snowflake photography. Avoid using flash, as it can create harsh shadows and wash out the delicate details of the snowflake. If needed, you can use a diffuser to soften the natural light or a reflector to bounce light onto the snowflake.
6. How can I protect my camera and lens from the cold weather?
Extreme cold temperatures can affect your camera’s battery life and cause condensation. Keep spare batteries warm by storing them close to your body. Use a plastic bag or camera rain cover to protect your camera from moisture and keep it insulated. Allow your camera to gradually adjust to room temperature to prevent condensation.
7. Any post-processing tips for snowflake photography?
In post-processing, make minor adjustments to enhance the details and colors of the snowflakes. Use a photo editing software to adjust exposure, contrast, and sharpness. Be careful not to over-process, as it can lead to an unnatural-looking image.
8. Are there any safety precautions I should take while photographing snowflakes?
Always dress warmly while shooting in cold weather to avoid frostbite or hypothermia. Be mindful of your surroundings, especially when shooting in icy or slippery conditions. If shooting outdoors for an extended period, take breaks indoors to warm up.
Wrap Up
Now that you have learned some tips and techniques on how to photograph snowflakes, it’s time to put your newfound knowledge to the test. Remember to dress warmly, find a steady surface, and experiment with different settings to achieve the desired results.
Capturing the intricate design of snowflakes can be a challenging yet rewarding experience. So grab your camera, head outside, and turn a simple snowfall into a photographic winter wonderland!
If you have any questions or want to share your own snowflake photography, feel free to leave a comment below. We would love to hear from you and see the beautiful snowflakes you capture.