Welcome to my blog, where I will guide you through the exciting world of laboratory equipment photography. Whether you are a professional photographer looking to expand your skills or a scientist wanting to showcase your work, this comprehensive guide will help you master the art of capturing the intricate details of lab equipment. From setting up the perfect lighting to perfecting your composition, join me as we explore the fascinating intersection of science and photography.
Table of Contents
- The Art of Lab Equipment Photography
- Choosing the Right Camera
- Mastering the Photography of Laboratory Equipment
- Frequently Asked Questions
- 1. What is lab equipment photography?
- 2. Why is lab equipment photography important?
- 3. What are some tips for photographing lab equipment?
- 4. What kind of lighting should I use for lab equipment photography?
- 5. Can I use a smartphone for lab equipment photography?
- 6. How can I achieve clarity in lab equipment photographs?
- 7. Are there any post-processing tips for lab equipment photography?
- Wrap Up
The Art of Lab Equipment Photography
Lab equipment photography is a unique genre that requires attention to detail, artistic vision, and technical skills. Whether you are a professional photographer or a science enthusiast looking to capture the beauty of scientific instruments, mastering the art of lab equipment photography can be a rewarding experience. In this article, we will explore the fascinating features of laboratory equipment that make for great photographs and discuss techniques to make your photos truly stand out.
Highlighting the Intricate Details
One of the most captivating aspects of lab equipment is its intricate design and functionality. From the sleek curves of a microscope to the intricate knobs and dials of a spectrophotometer, laboratory instruments offer a wealth of visual interest. To capture these details effectively, it is crucial to choose the right lighting and composition.
When photographing lab equipment, natural or soft lighting works best to illuminate the subject without creating harsh shadows. Consider using diffused light sources such as a softbox or light tent to achieve a soft, even lighting that showcases the subtle features of the equipment. Experiment with different angles and perspectives to find the most flattering compositions, paying attention to the placement of buttons, labels, and other small details.
Bringing Science to Life
Lab equipment photography offers a unique opportunity to bring the world of science to life through visuals. By capturing the equipment in action or in the context of a laboratory setting, you can create engaging and storytelling photographs that spark curiosity.
Consider photographing the equipment while it is in use, capturing the dynamic nature of scientific experiments. Highlight the movement of liquids, the glowing colors of chemical reactions, or the precision of measurements being taken. By including human elements, such as scientists conducting experiments or analyzing results, you can add a sense of scale and narrative to your photos.
Another way to make lab equipment photography more visually interesting is to experiment with still-life compositions. Arrange the instruments in an aesthetically pleasing setup, using props and backgrounds that complement the subject. Play with contrasting colors or textures to create visually striking images that draw the viewer’s attention.
Professional photography techniques, such as shallow depth of field, can also be employed to create a sense of focus and draw attention to specific elements of the equipment. By selectively blurring the background or certain parts of the equipment, you can guide the viewer’s gaze and emphasize the key features.
Remember, mastering lab equipment photography is a continuous learning process. Don’t be afraid to experiment with different techniques and approaches to find your unique style. With practice, attention to detail, and a passion for both photography and science, you can master the art of capturing the beauty of laboratory equipment.
Did you know that lab equipment photography is a niche field of professional photography? It requires a unique set of skills and knowledge to capture the intricate details and scientific beauty of laboratory instruments.
Choosing the Right Camera
When it comes to photographing laboratory equipment, having the right camera is crucial to capturing the intricate details and vibrant colors. While different photographers may have their preferences, there are a few key features to consider when selecting a camera for this specific genre of photography.
One option to consider is a DSLR (Digital Single-Lens Reflex) camera. These cameras offer a wide range of manual control and interchangeable lenses, allowing you to capture the minutest details of laboratory equipment. Another option is a mirrorless camera, which is more compact and lightweight, making it a great choice for photographers who need to move around the laboratory quickly.
Regardless of the camera type you choose, ensure it has a high-resolution sensor. This will allow for sharp and detailed images, crucial for showcasing the fine details of laboratory equipment. Additionally, a camera with a good dynamic range is essential for capturing the full range of tones in your photos.
The Right Lenses and Additional Equipment
To effectively shoot laboratory equipment, you’ll need a combination of lenses that can capture a variety of angles and details. Here are some options to consider:
- Macro Lens: A macro lens is a must-have for capturing close-up shots with incredible detail. It allows you to focus on small parts of laboratory equipment, highlighting their intricate features.
- Wide-Angle Lens: A wide-angle lens is beneficial when shooting larger laboratory equipment or capturing the entire laboratory setup in a single frame. It helps in creating a sense of space and context in your images.
- Prime Lens: Prime lenses are known for their sharpness and low-light capabilities. They are great for shooting laboratory equipment in challenging lighting conditions, providing clear and detailed images.
- Tripod: Stability is crucial in photographing laboratory equipment, especially when shooting in low light or with longer exposure times. A sturdy tripod will help eliminate camera shake and ensure sharp images.
- Reflectors and Diffusers: These tools are useful for controlling the lighting in your laboratory photography. Reflectors bounce light onto your subject, while diffusers soften harsh lighting, resulting in more balanced and pleasing images.
Remember, the equipment mentioned here are just suggestions, and there are various options available in the market. Consider your shooting style, budget, and the specific requirements of the laboratory equipment you’re photographing to make the best choice.
By investing in the right camera and equipment for laboratory equipment photography, you’ll be on your way to mastering the art of capturing these scientific marvels in stunning detail.
Mastering the Photography of Laboratory Equipment
Lab equipment photography, also known as science photography or still life photography, is a specialized field that requires attention to detail, technical skills, and creative vision. Whether you are a professional photographer looking to expand your portfolio or a researcher looking to document your experiments, mastering the art of photographing laboratory equipment can be a rewarding endeavor.
The Best Time of Year for Lab Equipment Photography
While laboratory equipment is not subject to the seasonal changes that landscapes or wildlife may face, there are still certain considerations to keep in mind when planning your photography sessions. The lighting conditions inside a laboratory can vary depending on the time of day and the position of windows or artificial light sources. It is crucial to choose a time when the lighting is consistent and not too harsh or dim.
One option is to schedule your photography sessions during the early morning or late afternoon when the natural light is softer and more flattering. This will help reduce harsh shadows and control the overall lighting in your images. Additionally, these times of the day are less likely to have distractions or interruptions from other lab activities, allowing you to focus solely on capturing the equipment.
Alternatively, if the laboratory has controllable artificial lighting, you can adjust the intensity and direction of the light to best showcase the equipment. Experiment with different lighting setups, such as using diffusers or reflectors, to achieve the desired mood and highlight the unique features of the equipment.
Choosing the Right Vantage Points and Positions
When photographing laboratory equipment, it is essential to consider the vantage points and positions that will showcase the equipment’s functionality and aesthetics. Here are two optimal options to consider:
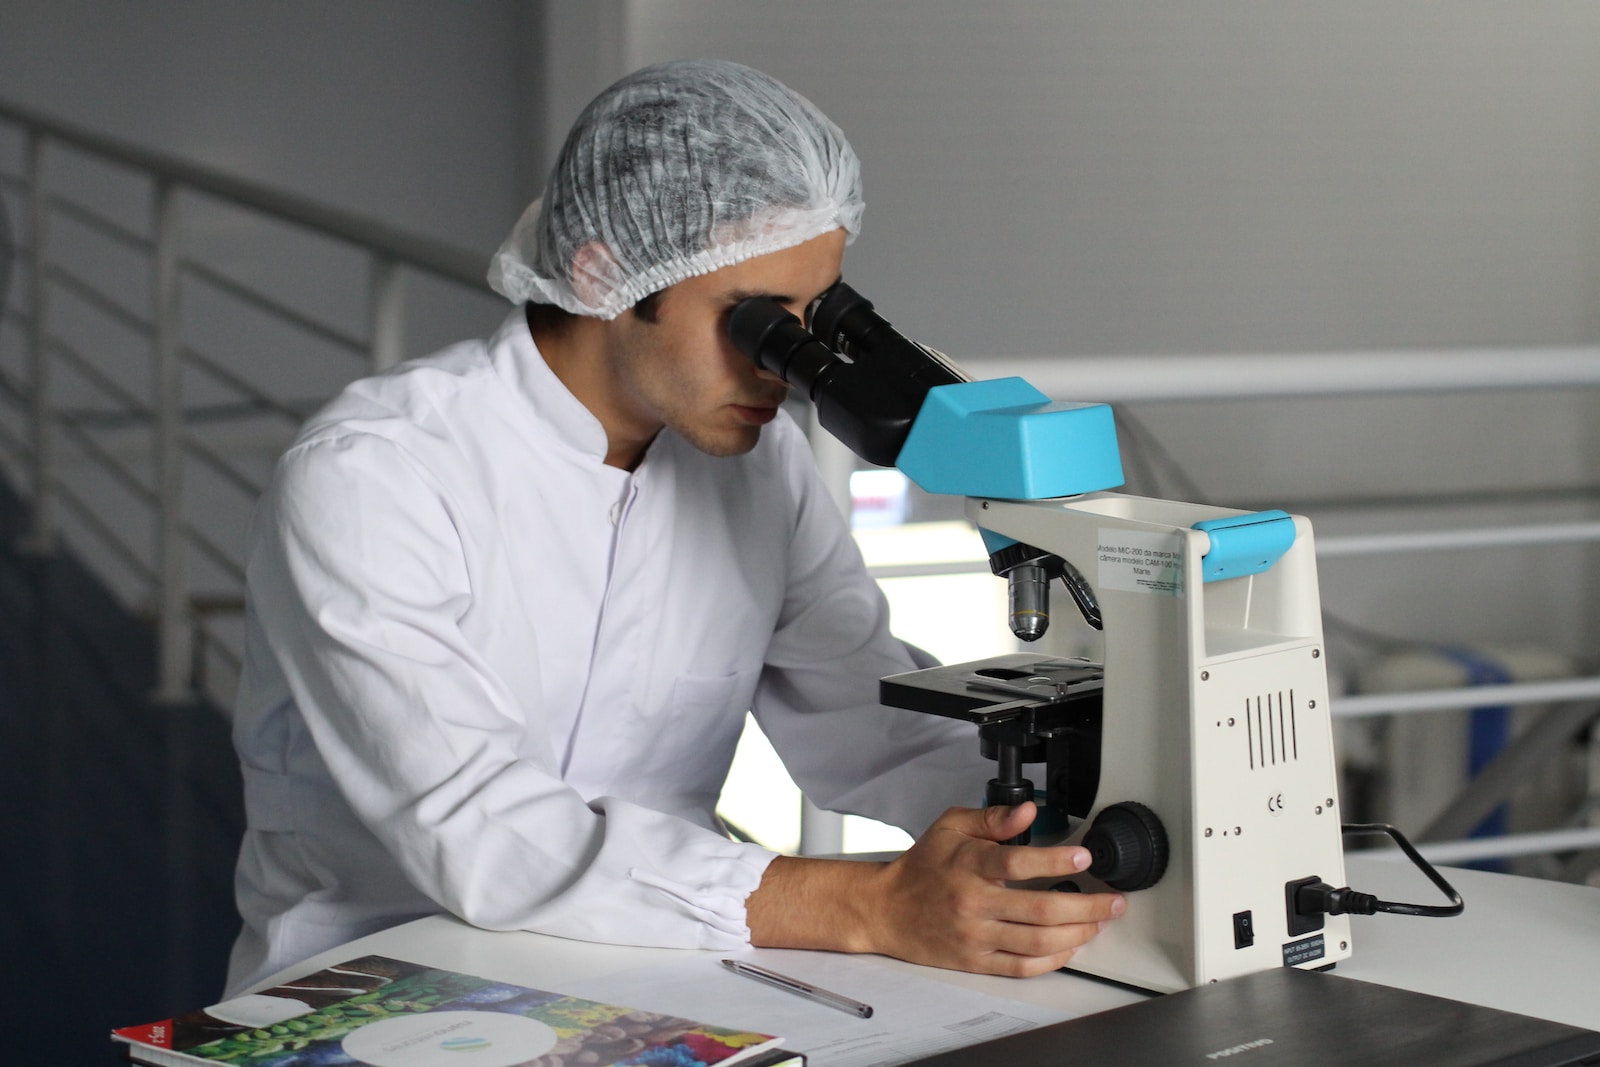
- Front-Facing Angle: Taking photos from the front of the equipment at eye level provides a clear and straightforward view of the apparatus. This angle allows the viewer to see the equipment’s details, labels, and buttons, making it ideal for documentation purposes or showcasing the equipment’s design and interface. For example, if you are photographing a microscope, capturing it from the front will allow the viewer to see the eyepiece, objective lenses, and focus knobs, giving them a clear understanding of how the equipment operates and its features.
- Overhead Perspective: An overhead or bird’s-eye view of the laboratory equipment can provide a unique and visually appealing composition. This perspective allows the photographer to capture the overall layout and arrangement of the equipment, especially when multiple apparatuses are involved. For instance, if you are photographing a chemistry lab, an overhead perspective can showcase the different workstations, equipment setups, and chemical reactions in progress. This perspective not only highlights the equipment but also offers insight into the lab’s workflow and scientific processes.
Remember to experiment with different angles, compositions, and perspectives to find the most compelling way to capture the laboratory equipment. Don’t be afraid to think outside the box and try unconventional approaches to create visually captivating images.
In conclusion, mastering the art of lab equipment photography requires careful consideration of lighting, composition, and vantage points. By understanding the best time of year for photography sessions and exploring various angles and positions, you can create stunning images that showcase the beauty and functionality of laboratory equipment.
One helpful tip for photographing laboratory equipment is to use a tripod to ensure stability and eliminate blur. This is especially important when capturing still life shots of delicate glassware or intricate lab apparatus. The tripod will allow for longer exposure times without the worry of camera shake, resulting in sharper and more detailed images.
Frequently Asked Questions
1. What is lab equipment photography?
Lab equipment photography refers to capturing high-quality images of scientific instruments and tools used in laboratories. It involves capturing detailed shots of the equipment to showcase its features and functionality.
2. Why is lab equipment photography important?
Lab equipment photography is essential for various purposes, including scientific publications, marketing materials, educational resources, and online catalogs. Great photographs help researchers, students, and customers understand the equipment better.
3. What are some tips for photographing lab equipment?
When photographing lab equipment, consider the following tips:
- Use proper lighting techniques to minimize glare and highlight important details.
- Pay attention to composition to create visually appealing images.
- Ensure the equipment is clean and free from any distracting elements.
- Use a tripod to maintain stability and avoid blurry photos.
4. What kind of lighting should I use for lab equipment photography?
For lab equipment photography, it’s recommended to use diffused lighting to minimize reflections and shadows. Softbox lighting or natural light from a window can provide even and gentle illumination.
5. Can I use a smartphone for lab equipment photography?
While smartphone cameras have improved significantly, for professional lab equipment photography, it’s recommended to use a DSLR or mirrorless camera with interchangeable lenses. These cameras offer more control over settings and better image quality.
6. How can I achieve clarity in lab equipment photographs?
To achieve clarity in lab equipment photographs, use a narrow aperture (higher f-stop number) to increase depth of field. This ensures that more of the equipment is in focus, capturing all the important details.
7. Are there any post-processing tips for lab equipment photography?
Yes, post-processing can enhance your lab equipment photographs. Use professional photo editing software to adjust brightness, contrast, and color balance. Also, consider cropping the image to eliminate any distracting elements.
Wrap Up
Photographing laboratory equipment requires a combination of technical knowledge and artistic skills. By mastering the techniques discussed in this guide, you can elevate your lab equipment photography to new heights. Remember to pay attention to lighting, composition, and clarity to capture stunning images that showcase the precision and intricacy of scientific tools.
We hope this blog has provided you with valuable insights and practical tips for improving your science photography. Now, grab your camera, experiment with different techniques, and embark on the exciting journey of capturing the beauty of lab equipment like a professional. Don’t forget to share your results in the comments below! We’d love to see your photographs and hear about your experiences. Happy shooting!