Welcome to “Moon Surface Details – An Astro-Photographer’s Guide,” where we embark on a captivating journey through the vast expanse of the moon’s surface. Join us as we explore the intricate details hidden within the lunar landscape, and discover the art of astrophotography and space photography. In this comprehensive guide, we will delve into the world of capturing the moon’s surface with precision and finesse, revealing tips on equipment selection and post-processing techniques for optimal details. Get ready to unlock the secrets of the moon like never before!
Table of Contents
- Exploring the Moon’s Surface Details: A Photographer’s Dream
- Choosing the Right Camera
- The Best Time and Vantage Points
- Frequently Asked Questions
- 1. What equipment do I need for astrophotography of the moon’s surface details?
- 2. What camera settings should I use for moon surface photography?
- 3. How should I focus when photographing the moon’s surface?
- 4. What techniques can I use to capture more details on the moon’s surface?
- 5. How can I enhance the details of my moon surface photographs during post-processing?
- 6. Are there any recommended resources for learning more about astrophotography?
- Wrap Up
Exploring the Moon’s Surface Details: A Photographer’s Dream
As an avid astrophotographer, capturing the intricate and mesmerizing details of the moon’s surface is one of the most rewarding challenges you can undertake. The moon, with its fascinating crater formations, rugged mountains, and mysterious mare, is an alluring subject that never fails to captivate both photographers and astronomers alike. In this comprehensive guide, we will delve into the techniques and equipment necessary to create stunning images that reveal the Moon’s hidden secrets.
Captivating Crater Formations
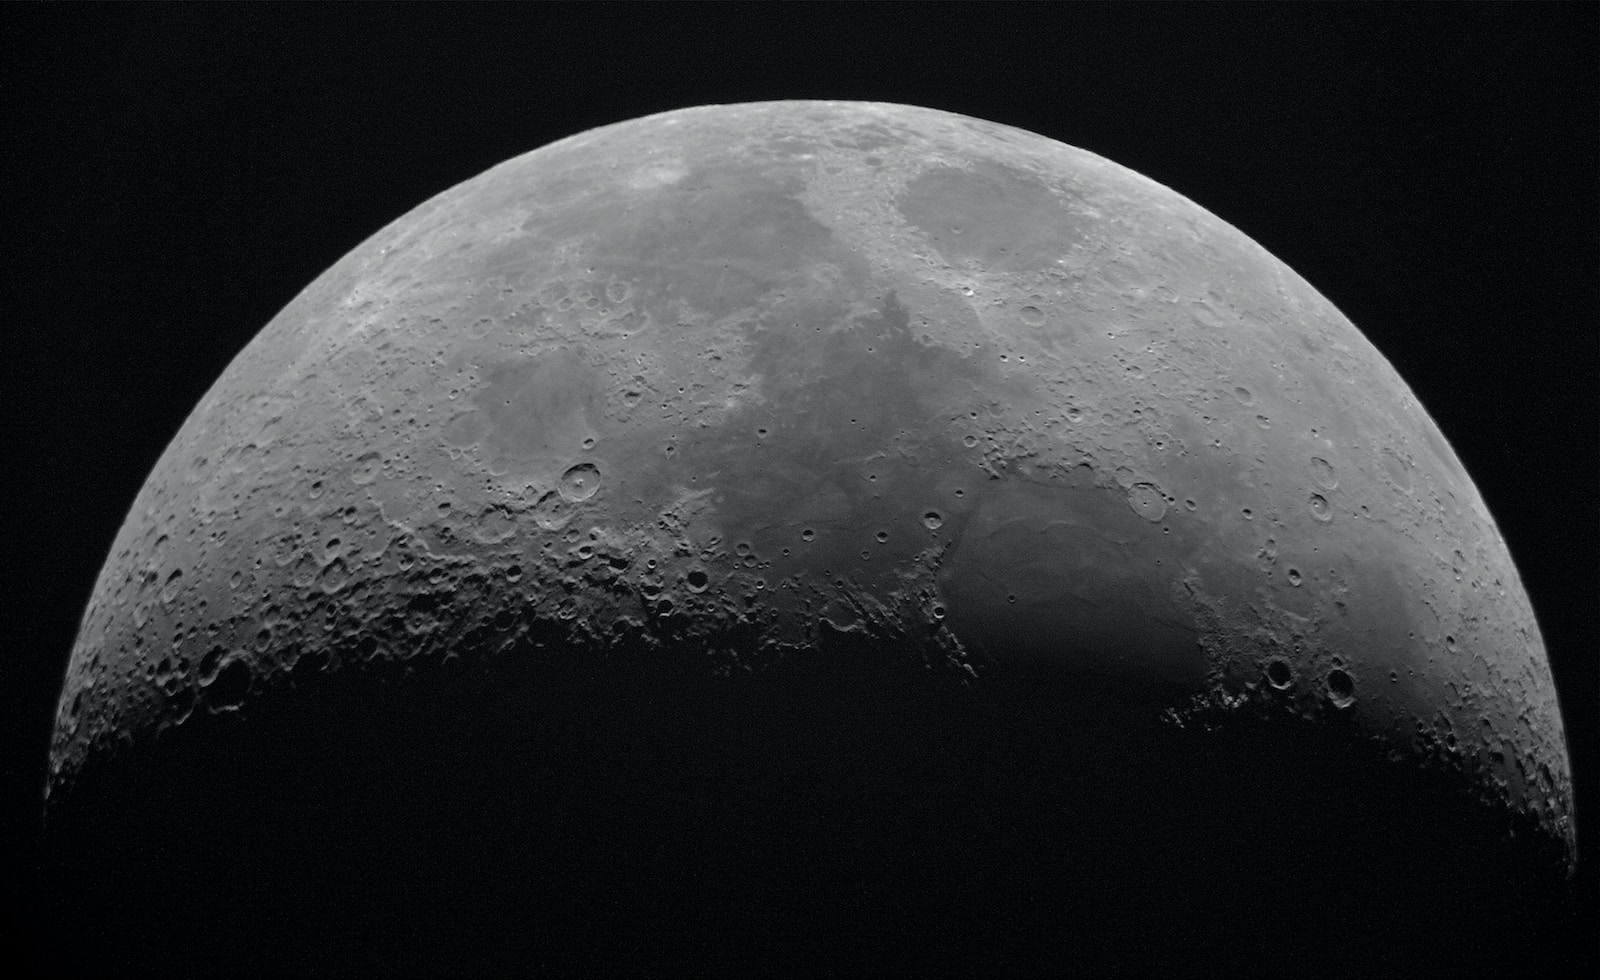
One of the most striking features of the moon’s surface is its multitude of crater formations. These scars are the result of impacts from asteroids and smaller celestial bodies over millions of years. To capture these captivating features in your photographs, it’s essential to utilize the right equipment.
- Investing in a quality telescope with a large aperture will allow you to capture finer details of the crater walls and central peaks.
- Pairing your telescope with a camera capable of astrophotography, such as a DSLR or mirrorless camera, will enable you to capture high-resolution images.
When photographing crater formations, it’s important to take advantage of the moon’s different phases. During a half-moon or crescent moon phase, the long shadows cast by the sun highlighting the depth and texture of the craters, creating an awe-inspiring effect. Be sure to plan your photography sessions accordingly.
Rugged Mountains and Mysterious Mare
In addition to the craters, the moon’s surface is adorned with breathtaking mountain ranges and vast dark plains known as mare. These features provide photographers with endless opportunities to create stunning compositions.
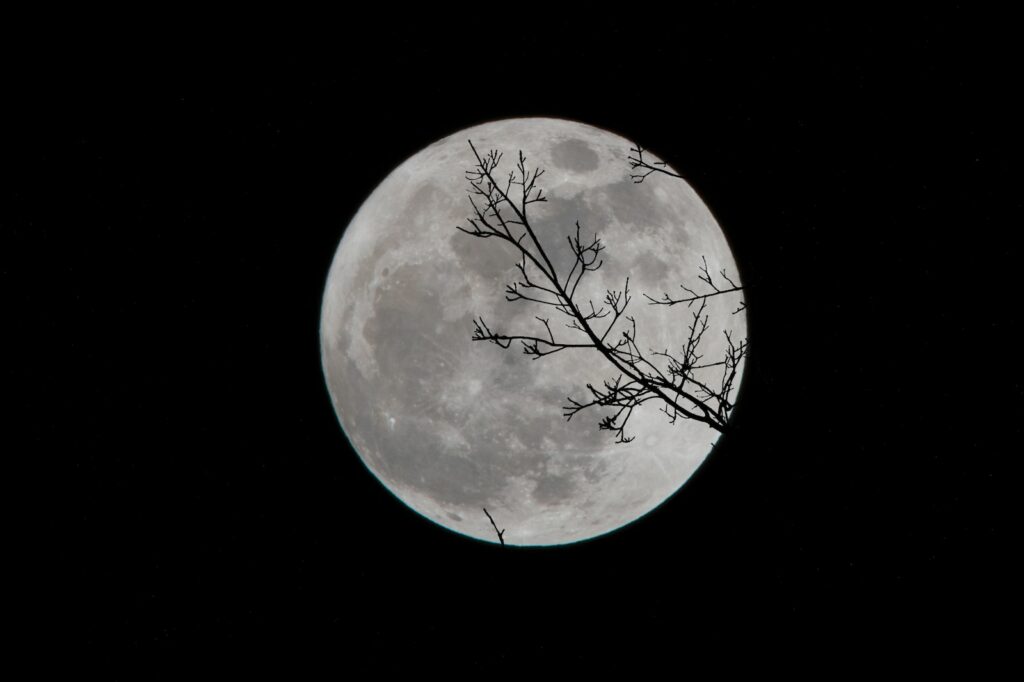
Capturing the moon’s mountains requires the use of telescopic lenses or a dedicated telephoto lens, which will allow you to zoom in and isolate specific peaks and ridges. Positioning the moon closer to the horizon during twilight can also add depth to your images by incorporating silhouettes of trees, buildings, or even people.
On the other hand, when photographing the moon’s mare, pay attention to the contrast between the dark plains and the brighter surrounding areas. During a full moon, the mare becomes more prominent, setting the perfect stage for contrasting lunar landscapes. Experimenting with different exposure settings and post-processing techniques will help bring out the details and enhance the overall mood of your images.
Whether you are a seasoned astrophotographer or just starting on your lunar journey, capturing the moon’s surface details is a truly awe-inspiring experience. Armed with the right equipment and an eye for composition, you can unlock the secrets of our celestial neighbor and present them in a way that leaves viewers speechless. So, gear up, prepare your camera settings, and get ready to embark on an epic lunar photography adventure!
Interesting fact: The surface of the Moon is covered in fine dust called regolith, which is made up of tiny particles of rock and debris. This regolith is the result of billions of years of meteoroid impacts and has a texture similar to soft sand.
Choosing the Right Camera
To capture the intricate details of the moon’s surface, you need a camera that offers high resolution and excellent low-light performance. A DSLR or mirrorless camera with manual controls will provide you with the versatility and control needed for astrophotography. These cameras allow you to adjust settings such as exposure, aperture, and ISO to capture the moon’s surface details with precision.
Lenses for Moon Photography
When it comes to selecting lenses, a telephoto lens is essential. Look for a lens with a focal length between 200mm and 400mm to capture the moon’s surface in captivating detail. This range will provide you with the ideal magnification while still maintaining a manageable size and weight.
Additionally, consider using a lens with a wide maximum aperture, such as f/2.8 or f/4. This will allow you to capture sharp and well-exposed images even in low-light conditions. A fast aperture also enables you to achieve a shallow depth of field, isolating the moon from its surroundings and creating stunning visual impact in your photographs.
If you want to enhance your moon photography experience, you can explore options like a teleconverter or a focal reducer. A teleconverter can extend the focal length of your lens, allowing for even more magnification. On the other hand, a focal reducer can widen the field of view, enabling you to capture the moon alongside its surrounding celestial features, adding depth to your images.
Lastly, don’t forget to invest in a sturdy tripod to keep your camera stable during long exposures. This will prevent any unwanted camera shake and ensure the sharpness of your moon surface details.
By carefully selecting the right camera and equipment, you can elevate your moon photography to new heights. Whether you opt for a full-frame DSLR, a mirrorless camera, or specific lenses to suit your objectives, having the right gear is crucial in capturing the moon’s surface details with utmost precision and clarity.
The Best Time and Vantage Points
As an astrophotographer, capturing the intricate details of the moon’s surface is a thrilling challenge. To achieve the best results, timing and choosing the right vantage points are crucial. Let’s explore when and where you can get the most stunning shots of the moon’s surface.
Timing is Everything
Timing plays a significant role in moon photography. The best time to capture the moon’s surface details is during the waxing gibbous or waning gibbous phase. This is the period when the moon is not fully illuminated, allowing the shadows to accentuate the surface features. During a full moon, the surface details tend to blend together, making it harder to capture fine details.
Additionally, photographing the moon when it is high in the sky provides better clarity due to less atmospheric distortion. Check the moonrise and moonset times in your area to determine when it will be in the ideal position for a perfect shot.
Choosing the Perfect Vantage Points:
When it comes to capturing moon surface details, finding the right vantage point is crucial. Here are two recommended options:
- Rooftop or Elevated Locations: Finding a high vantage point with an unobstructed view of the moon allows you to capture the surface details clearly. Consider rooftops, hilltops, or even tall buildings with observation decks. Higher altitudes reduce the interference caused by surrounding objects and atmospheric disturbances, resulting in sharper images.
- Remote or Low Light Pollution Areas: Light pollution can negatively impact astrophotography. To get clearer and more detailed shots of the moon’s surface, venture out to locations with minimal light pollution. National parks, remote countryside, or areas away from cities and towns are perfect options. These locations offer darker skies, allowing for better contrast and details in your photographs.
By considering these options and finding the right timing, you can dramatically enhance your moon surface photography. Remember to experiment with different locations and timings to capture unique perspectives and maximize the details you capture.
To capture the intricate details of the moon's surface, use a tripod to stabilize your camera and prevent any blur. Additionally, utilizing a telephoto lens with a focal length of at least 200mm will help in getting sharp and crisp images. Combine these techniques with a remote shutter release for optimal results in your astrophotography endeavors.
Frequently Asked Questions
1. What equipment do I need for astrophotography of the moon’s surface details?
To capture the intricate details of the moon’s surface, you will need a digital camera with manual settings, a telephoto lens with at least 300mm focal length, a sturdy tripod, and a remote shutter release.
2. What camera settings should I use for moon surface photography?
Set your camera to manual mode and choose an aperture of f/11 or smaller to ensure a wide depth of field. Use a low ISO (around 100-400) to minimize noise, and select a fast shutter speed (1/250 or faster) to prevent blurriness caused by the moon’s movement.
3. How should I focus when photographing the moon’s surface?
Switch your camera to manual focus mode and zoom in on the moon using live view. Adjust the focus until the details on the moon’s surface appear crisp. Alternatively, you can use the autofocus mode by selecting a specific area of the moon’s surface to focus on.
4. What techniques can I use to capture more details on the moon’s surface?
Using a telephoto lens allows you to capture the moon’s surface in greater detail. Additionally, you can use a teleconverter to increase your lens’s focal length further. Try experimenting with different exposures to enhance the shadows and highlights, and consider using a polarizing filter to reduce glare and enhance contrast.
5. How can I enhance the details of my moon surface photographs during post-processing?
In post-processing, you can use editing software like Adobe Photoshop to sharpen the details of your images. Apply selective adjustments to bring out the subtle textures and enhance the contrast on the moon’s surface. Avoid excessive editing, as it can make the image appear unrealistic.
6. Are there any recommended resources for learning more about astrophotography?
Yes, there are various online communities, forums, and tutorials dedicated to astrophotography. Websites like astropix.com and lonelyspeck.com offer valuable resources, tips, and techniques specific to capturing the moon’s surface details. Additionally, consider joining local photography clubs or workshops focused on astrophotography.
Wrap Up
In conclusion, mastering the art of capturing moon surface details through astrophotography requires the right equipment, patience, and skillful post-processing techniques. By following the tips and techniques discussed in this guide, you’ll be on your way to capturing stunning moon photos that highlight every intricate detail.
Remember to experiment with different camera settings, tripod options, and post-processing software to find what works best for you. Don’t be afraid to step out of your comfort zone and try new techniques, as this will help you develop your own unique style.
Lastly, I encourage you to engage with the astrophotography community and share your experiences. Leave a comment below with your favorite moon surface details photo or any questions you may have. Happy shooting!
